Before & After

Challenge Completed!

When I got home from the 9to5 yesterday, I went into 'mission mode." Must...get...project...done...

And I did!

I decided to join a group of my favorite bloggers in their Pinterest Challenge.  It started last Tuesday evening and the challenge was to do a DIY project inspired by an image found on Pinterest.  And complete the project by today.  After a busy weekend, I was severely doubting my time management abilities.  Luckily, yesterday I was uber productive and finished my project and I'm super excited about it!!

As a reminder, here was my Pinterest Inspiration:

My challenge to myself was to take an piece of metal wall art that we already had...

..and rework it and refresh it, so I'm not bored of it anymore.

Cutting apart those *%$#* darn plates was the toughest and most time consuming part of this.  And of course once I separated them, I needed to remove the stand-offs and all the rough edges.  I used wire cutters, a hack saw, and a metal file for this whole process.

In addition to just reconfiguring their layout, I introduced some paint to change it up a bit.  I'm actually relatively new to spray paint, so I decided to take this opportunity to experiment with a few things (some more successful than others).

I was able to make-up try a few paint techniques.  The shot in the dark was taking Vaseline and applying it to the raised portion of the design before painting.  After it dried, I wiped where the Vaseline was a prayed that it worked.  It didn't.  Luckily I had more than enough plates so I could afford to mess up a few.  If my Vaseline had maybe been less messy, it might have worked out.  The technique did work in theory, but the end product was too much of a mess.  Seeing how well (or not well) the spray paint was sticking to the plates did inspire me into another technique that did end up on the wall.  After painting, when it was try to the touch but still tacky, I took a piece of sand paper and wiped/scraped away pieces of paint in one direction.  The outcome was imperfect and a little quirky- somehow it worked.

As I mentioned yesterday, I had also purchased 5 plates to potentially add into the mix.  4 made it to the wall, and only 1 will be returned.  I'm really excited to show you the outcome, so without further ado.

Drumroll please.....

Here's my project breakdown:

Existing metal plate art: $0

Plate hangers: $20

4 new plates: $15

Spray paint: $12

PROJECT TOTAL: $47

I think that's pretty good price for art of that size.  What I find super exciting about my new plate art is that it isn't a stagnant piece.  I can interchange plates if I find some at tag sales, or by season, or by my mood, or to match my outfit.

Did you do a DIY project for the Pinterest Challenge?  I'd love to see it!  Link to it in my comments.

I've also linked this project on these link parties:
Young House Love: Pinterest Challenge Projects
Joey & Lana Make a House a Home: Pinterest Challenge Time!
Bower Power Blog: Pinterest Challenge
Creative Blog: Get Your Craft On
Savvy Southern Style: Wow us Wednesday

Living Room Progress!

One of my personal rules to live by is:

You aren't allowed to complain about something if you're not doing anything to change it.

For example: you can't complain about the size of your rear if you don't get up off of it and work out.  (the exception is things you can't change of course, but if you can't change something, you can change how you look at it and stop complaining anyway).

Hubby pointed out to me that Friday's post was a laundry list of complaints about the living room so I figured I should practice what I preach and put my $$ where my mouth is and whatever other cheesy cliche's apply.

So I did.

I've been far too ADD with design ideas lately, so I just need to focus on one room at a time.  I'm putting jewelry organization/display and some other projects on hold and focus on the room that irks me the most: the living room.

2 notable changes were made over the weekend.

#1. Harry Potter's room has a new door!  No, Harry Potter does NOT live with me, however we do have an awkward closet that spans the entire space under the stairs.  We call this Harry Potter's room, or the hall closet, whichever you prefer.  The bi-fold door to this space was the only non-white door in the entire house and was a very awkward orangey wood tone that was not finished well in the first place.  Since the hall is wide open to the living room, I consider them 1 large space.

Pre-primed white doors with paneling similar to the other doors in the house were less than $50 at my friendly local Home Depot, so I was on the ground running.  I'll spare you the enthralling progress shot of painting white primed doors white satin and I'll jump to the after.

As a finishing touch, I picked up a mercury-glass knob from Anthropologie and put up a mirror from HomeGoods to give the space more presence.

You like?  So much better if I do say so myself!

__________________________________________

Weekend Project #2:  New vignette/storage.

I've been hunting for some type of table to put against the stair wall, but am challenged by the narrow space.  While looking at HomeGoods, I fell in love with a small asian style cabinet that was too deep.  After re-measuring the area several times (hoping that somehow the space would multiply- no luck), I decided to bring it home anyway.

It worked as I was hoping next to the chair (which Hubby is all about replacing now, yay!).  I took down the brown curtains (not the hardware yet though) and styled the new cabinet with a new "&" sign, Starry Night (removed from the opposite wall), a few tag-sale books, and Archimedes the owl.

I'm so pleased to see the living room finally start evolving!

Curb Appealed

I would be doing a happy dance right now if I wasn't so pooped from the weekend's projects. Saturday, the house got a facelift in the form of a bush-ectomy.  Birds chirped in happiness, the sun shone in approval, and the choruses in my head were singing "Halleluiah."  Ok, so I may be exaggerating a little, but the outcome was well worth the effort and I couldn't be more pleased!

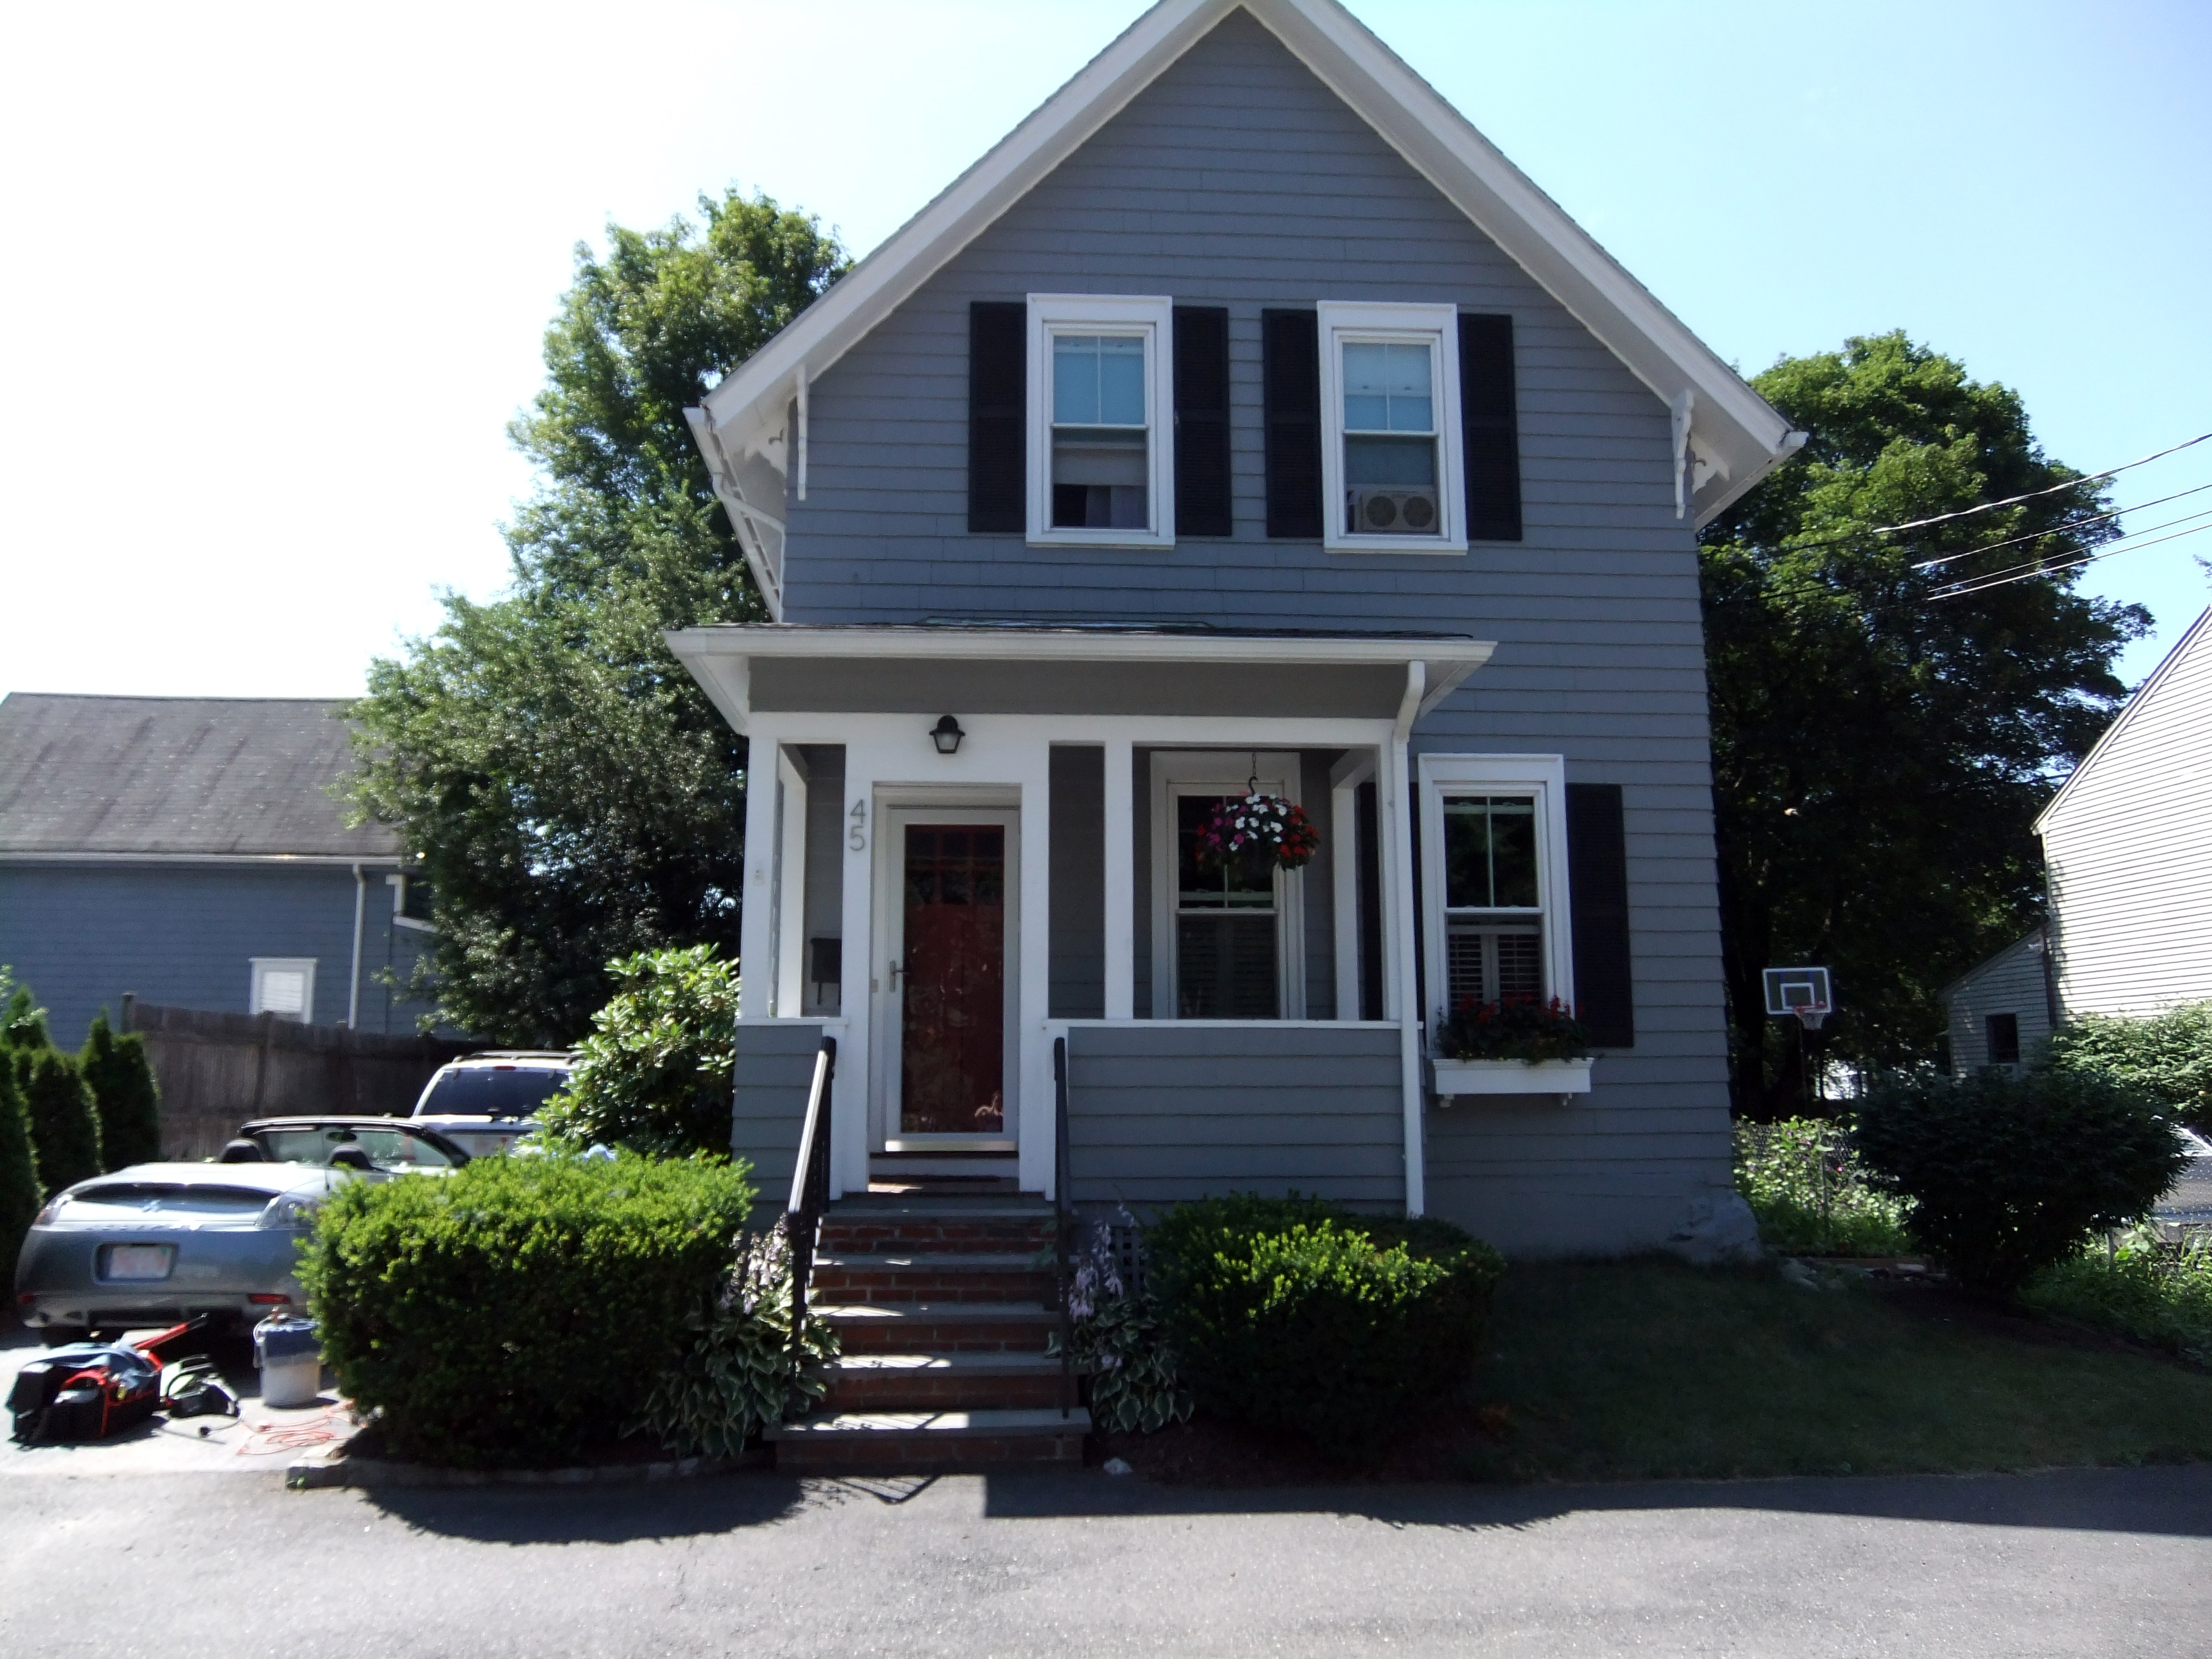
Here's what the unsuspecting front yard looked like in the morning hours:

Let the games begin!  The helpful parents made the trek from CT with all their tools to help.   I learned long ago: If I don't have the tool I need, don't go out and buy it, Handy Dad probable has 3 extra. (and often times, borrowing tools leads to helping hands too- win-win!)

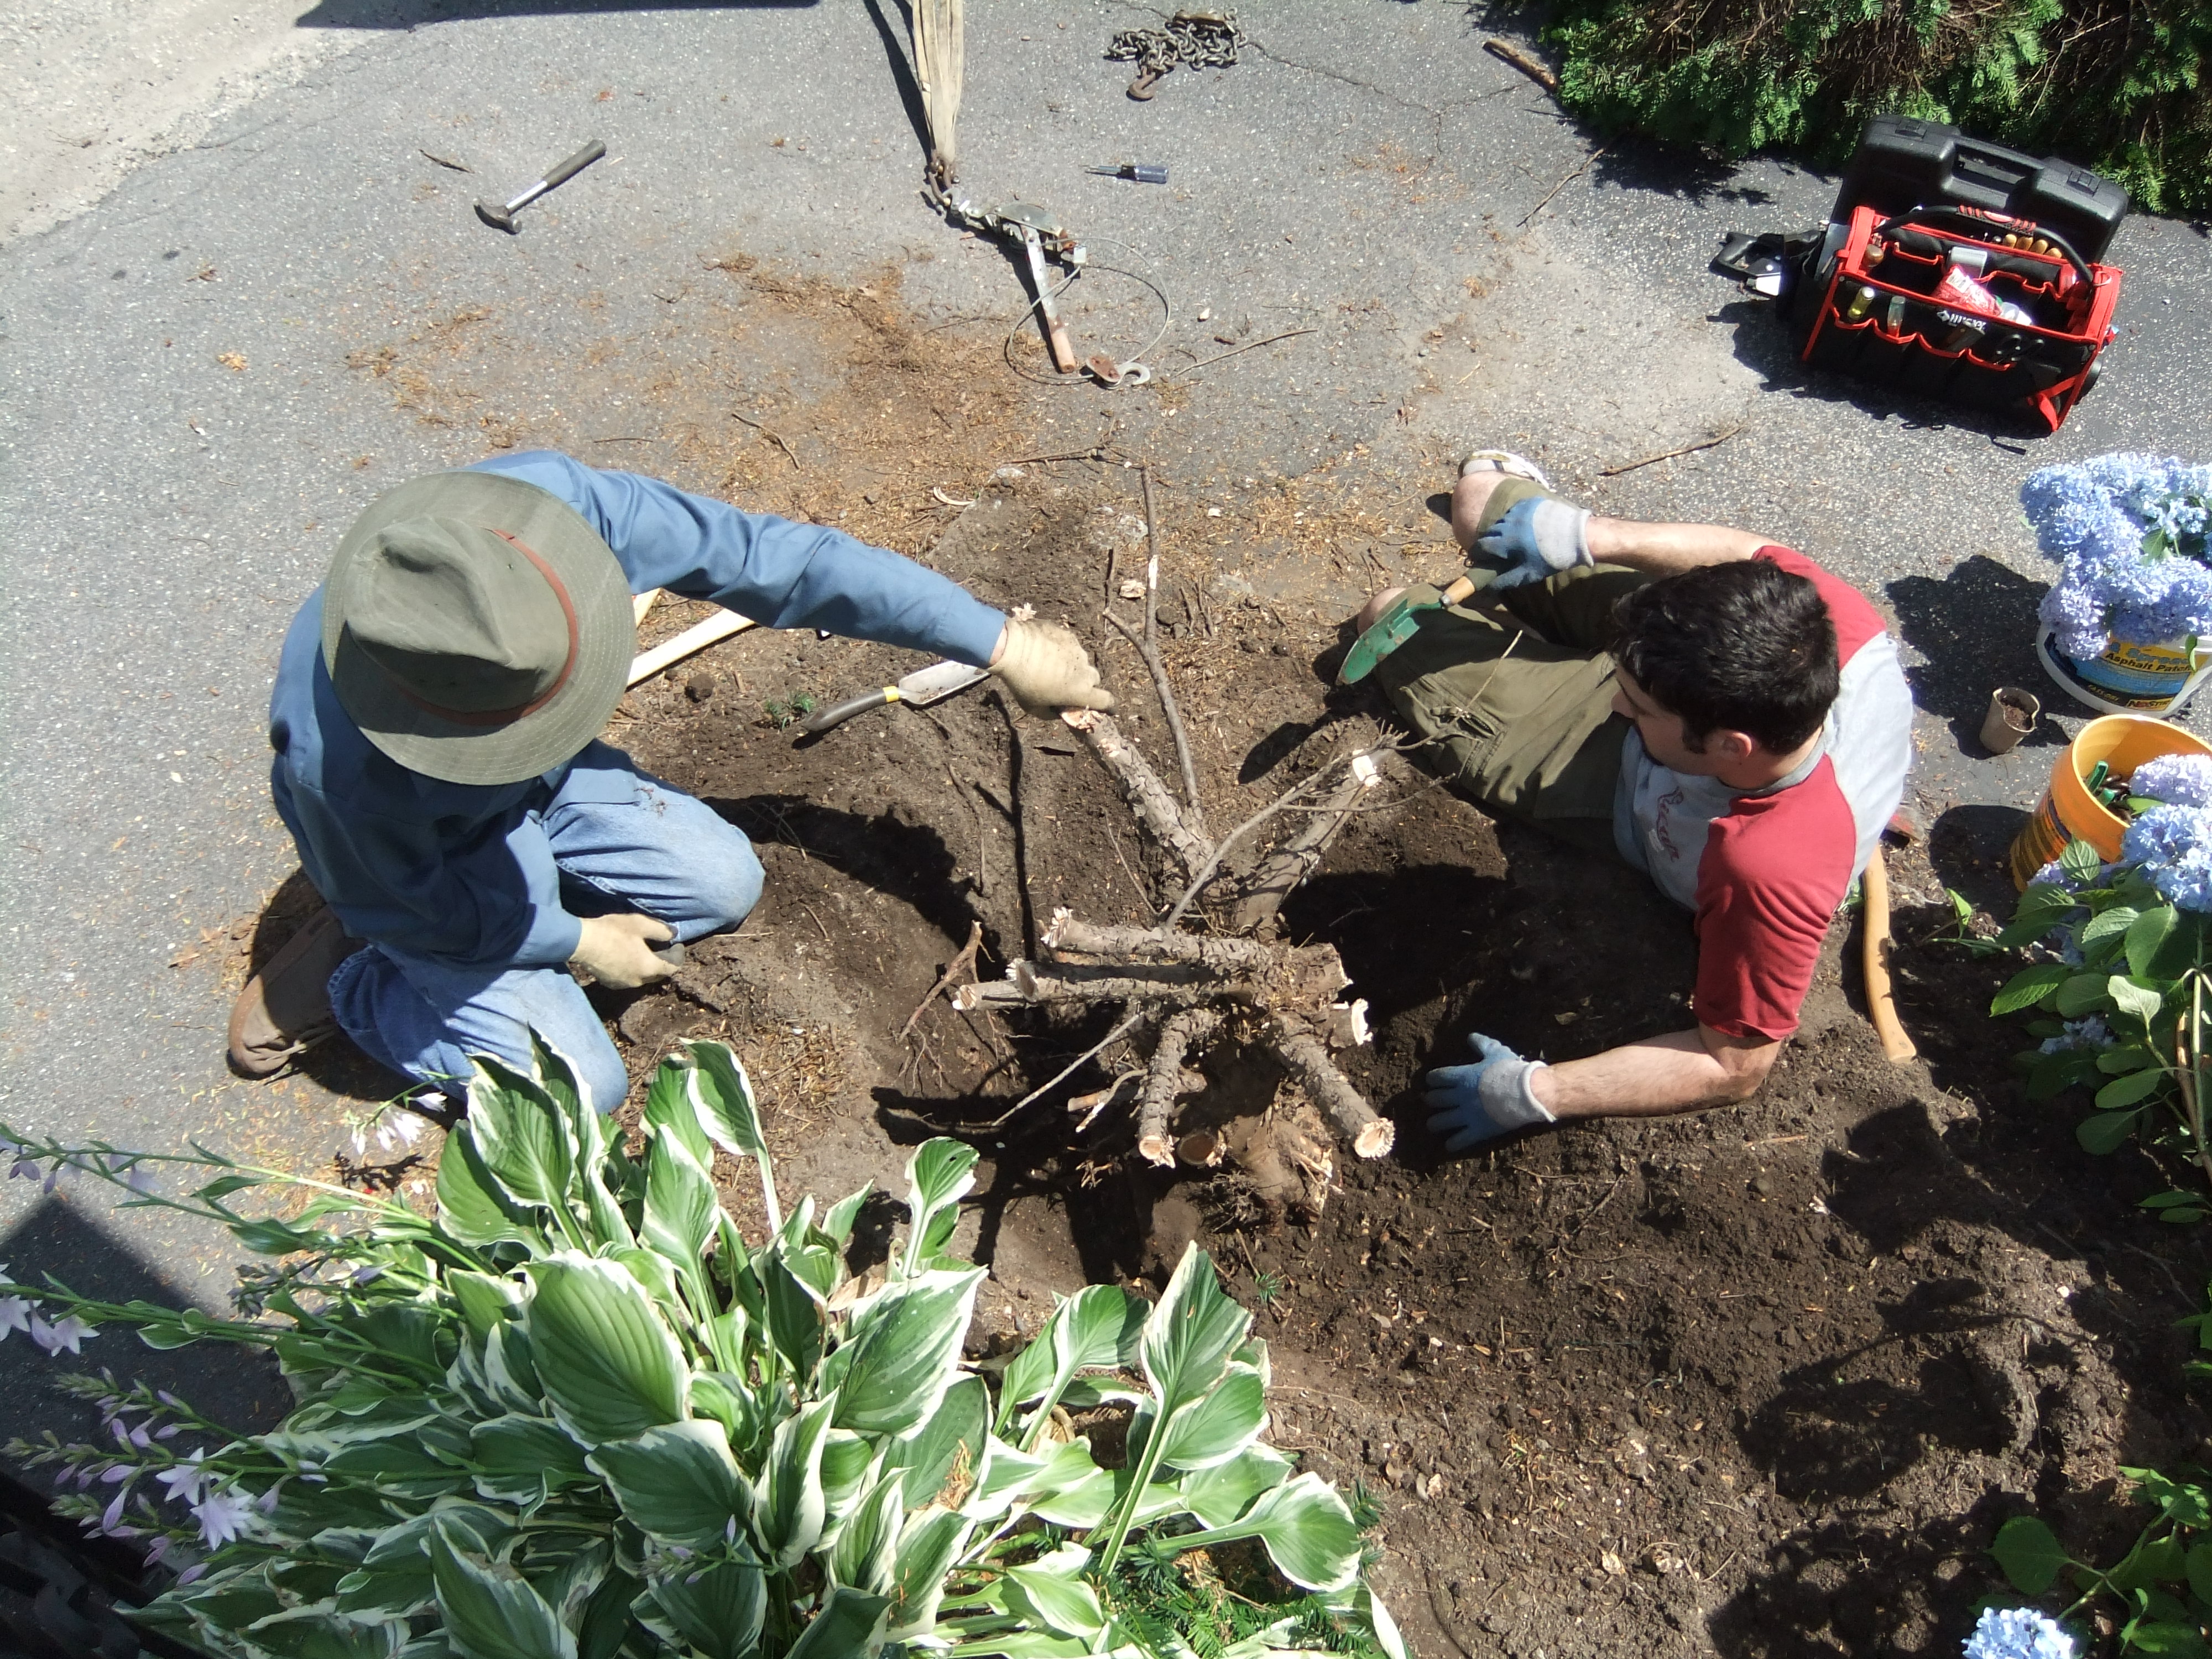
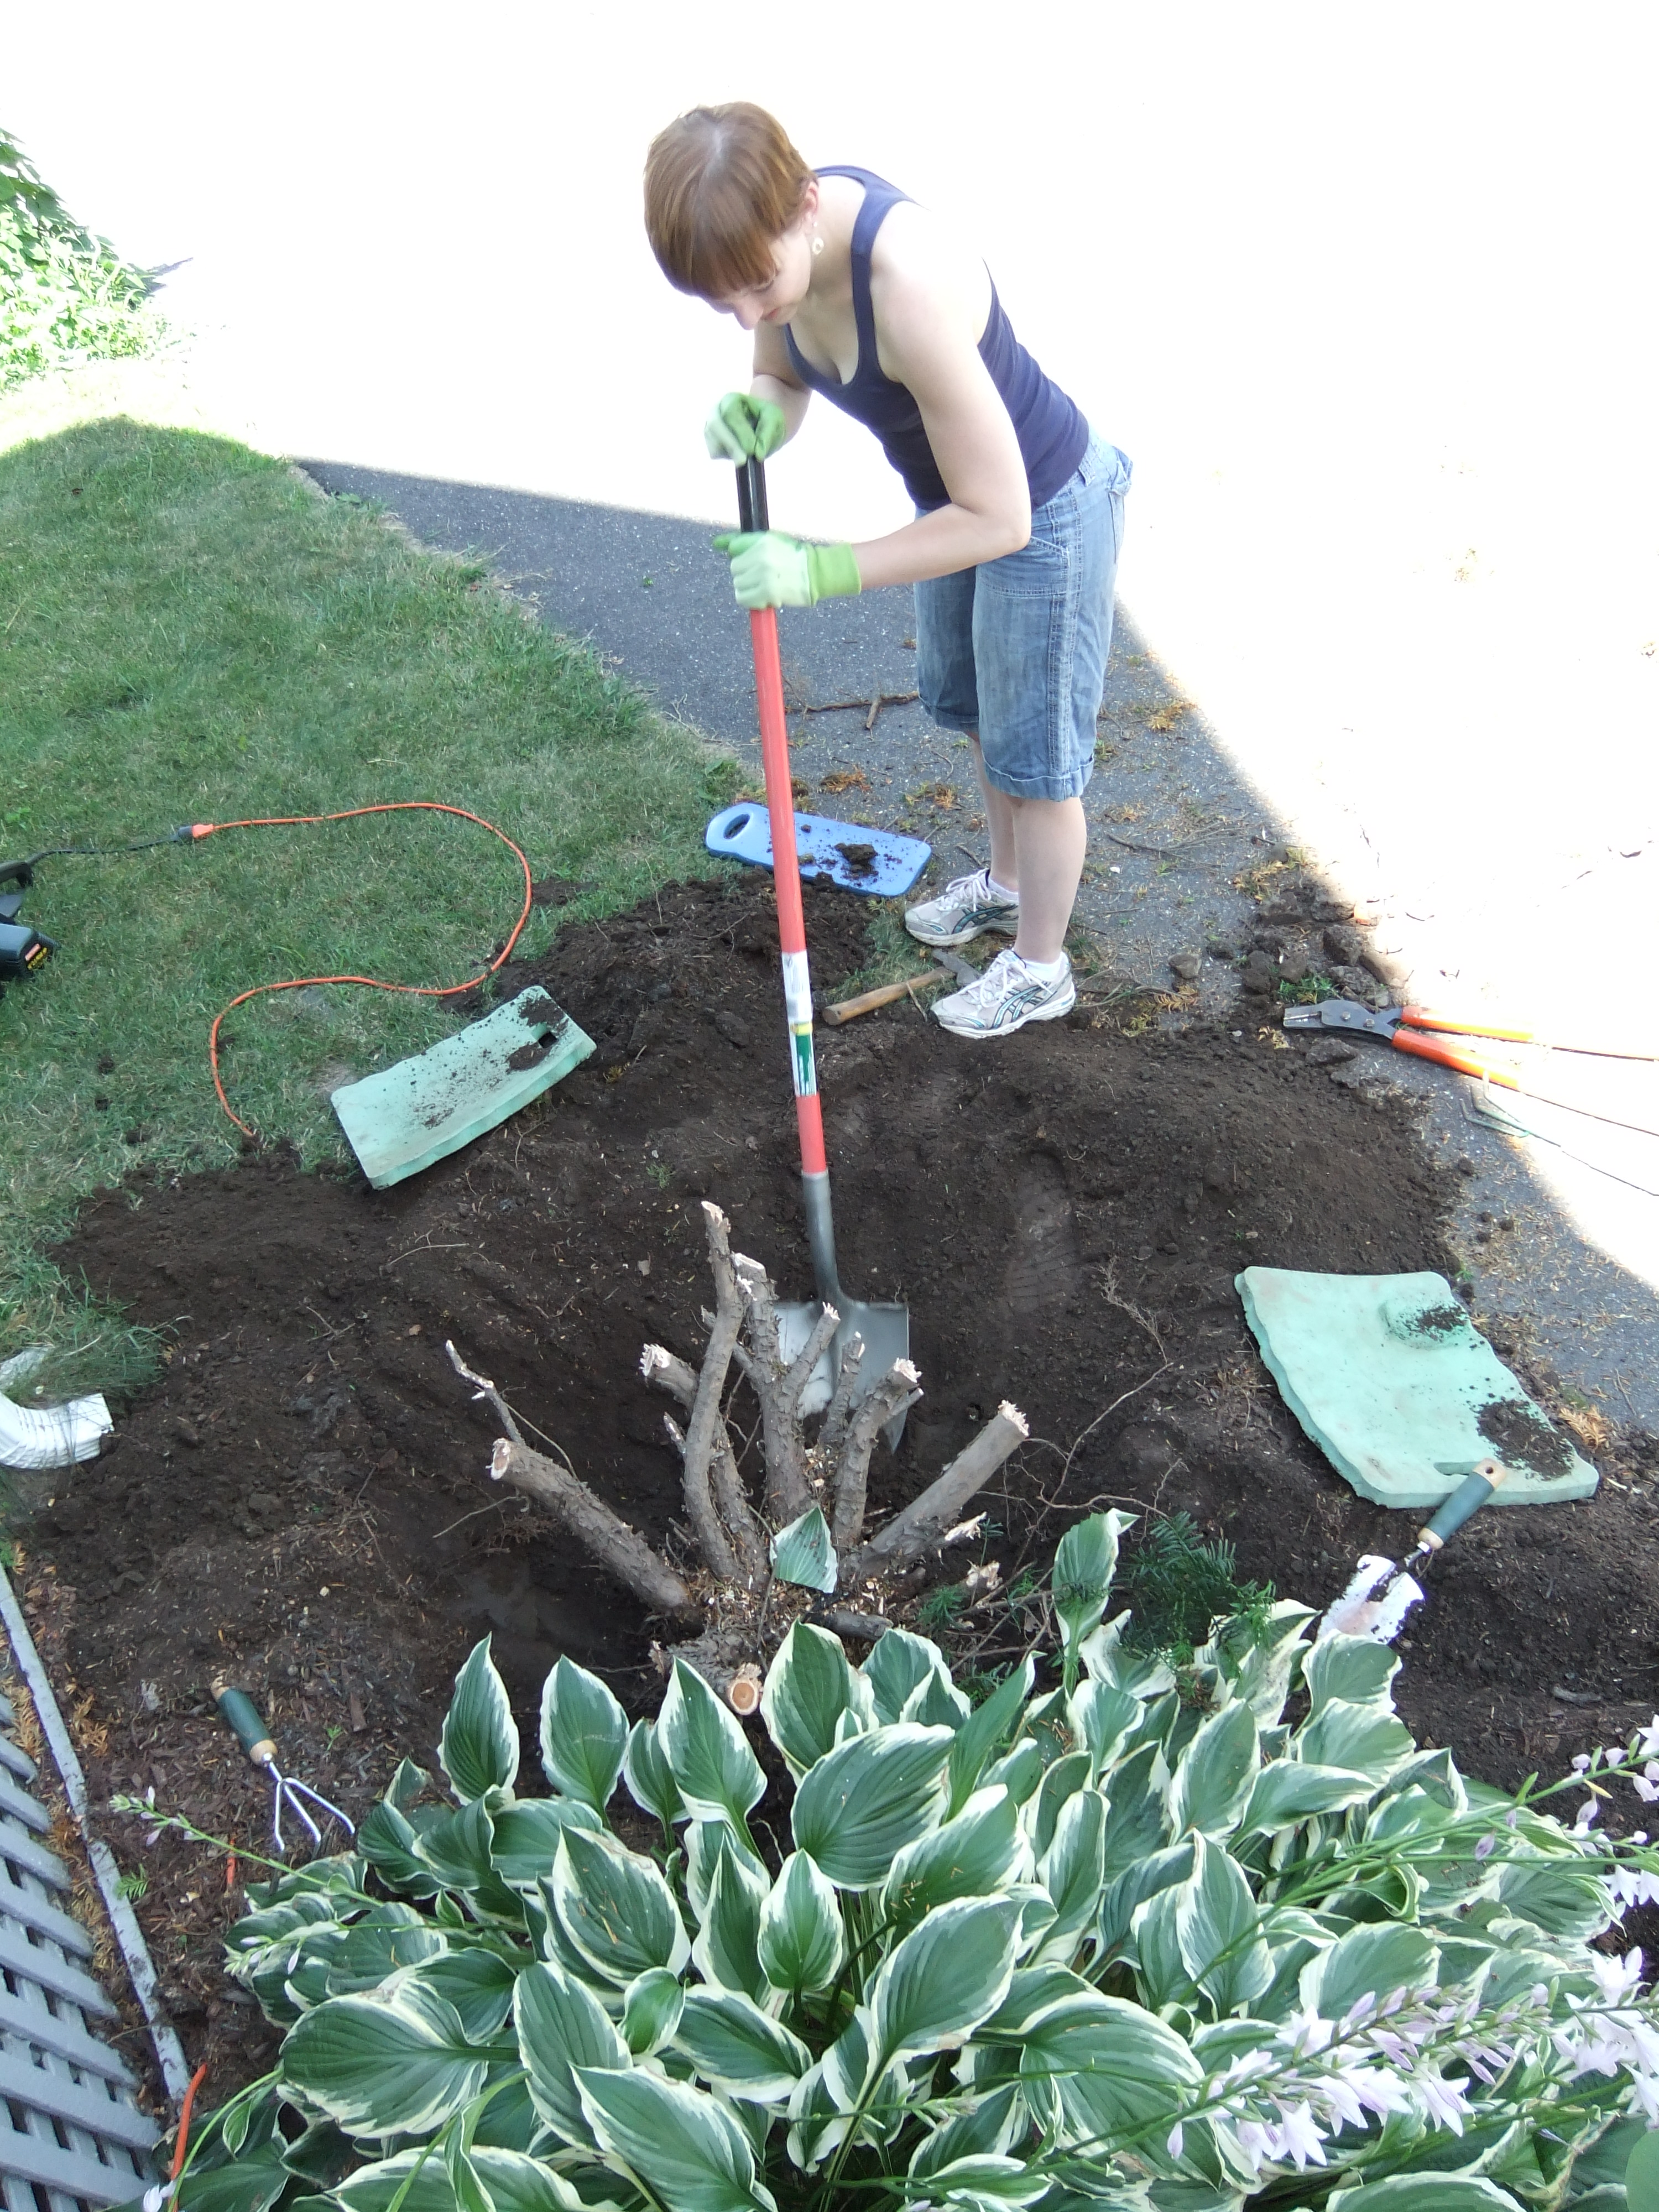
First step of a bush exorcism?  Expose the roots and start hacking away at them:

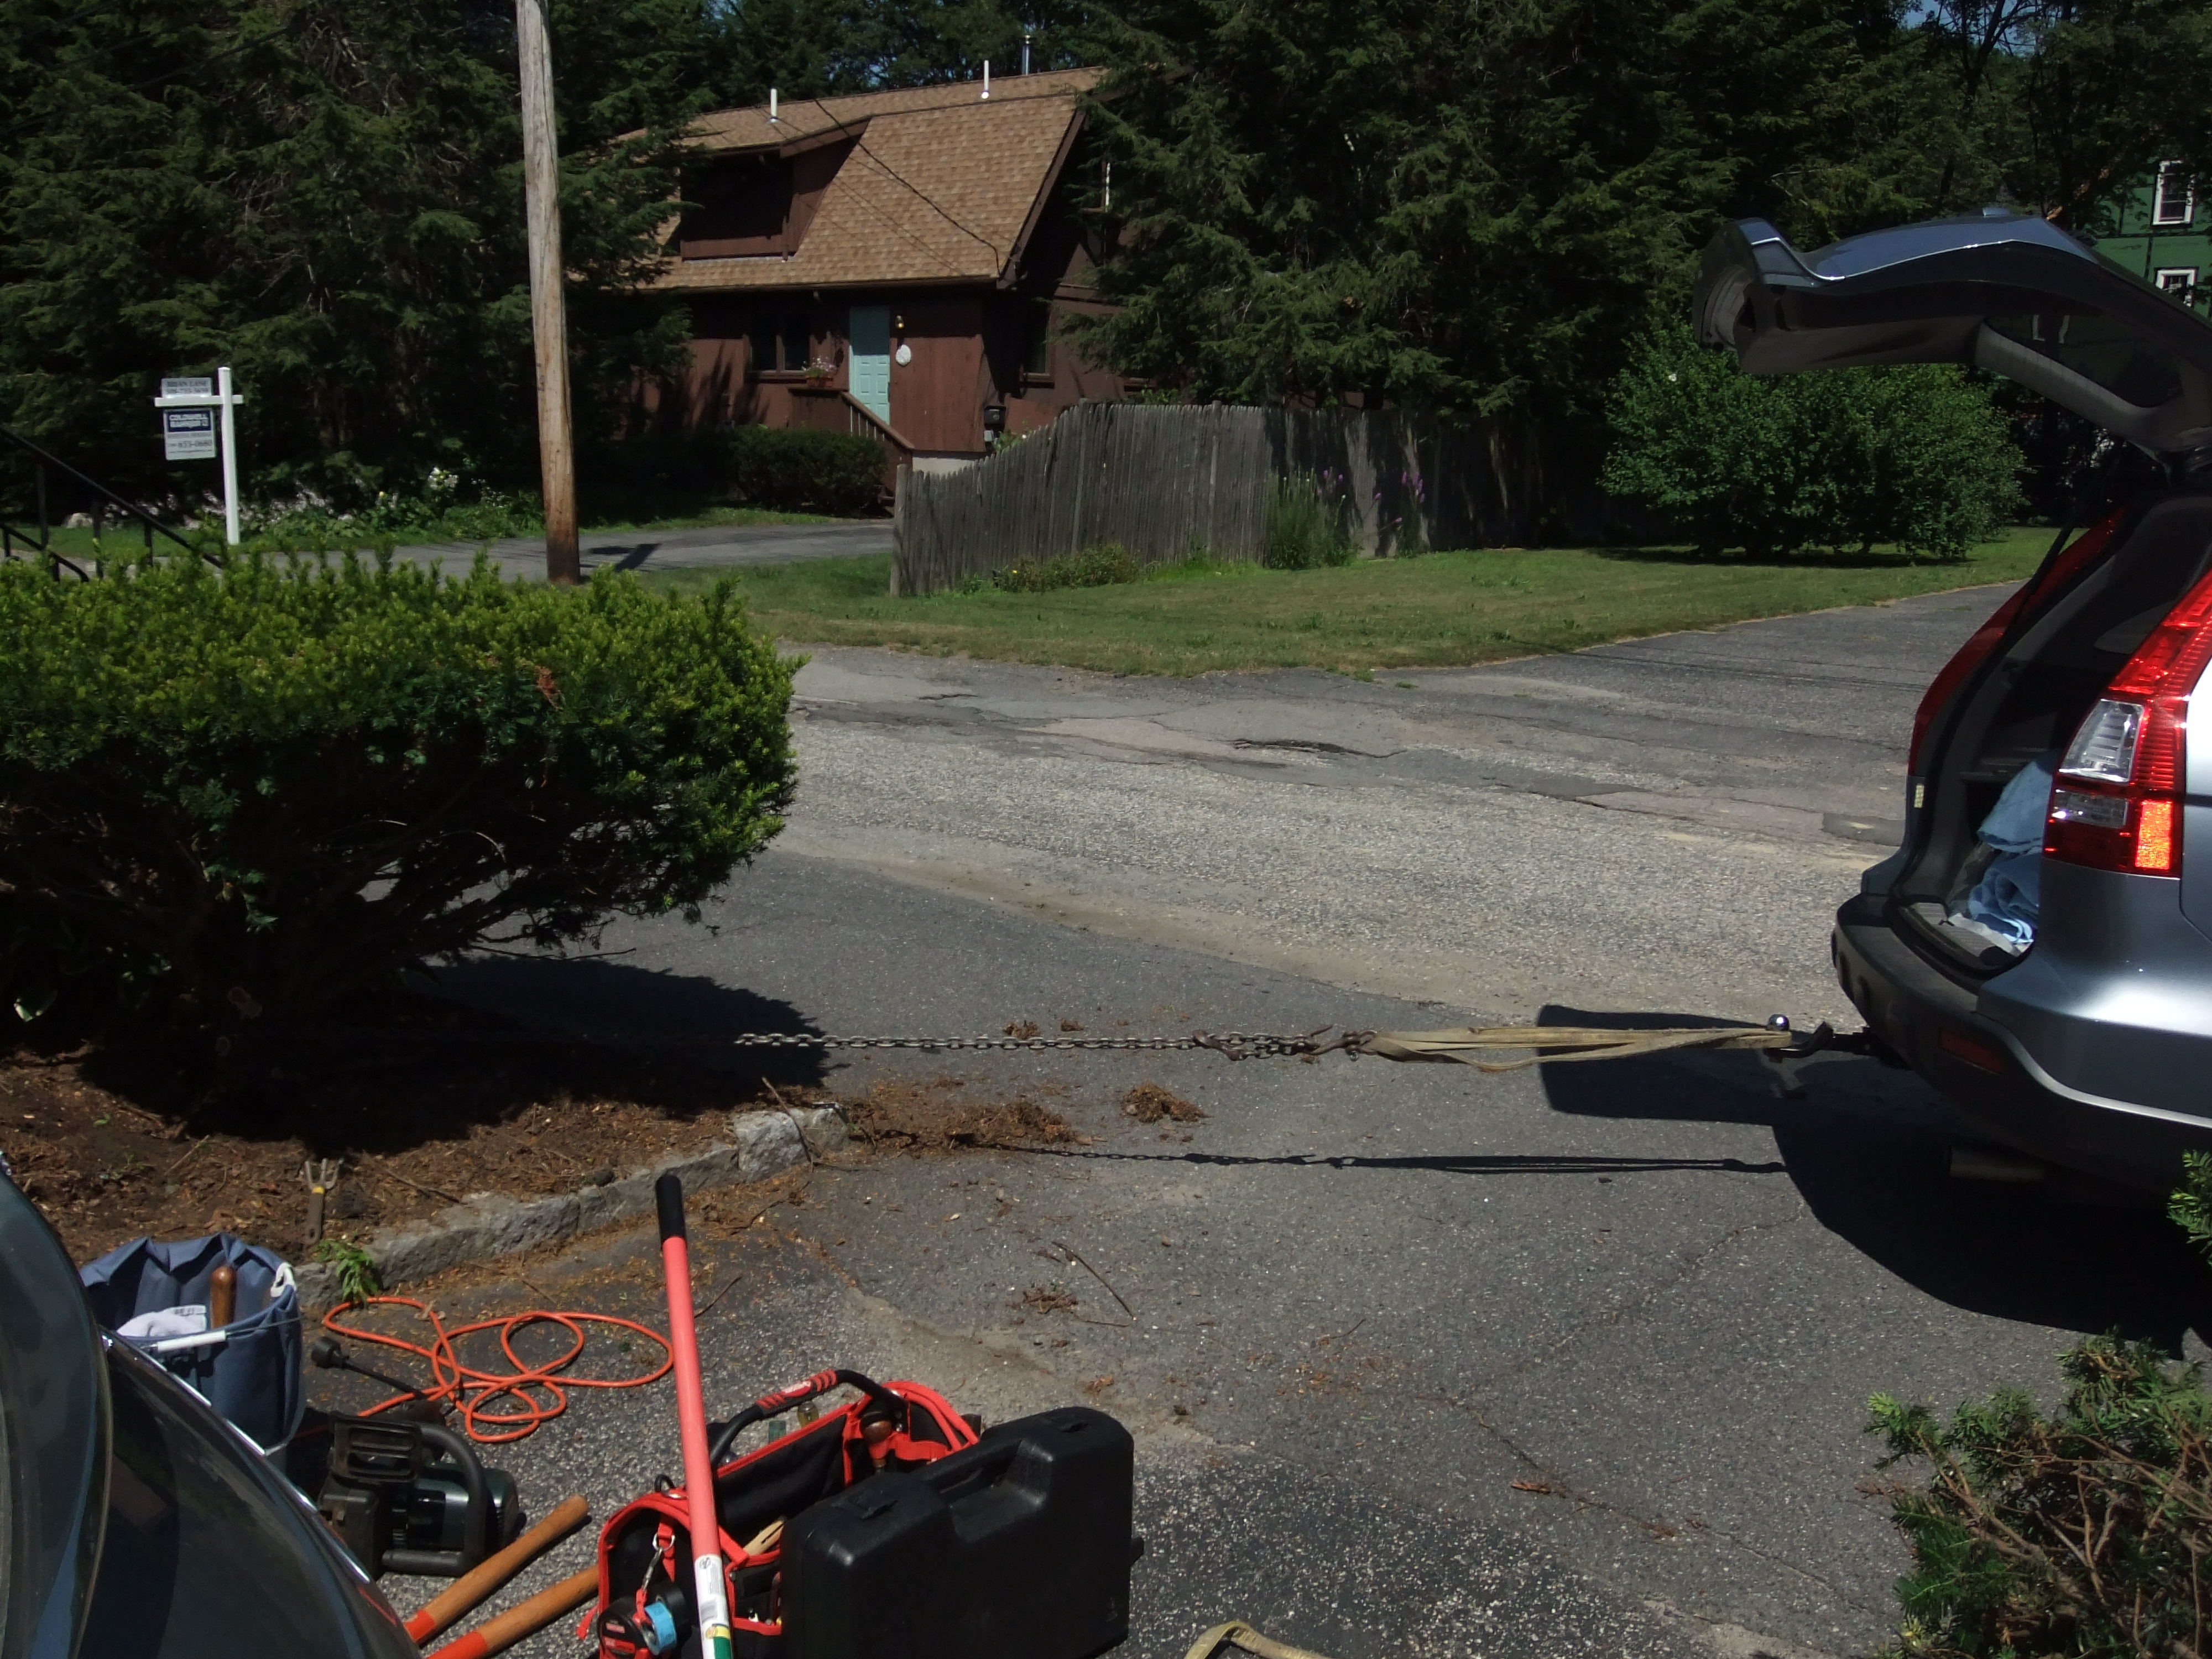
Next step?  Attempt to yank it out with my parent's mighty CR-V.  The irony is that Hubby and I have an 8 cylinder Jeep Grand Cherokee that has no trailer hitch or any place to attach any towing assembly to, making it as useless as our other car (a convertible) for towing.

Well, the mighty CR-V let us down this time (shocked? yeah, us too).  Indiana Jones, uh..I mean Handy Dad and Hubby continued hacking at the roots of this bush while Mom and I got started on the lesser of the two evil bushes.

All the while, my furry project buddy was supervising.

Once we hacked out the roots as much as possible, mighty CR-V  did prove useful as a big heavy object to attach a ratcheting pulley to.

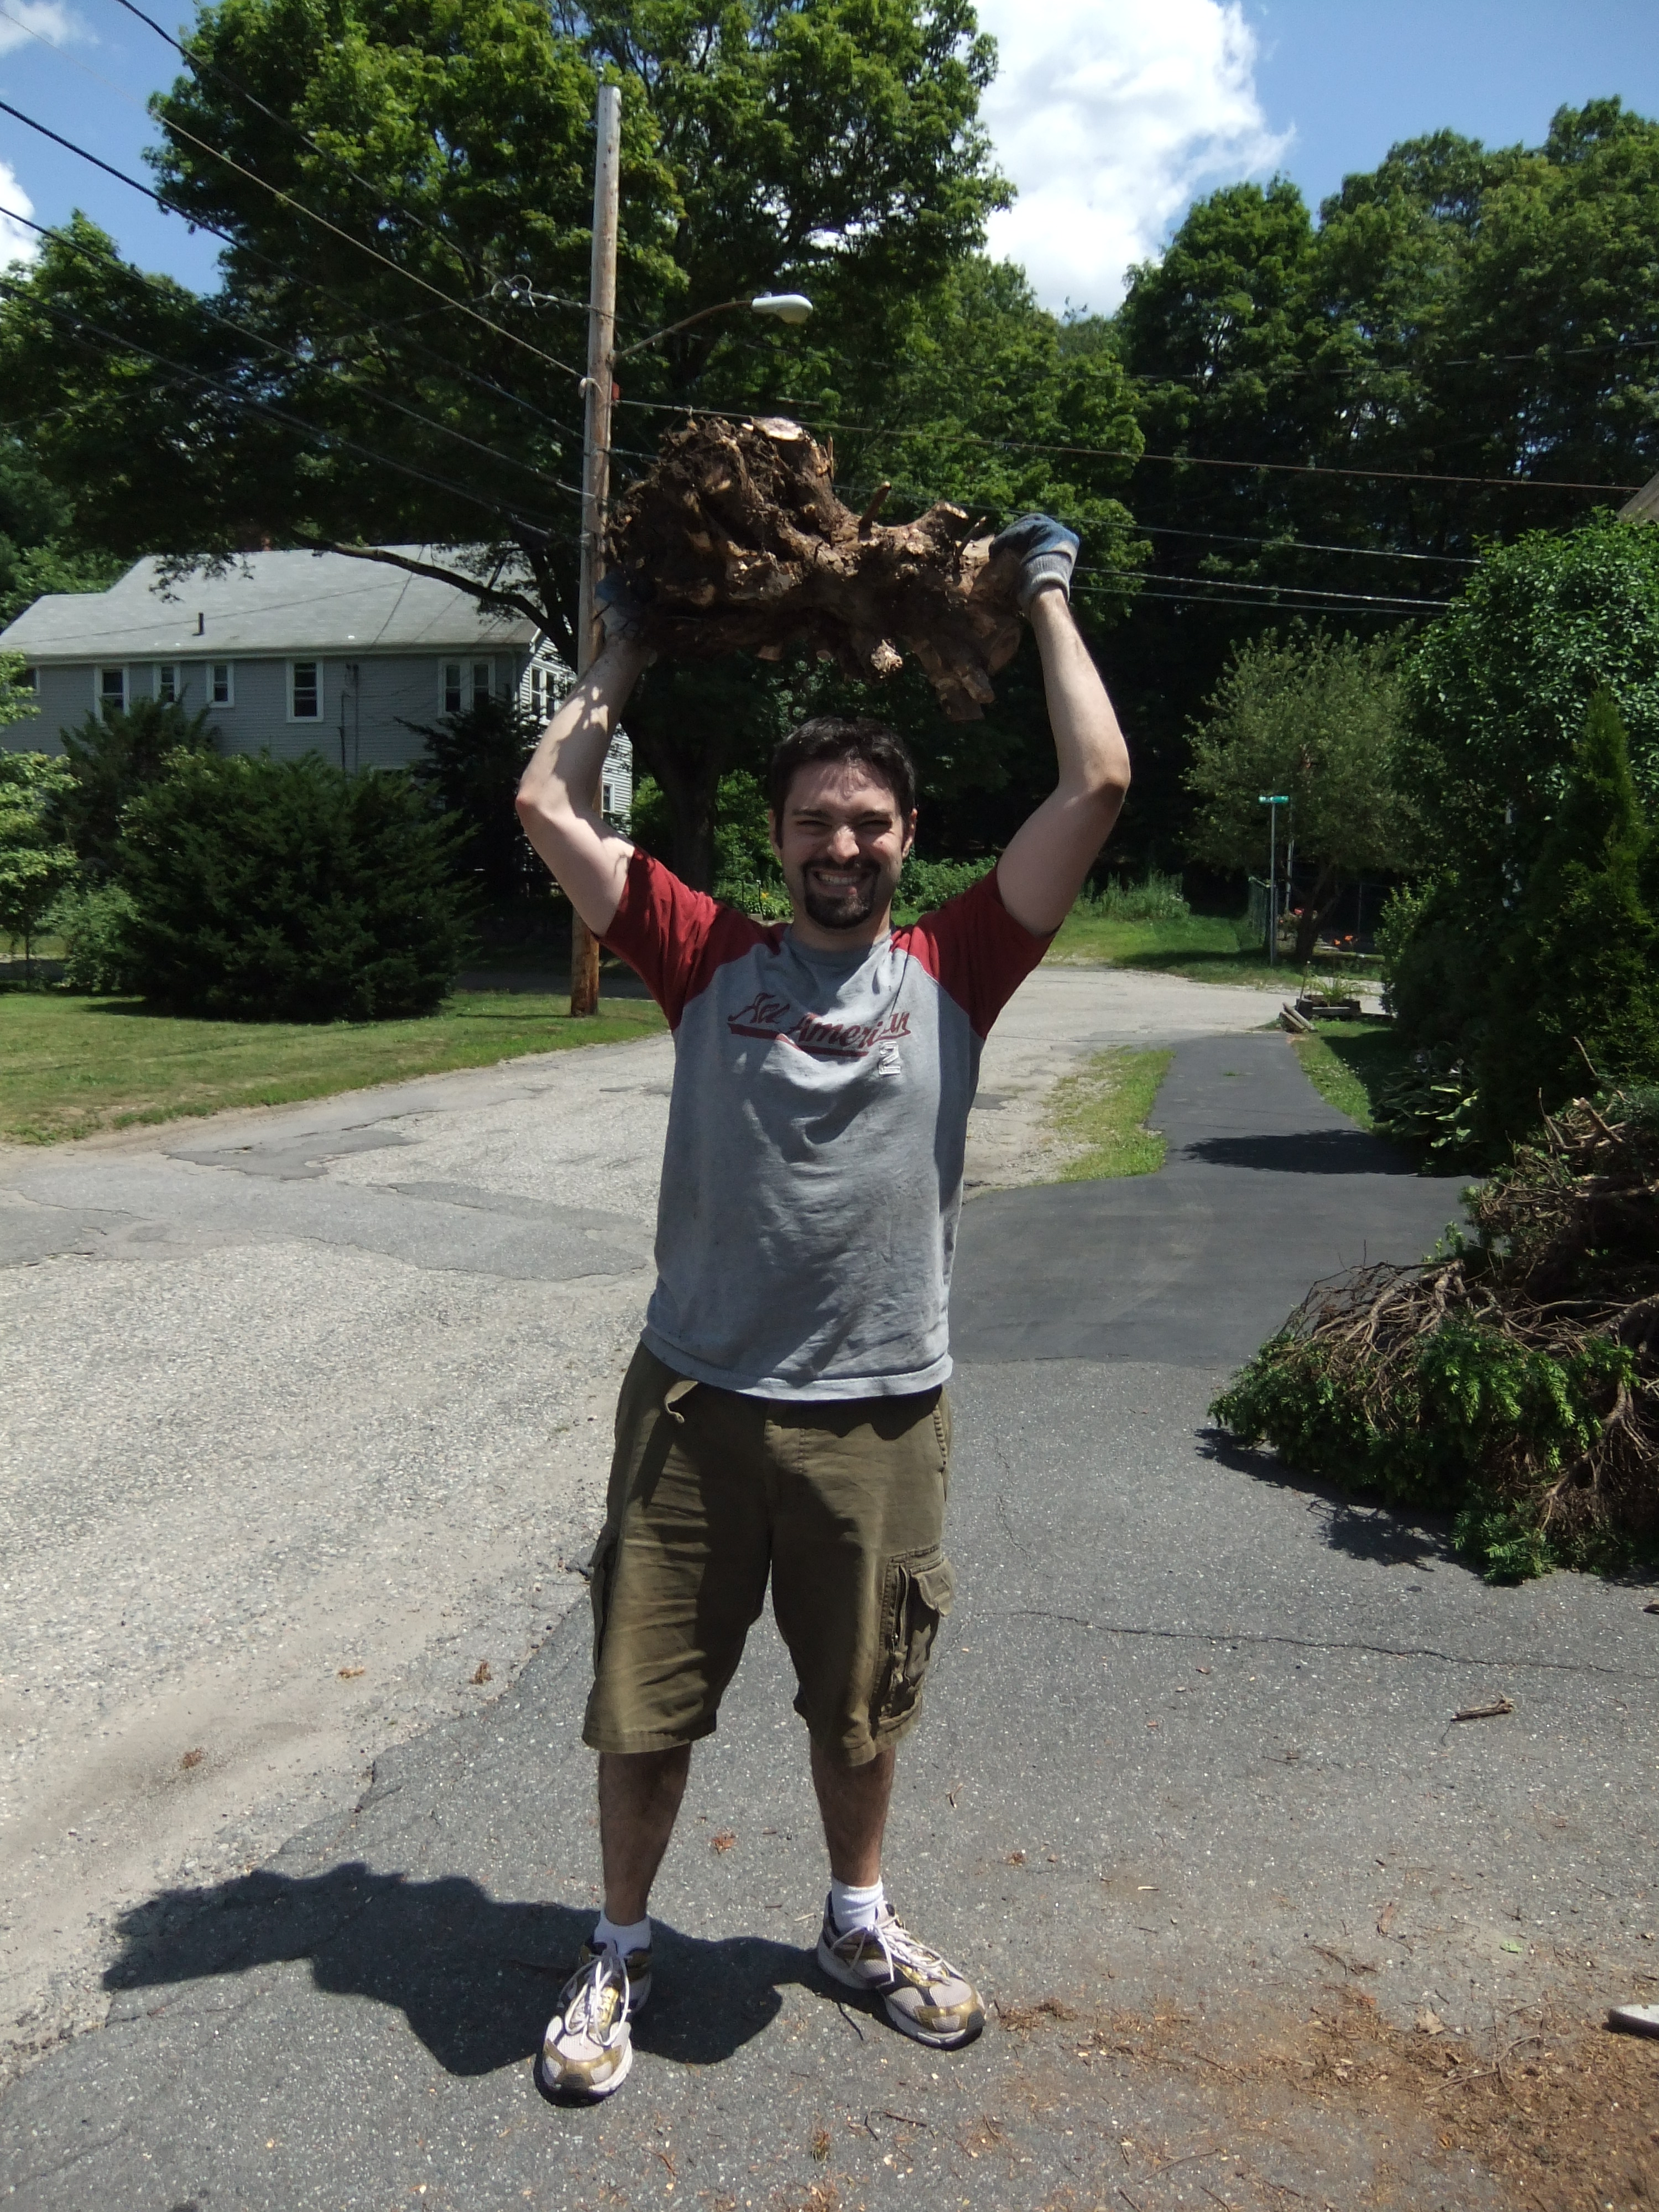
Eventually the evil bush forfeited and Hubby celebrated the victory with bad Braveheart impressions (I'll spare you).

The lesser bush was far less climactic of an extraction after the excitement of the first bush.  Once we excitedly had both bushes removed, Mom and I sent the men to dispose of the bushes while we plotted the beautification of the 2 new dirt holes.

Better already, right?

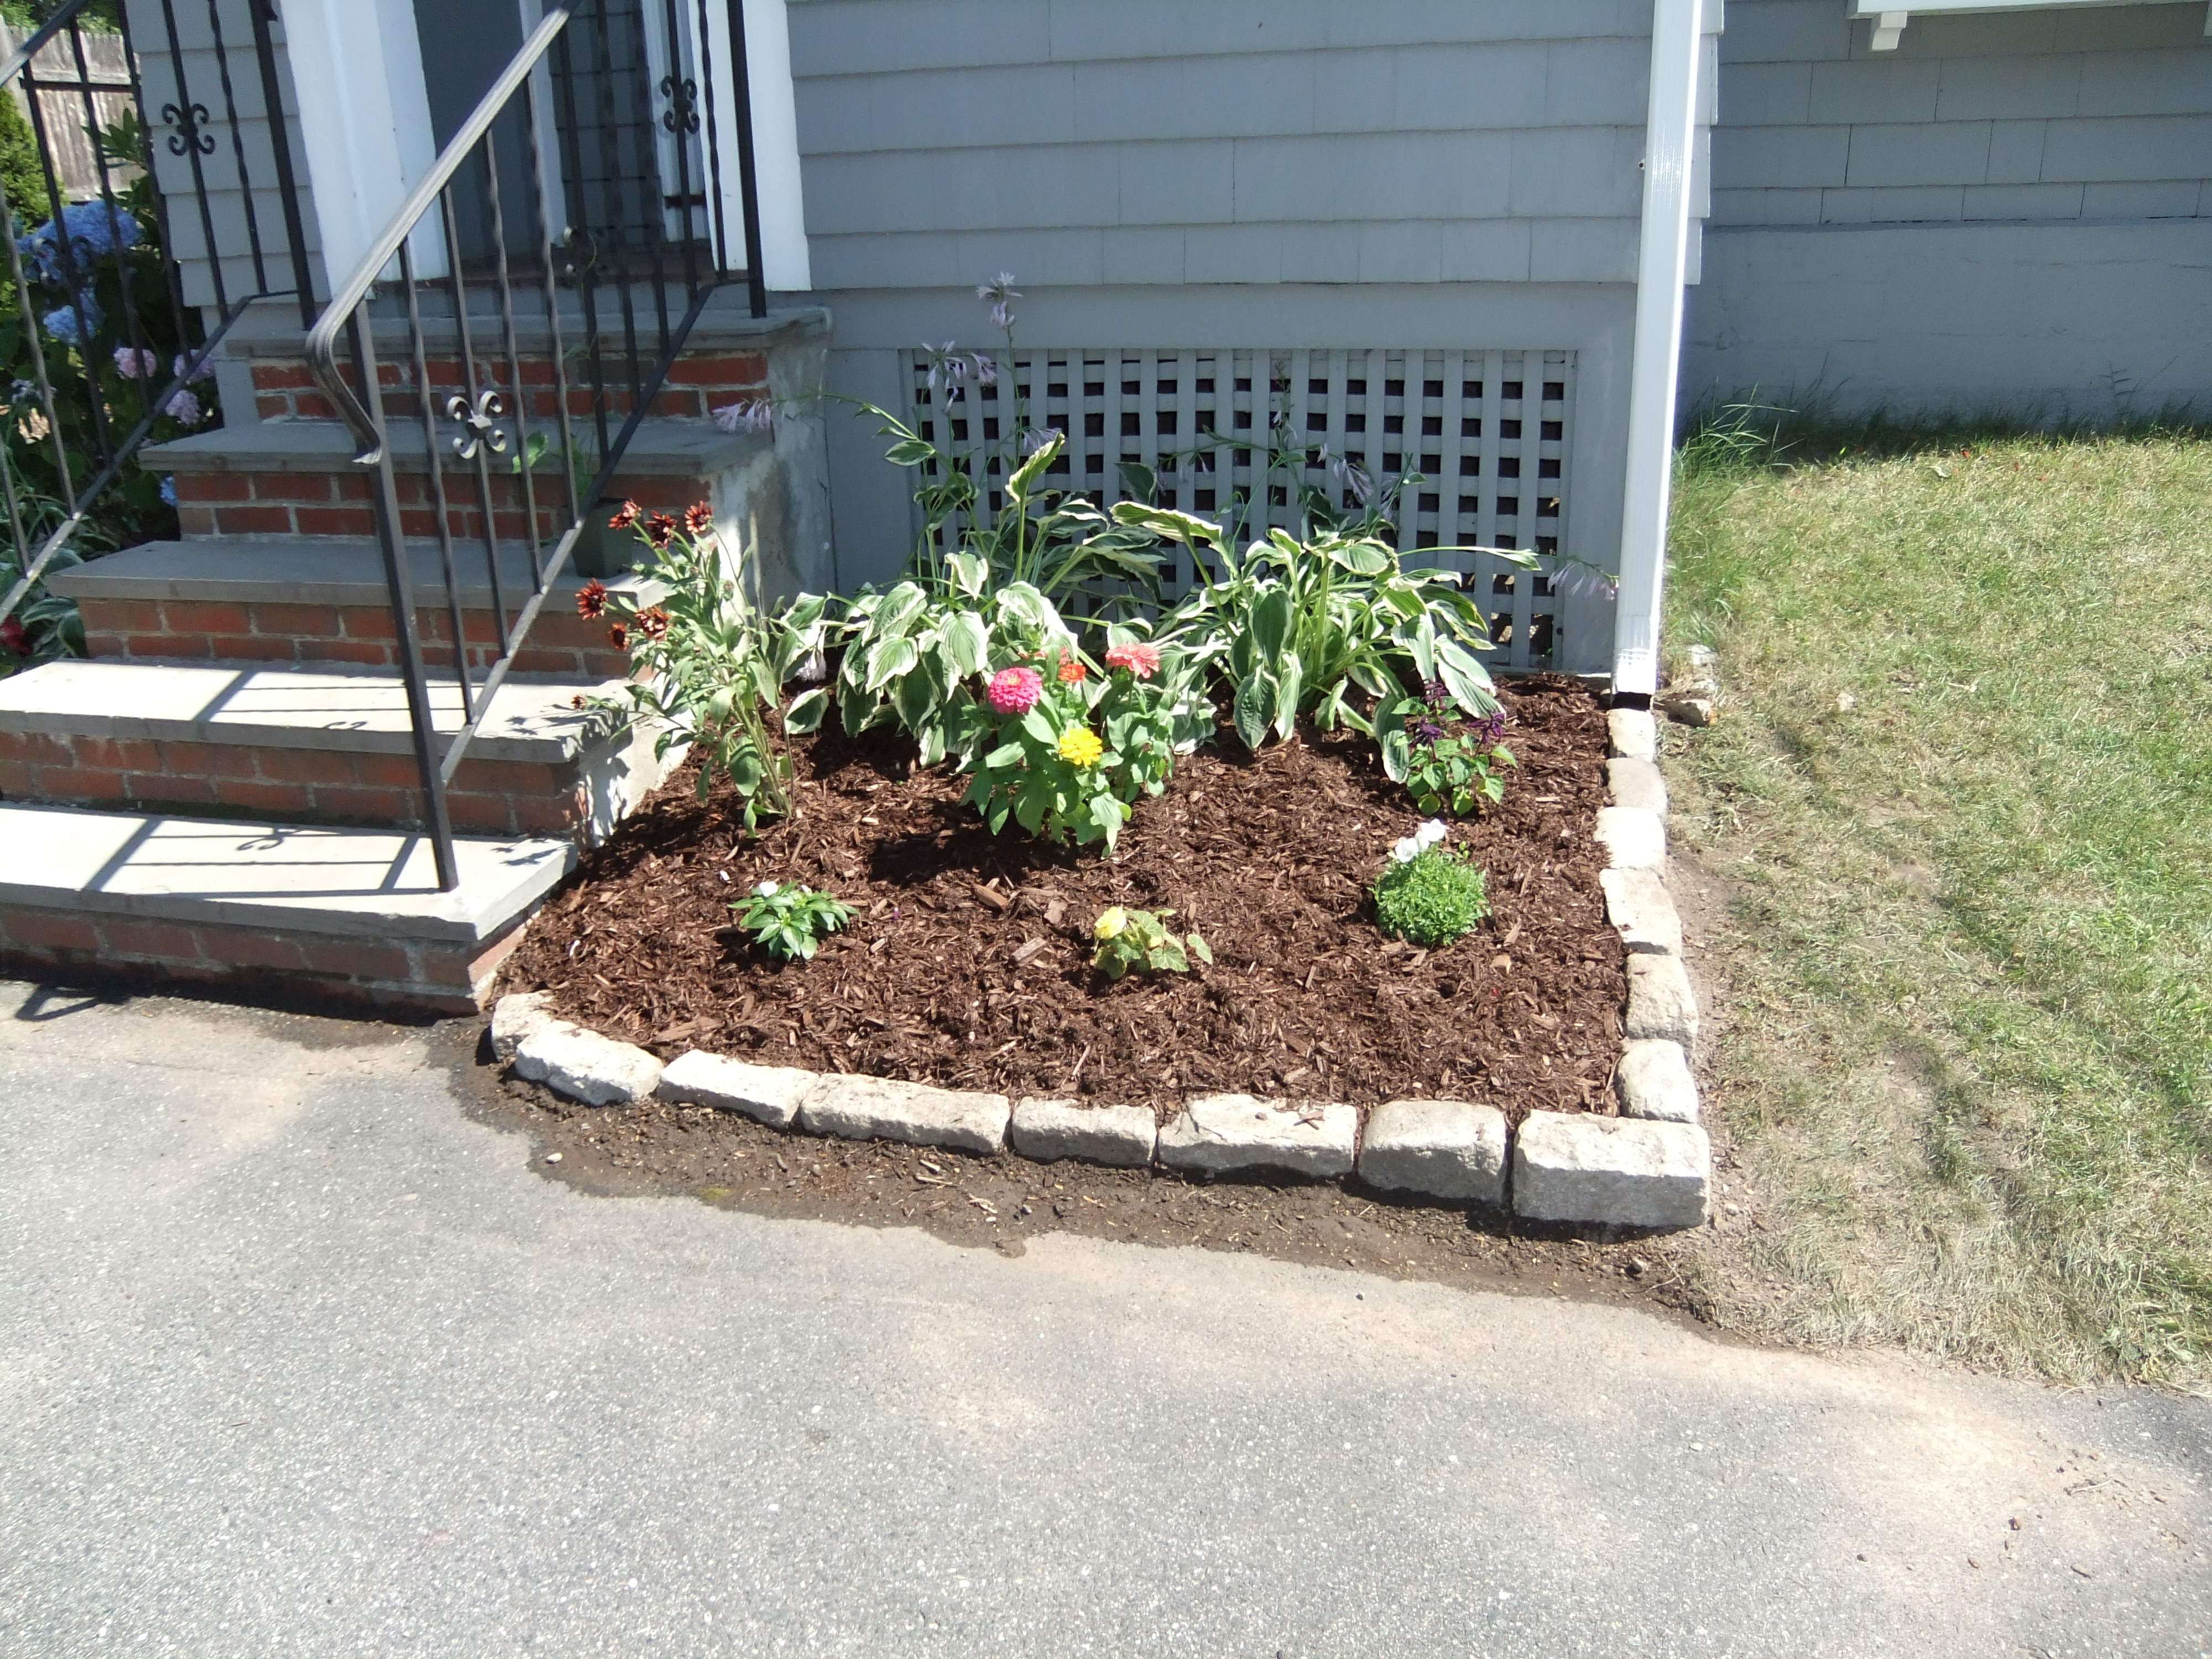
Mom kept busy with Hosta relocation (since they were previously squished in between the gigantic bushes and the stairs), while I worked on creating a stone border on the right side to match the one that already existed on the left.

Soon enough we were ready to start figuring out flower location, although I saved the actual planting and mulching for the next day.

Ready to see the outcome?

Have I built up enough anticipation yet with all the pictures?

Maybe I should make you wait until tomorrow to see the final product....

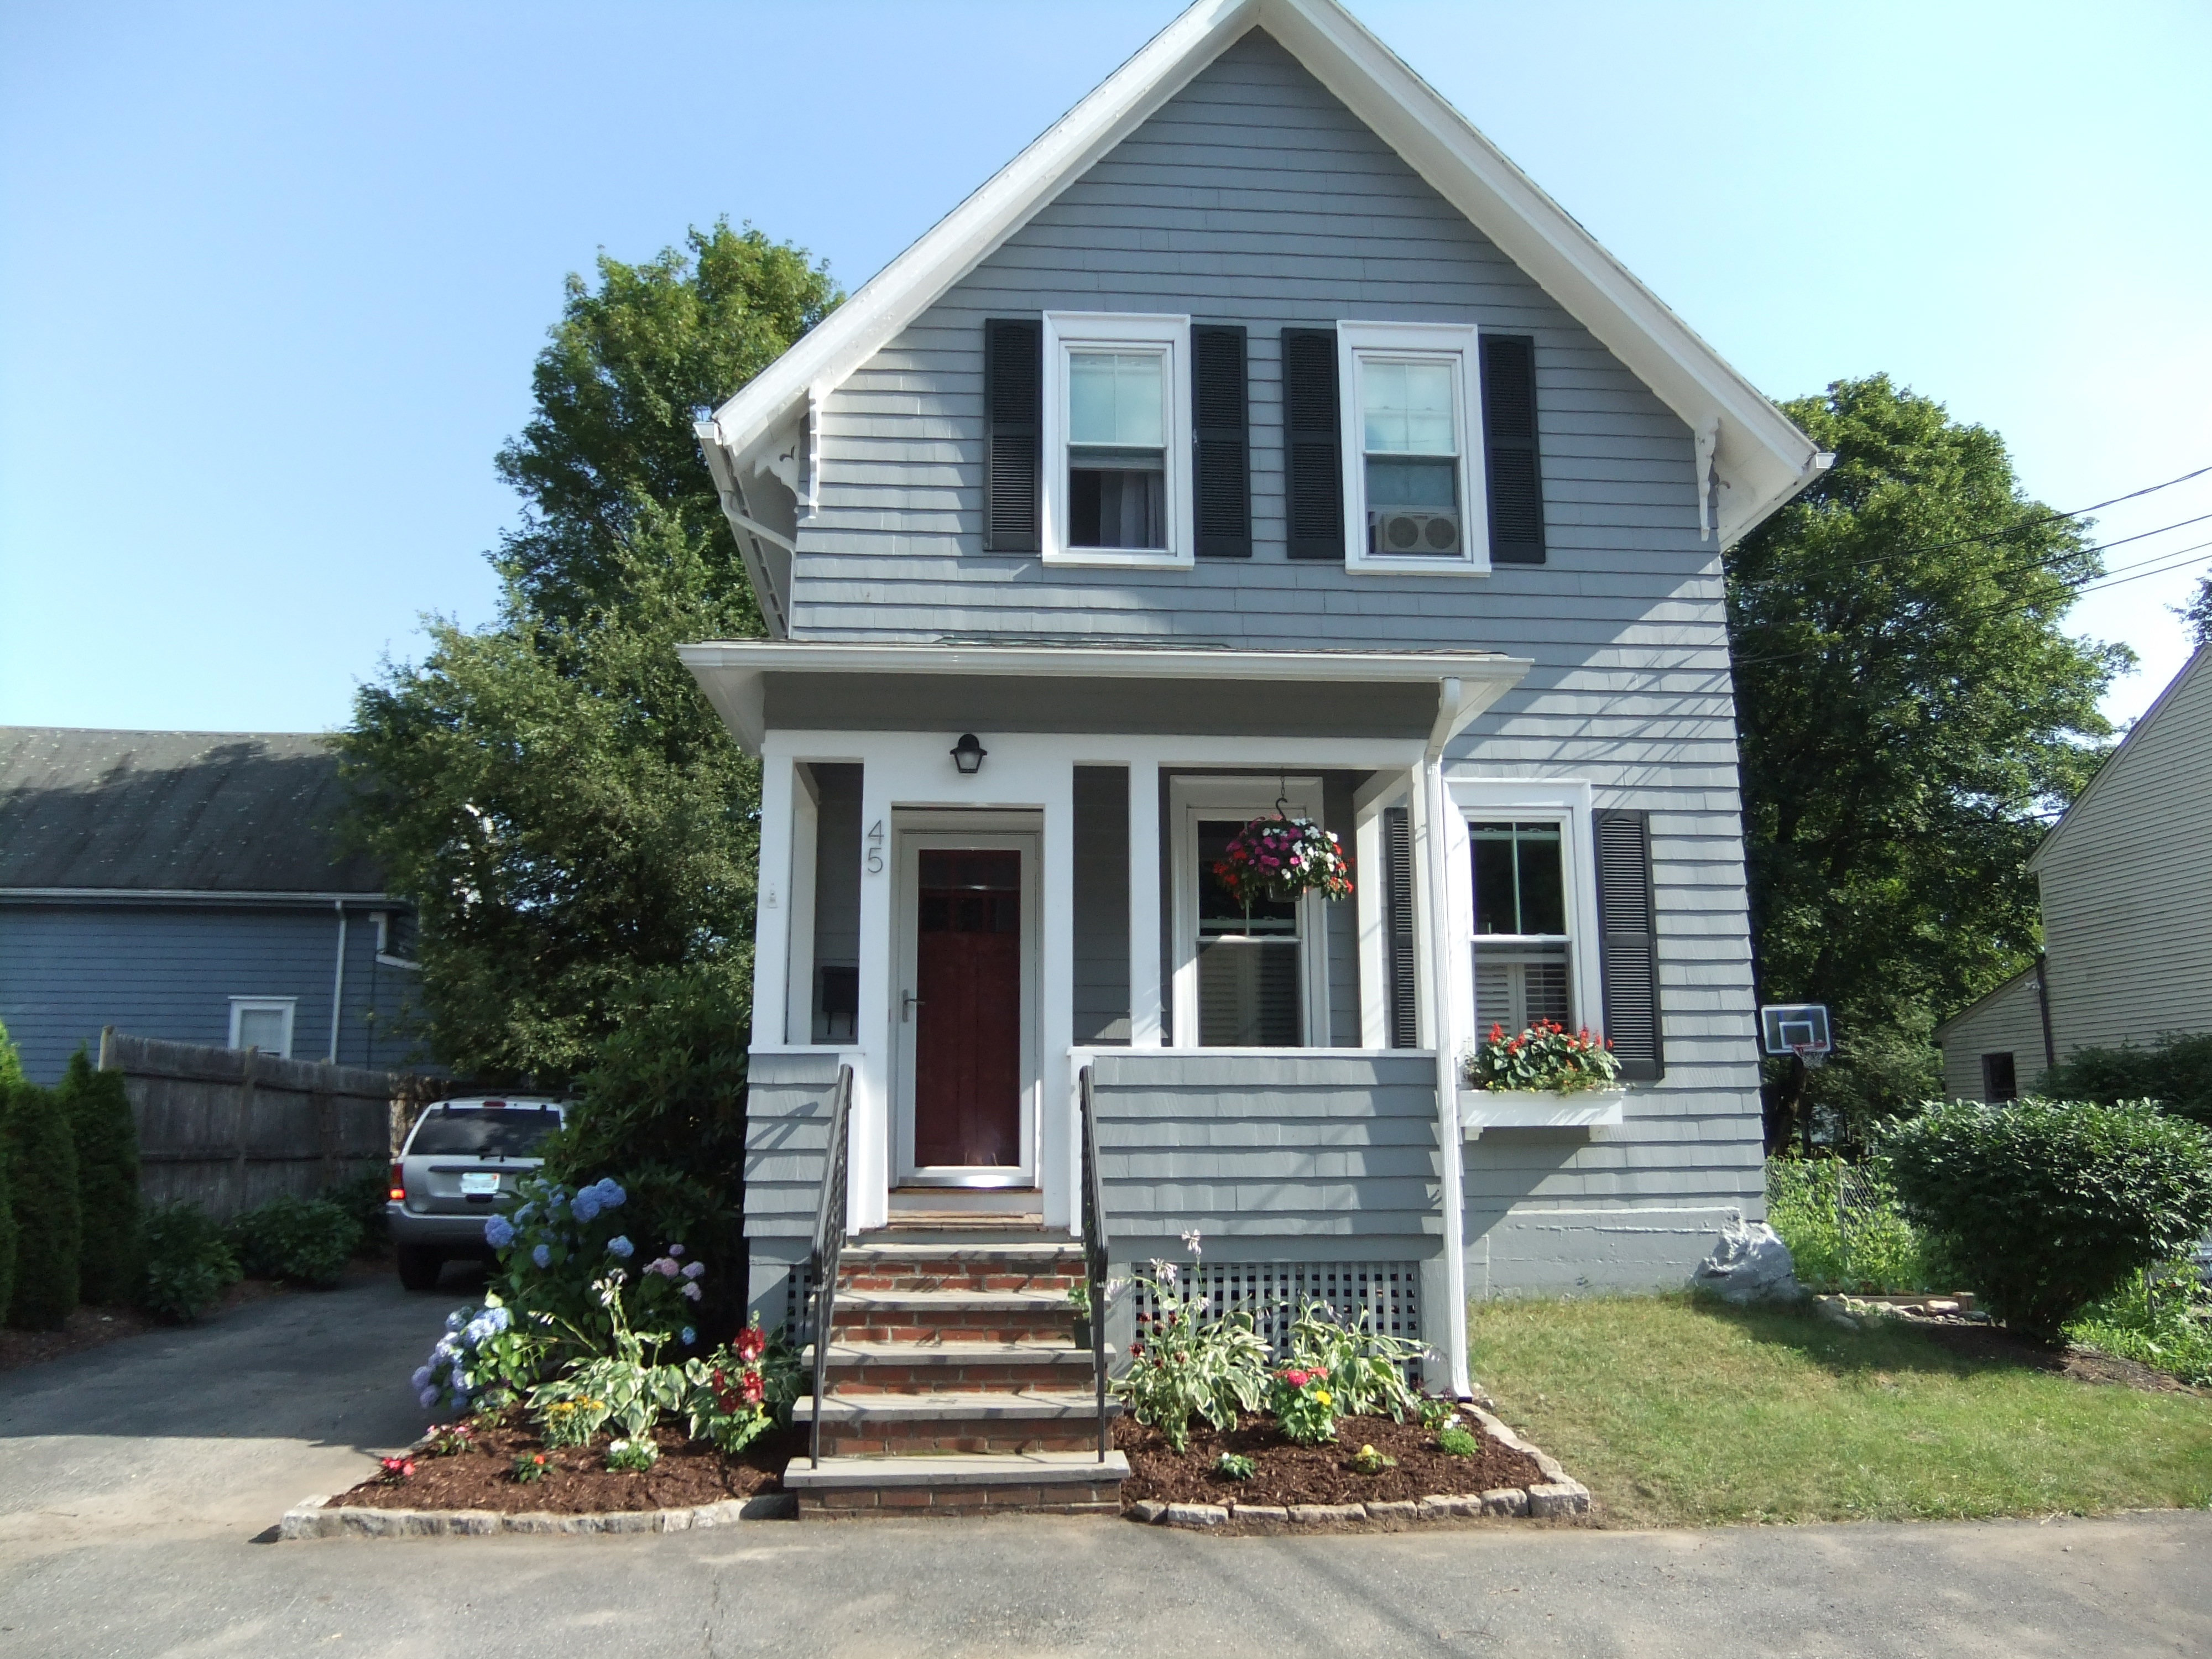
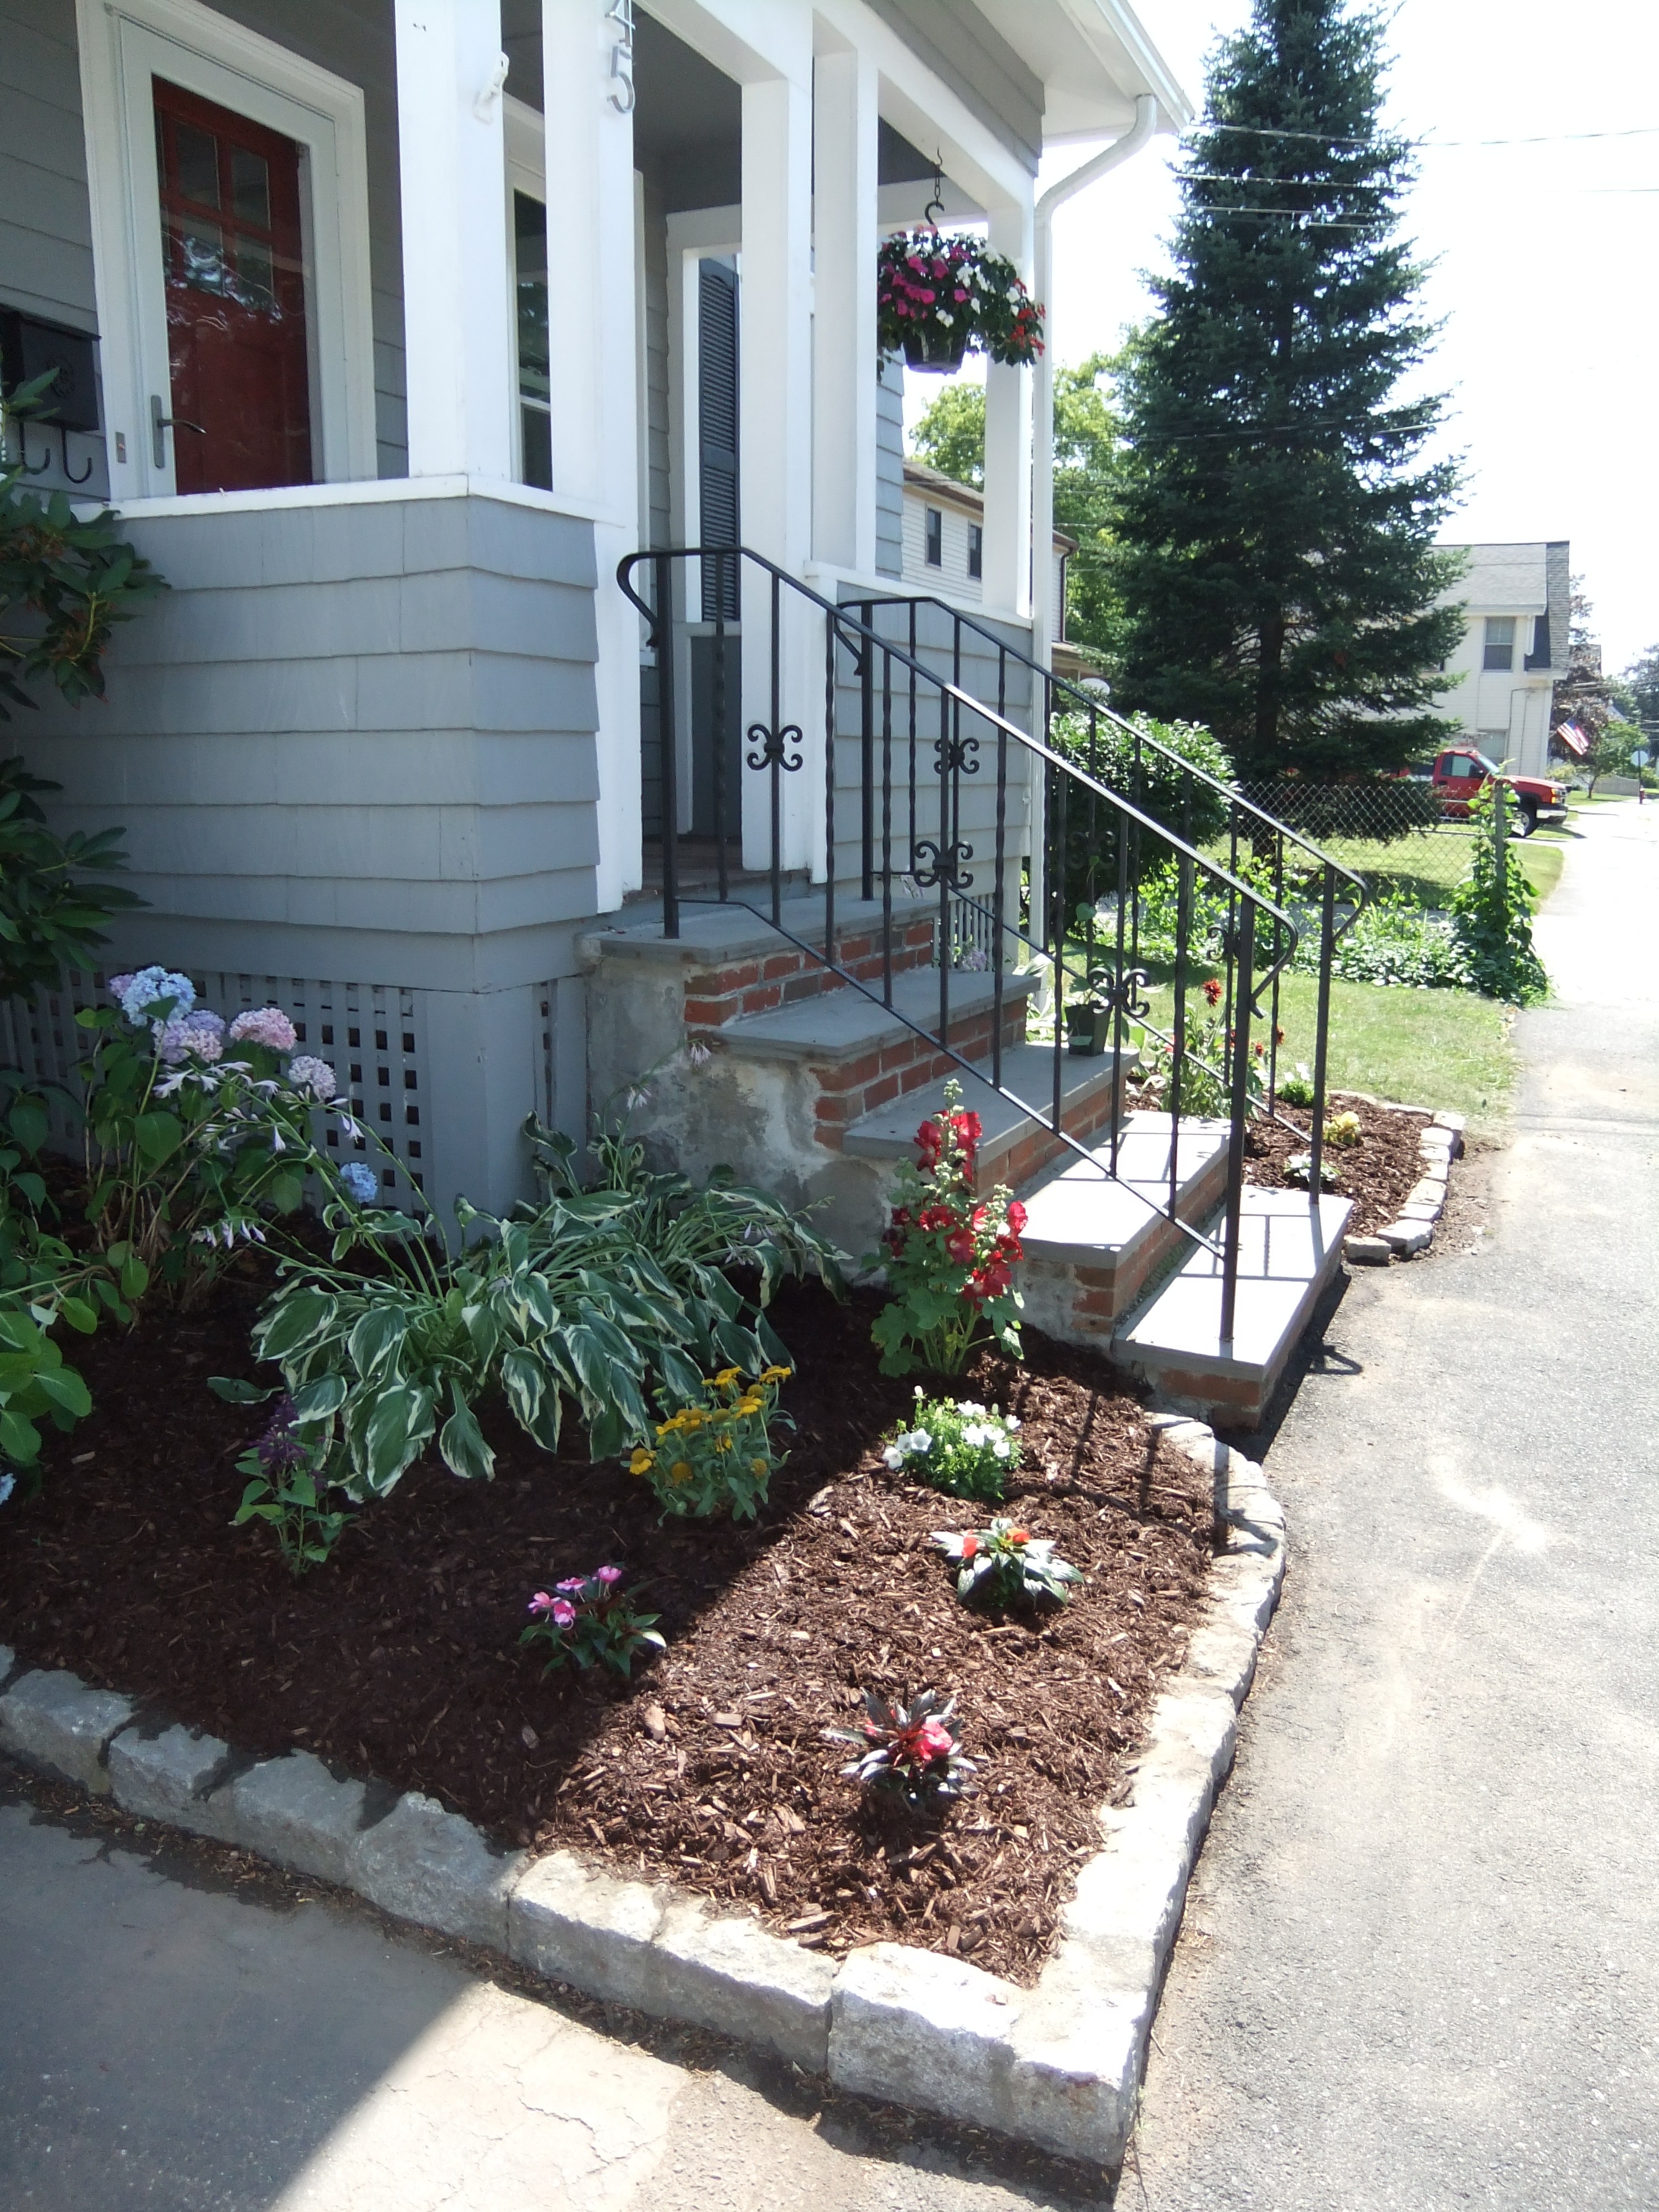
Just kidding!!  Here's what our front yard looks like now!

The new stone border might need some more love when I get up the energy to quik-crete it in place (like the other side), but it is good enough for now.

Isn't the front yard pretty?  Now can you see why I was feuding with the bushes?  They were in the way of my lovely garden!