Before & After

Refreshing Tangerine

A day later than anticipated, but it's done!!! (for now...) I purchased this little tangerine chest/commode the other weekend at the Preservation Worcester yard sale for $30.

Adorable, no?  I happen to like the tangeriney-orange aged paint on it (Hubby not so much) and I think the scale is perfect for our guest room.

I decided that before it made it into the house, it needed some minor work/refreshing.  The top was pretty damaged- you could see ghosted newsprint among the other stains.  Also, whoever painted it orange wasn't nice enough to remove the hardware first, so it was nice and caked onto the handles.

First order of duty was to use furniture stripper to take the paint off the top only.  The wood underneath was beautiful with few blemishes, so I totally lucked out.  This was only my second stripping project (my first was my dining table seen here), so I'm still figuring out the best way to do things.  I used Strip-X Fast Furniture Stripper that was left over from my previous project and spread it onto the top with an old paint brush very carefully (so I got it ONLY on the top).  After it set for about 15 minutes, I used a putty knife and scraped it off.  I repeated this to get through all the orange.  Once stripped, the top got a quick sand and wipe-down and dried overnight before I hit it with stain.

I had gotten Dark Walnut stain for another project, so I decided to give it a try on here.  4 coats of stain later, and I got it close to the desired color.  That's also why this post is a day late.  You have to wait ...........about ..............4 ............hours ...............between ................coats.  I much prefer spray paint in that vein where you only have to wait minutes before the next coat. Or I should have just started with a darker stain.  C'est la vie.

In Friday's teaser post, I mentioned using a crock pot.  I even had Handy Dad stumped about that one until I revealed my plans.  I found this article from This Old House detailing how to remove paint from hardware using a crock pot and I HAD to try it!  I dusted off my crock pot, purchased Reynolds crock pot liners, and went to town.  I 'cooked' the hardware in water with just a touch of laundry detergent (per This Old House's advice) for a just over a day.  It would have been fine in 1/2 that time, I'm sure, but I didn't get to it sooner.  All the hardware needed was a quick scrub with a toothbrush and the paint crumbled off.  It was quite exciting (and messy, so be sure to cover your worksurface first) to see how easily it came off!

I then hit the hardware with a few coats of Valspar Brilliant Metal Silver spray paint.  I was going for a more chrome look than it resulted in, but I don't hate it.  It's shinier than your standard silver spray paint, so the contrast on the orange is quite nice (if I do say so myself).  For future reference, though, do you know of any spray paint that comes out with a finish closer to chrome?

Here's what it looks like all finished.  Not a dramatic change, but enough to freshen it up a bit.

Hubby's not currently a fan of the orange, but I'm hoping that it'll grow on him.  If not, we'll repaint the orange parts sometime in the future.  But I want to give it time to make him agree with me see how he feels.

What do you think of my refreshed tangerine chest?

Evolution of a Room

Let me start by saying- my living room still needs lots of love and accessorizing....  BUT I think it's on its way.  I would love to be able to wait and just show the finished product years months from now, but lets face it, I'm too impatient. Over the past week, our living room has undergone a few major transformations.

Transformation #1: Stripes!

It took me a full weekend and week of evenings to get the stripes measured and taped off, then only 1 weekend to paint.  Phew!

I was first thinking 1 foot stripes would work.  That was until I taped out 2 partial stripes- WAY too wide.  So then I debated- 9" (on the right) or 6" (on the left).

In the photo, 9" looks a bit better, but in person, the 6" won hands down.  So the tedium began.

My tools for this process were a level, tape measure and pencil.  I started at the ceiling moulding at the corner and started marking out 6" segments.  After I did a few lines with multiple pieces of tape per line, I realized it got wavy, so I resolved to have 1 continuous piece of tape down the wall- which actually ended up being easier anyway.  Once I had the 6" segments measured at the top, I took my trusty purple level (I wish they made more tools in fun colors) and measured down the wall, leaving pencil marks down the path.  Once I had a few of those lines pencilled out, they got taped.  In case you didn't guess, the 'dots' of tape are to illustrate where NOT to paint.  There were a few spots that I had to thumb my nose at my level and just make the line LOOK right instead of be level.  Afterall, this house is over 110 years old, and level is not a word I would use to describe anything in my house.

So at long last, I had stripes.  But they were only temporary tape.  I've always been a blue painters tape kinda gal, but I decided to be a rebel and try Frog tape this time.  I was quite happy with it in the end- as long as I made sure the tape was fully secured at the edges (by running my finger along it right before I painted) I ended up with very few spots that I need to touch up.

In this pic, you can also see Transformation #2: the chair.

This awesome chair has been hanging out in our office upstairs and I asked hubby and his brother to muscle the large club chair upstairs and bring this one down to see how it worked.  The living room looked about 5 times larger with this minor change, it was kind of remarkable.  After a few days of contemplating it, I know this chair is too small for the space, but worlds better than the oversized one it replaced.  I need to find a cool chair that's mid scale and then I can send this beauty back up to the office where it belongs.  The club chair pretty much takes up the ENTIRE office, so that needs to go anyway (can I interest you in buying a chair?).

Anywho, back to the stripes.  I used paints that I already had to mix the perfect concoction.  I mixed a semi-gloss clear glaze, the blue wall paint, and a semi-gloss white paint until I got the right balance.  I had painted a piece of foam core board with the wall color, then tested my color mixes on it and held the board in different lights until I mixed a color that was exactly what I was looking for: visible in all lights, but was still subtle.

This picture is the perfect segue into Transformation #3: coffee table(s).

Say buhbye to the wood hunk of a coffee table dragging the room down, and welcome its much more svelte counterpart(s).

I found these guys on overstock and ended up paying $97 a piece including shipping.

Are you ready to see it all together??  Let me first remind you what the living room looked like not too long ago.

This is what my living room looks like today.

Here's what's still on my list for the room:

  • Change out the ceiling light (not sure what yet, so it's waiting for the perfect thing).
  • I need to get my hands on some more graphic pillows (Mom made me some of them for my bridal shower 2 years ago, but I need to introduce others and start rotating what ones get used)
  • Accessories!!!  I want to find some awesome boxes to hide stuff and cool pottery for color pops.  I'm also picturing a super oversized square boho-chic basket to hold blankets and pillows.
  • Artwork- something needs to be on the wall.  Hubby just picked up a painting in France, so I need to find a place for that.
  • Chair- as I mentioned already, I need a mid scale chair.  I need to go Goldilocks on this- I found one that's too big, and one that's too small- I need one that's juuuuuuust right.
  • Rug.... maybe something Persian- inspired to make Hubby happy?  For some strange reason, the shag just ain't cuttin' it with 2 kitties. We got this rug before they were part of our family.

Hmm, is that it?  I'm sure other things in the room will evolve too as I work things out.  I'm just pleased that the room no longer feels like its closing in on you, and it no longer looks like it's straight out of a discount furniture showroom.  Huzzah!

Shedding

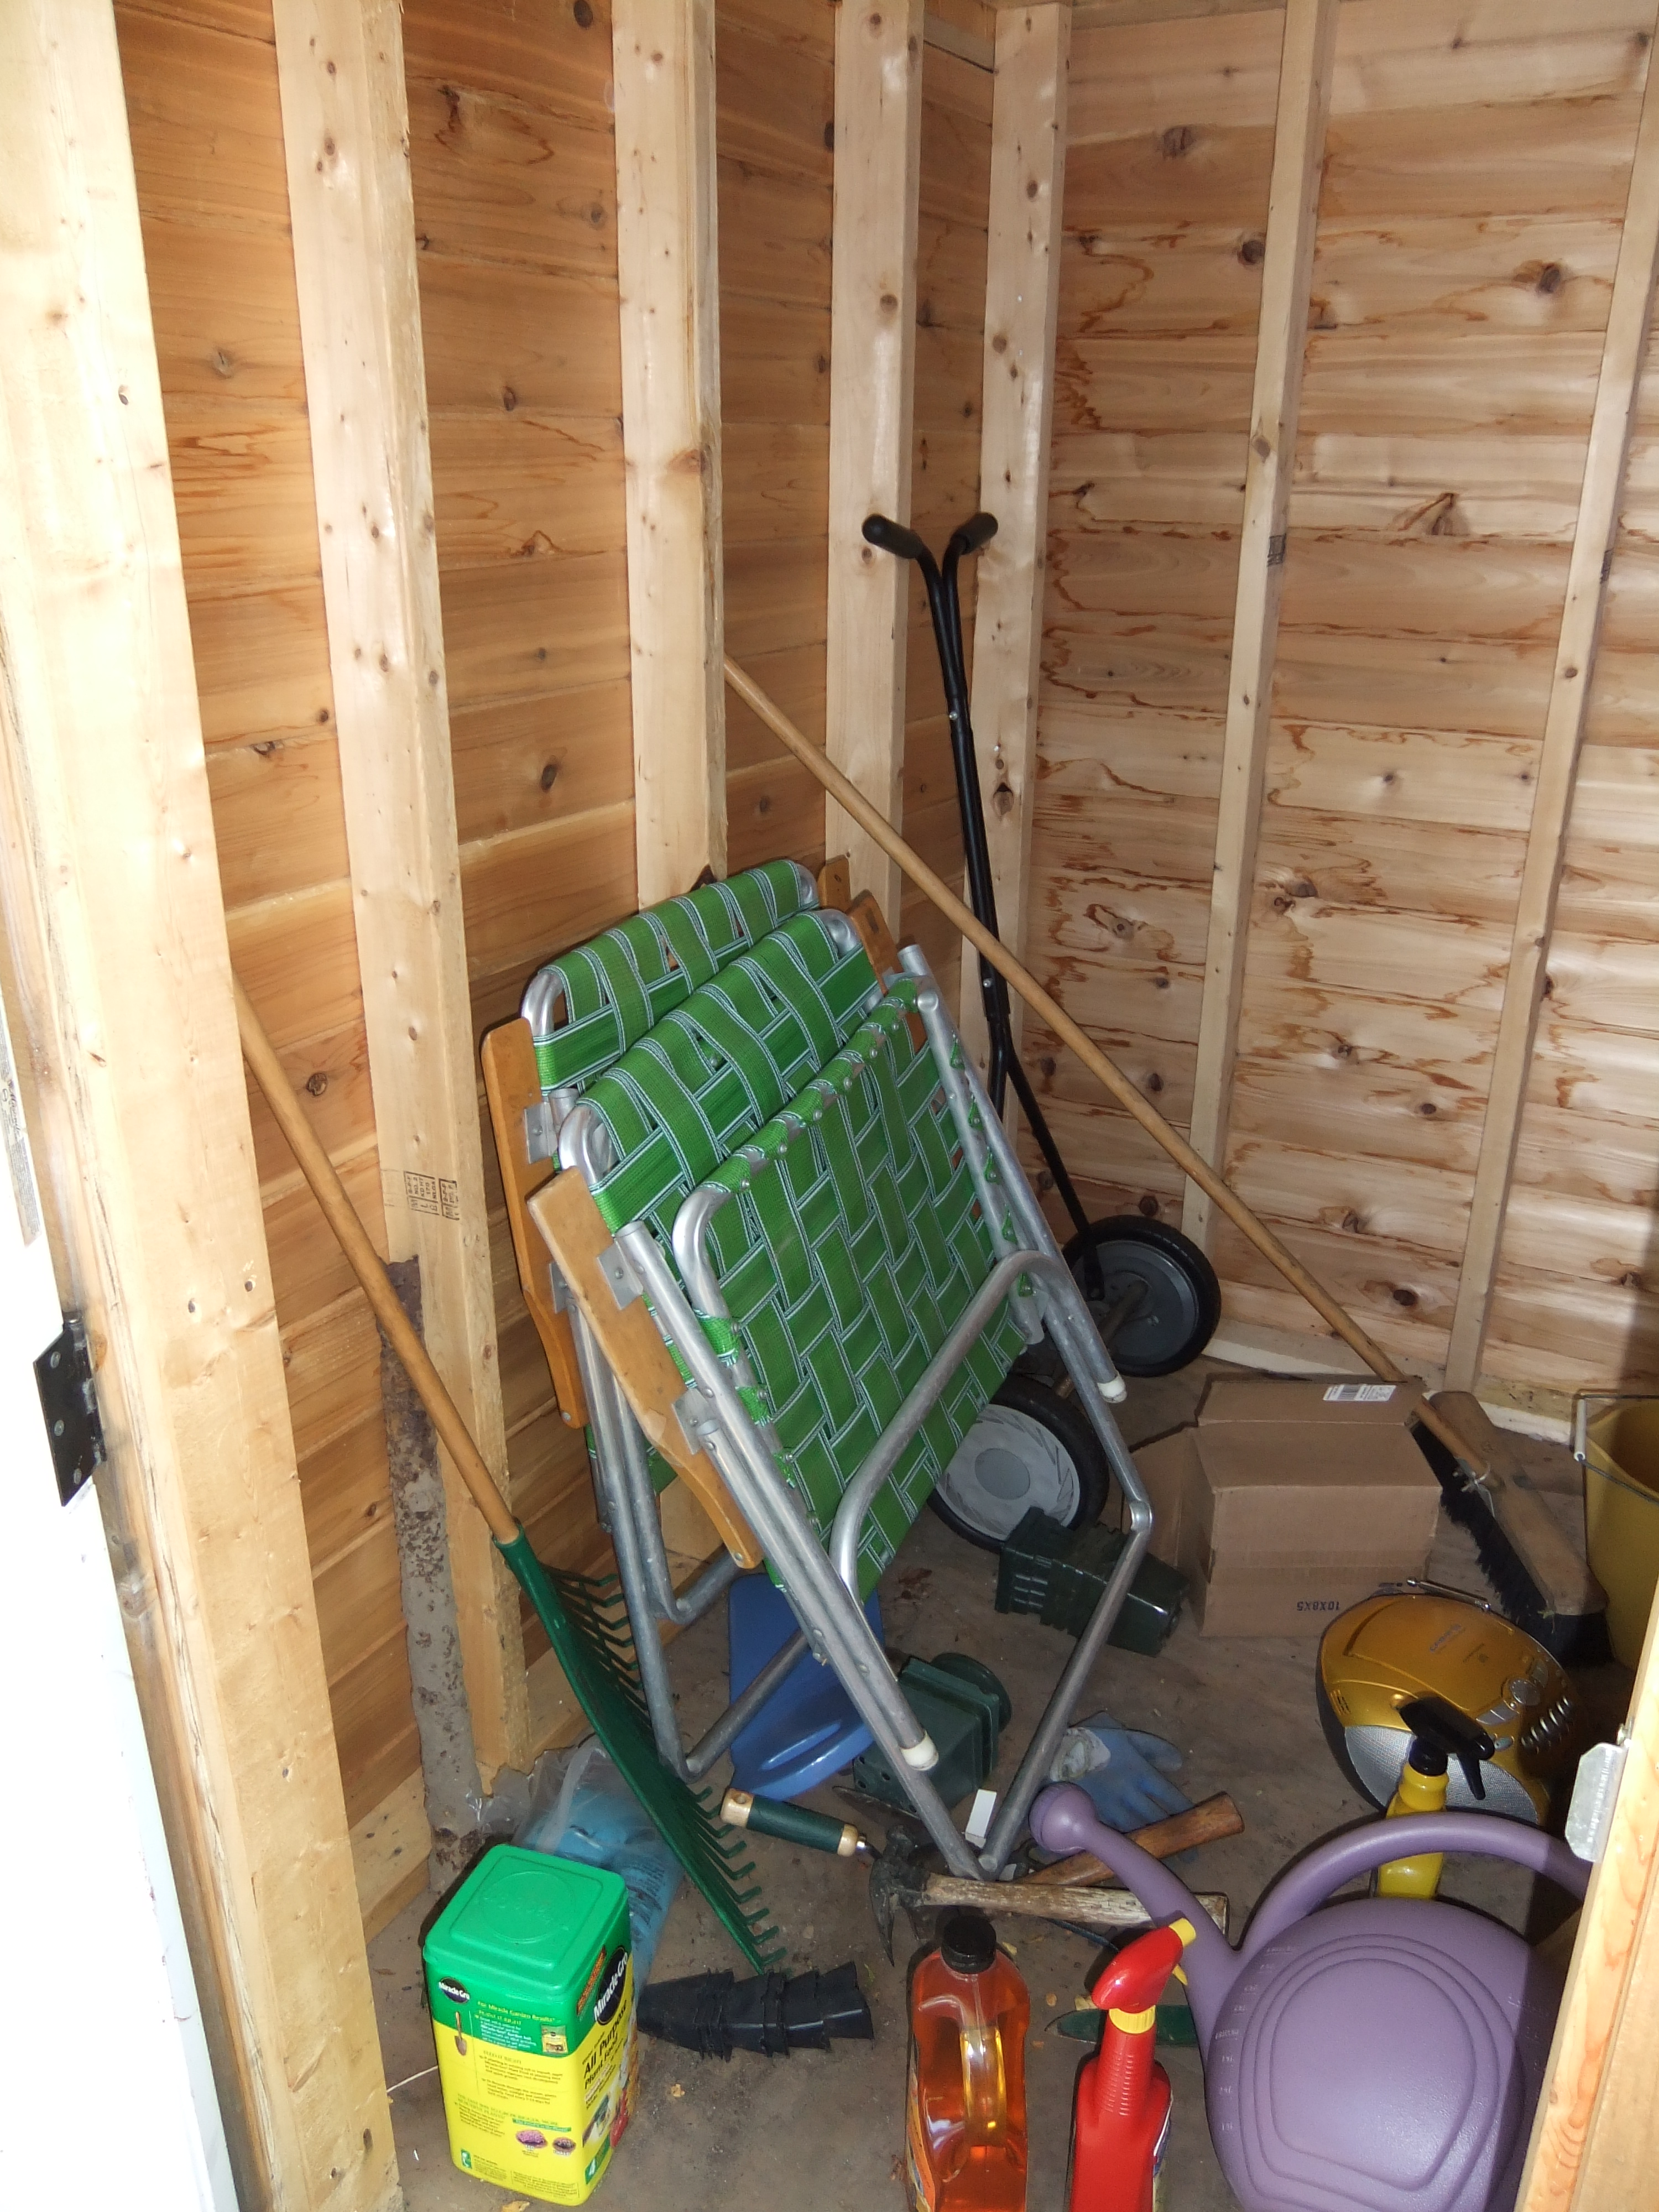
At long last, our small shed has become an organizational masterpiece.  Ok, so I may be exaggerating a TOUCH... but it's looking good.

Here was it's pseudo-starting point (I say pseudo because the shed got worse in the time span between these pictures and finally starting the organizational process... oops):

The shed only had 2 steps worth of clear floor space.  Totally functional, right?  Well, that's why I fixed it.

My organizational tools for this project were:

  • Peg board and pegs (CAUTION: these are located in separate sections of your friendly local hardware warehouse store.  Peg board can be found with the decorative moulding, and the pegs hang out in the section with the closet organizers.)
  • Rake/shovel holder
  • Wooden shelf and brackets from my childhood bedroom.

You got a sneak peak of the peg board here, but it's about time to check out the full outcome.

I decided not to repaint the shelves and left them the original purple of my childhood bedroom.  The 2 shelves were once upon a time a single shelf that spanned the length of my bedroom about a foot and a half from the ceiling and was home to my stuffed animal collection.  I was cool like that.

After suffering through the abuse of a child/teenager's room, then getting chopped in half and transported to Massachusetts, the shelves were a little worse for wear.  Sandpaper to the rescue!  I roughed up the edges a bit and made the scratches blend in.

Well, what do you think?