Before & After

Great Green

Guys, Frankie the Fliphouse is starting to look downright sexy as he gets cleaned up.  It's kind of exciting!  I can't WAIT to show you the final reveal.... next week (sorry). One thing that really makes the kitchen, though, is the dresser-turned-island.  It may have elicited a happy dance from me.  I hope whoever buys the house falls in love with this piece too, otherwise, I'm taking it with me!

I found this dresser at the Habitat for Humanity ReStore for $62.50 (50%off!) and immediately knew this was the piece I had been looking for.  It was the right height and scale, AND as a bonus, it was already on wheels!

restore dresser before

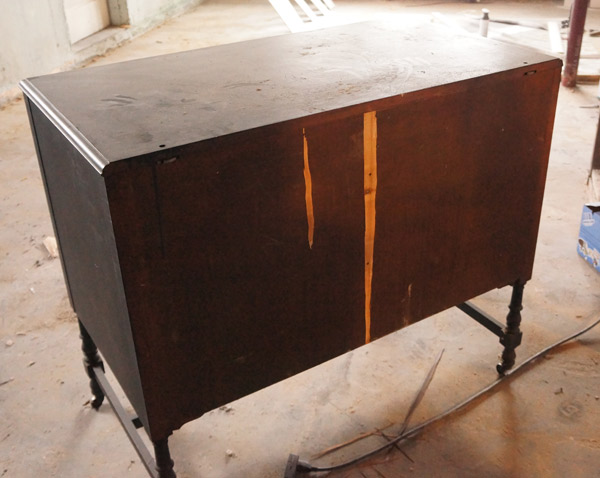
restore dresser back before

I found these date stamps on the bottom of one of the drawers.

restore dresser date

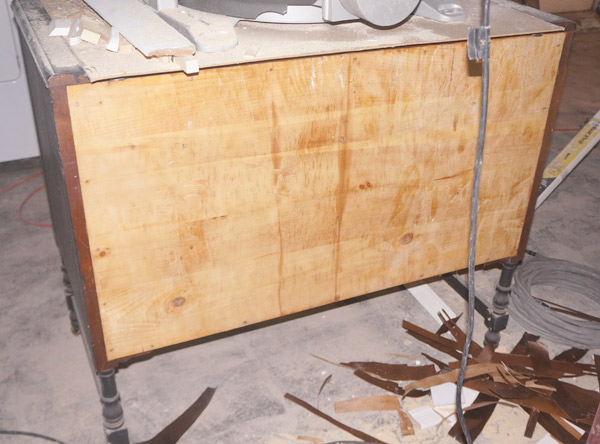
Luckily the dresser was in stellar shape for being 98 years old!  There were only 3 prep steps that I needed to do before painting.  First, I used a heat gun and scraper to rid the back of the cracked veneer.

restore dresser veneer

After the old veneer was gone, (prep step 2) I patched the blemishes and sanded.  The last prep step was removing the top.  Luckily it wasn't glued down, so I was able to remove a few screws I could reach and brute force the top off in no time.  Strong like bull.

restore dresser topless

The fun part was painting, putting on new hardware and attaching the butcher block top.

Drum roll please!!!  No? ok, well, here's what she's looking like today:

restore dresser island after 1

Hubba hubba, amIright?

I actually ended up using the darker/brighter color that I polled you guys about.  Once I changed the offensively colored CFLs in the house for more true-color bulbs it was the exact color I was hoping for.

restore dresser island closeup

I added a towel bar for added functionality.  Plus it gives me the ability to style it with a cute little hand towel (which, since I'm styling a house for sale, not to use..... this cute little towel, may actually be a pillow case.  sshhhhh, don't tell).

restore dresser island after 2

I'll break it down for you:

  • Dresser: $62.50
  • Butcher block from IKEA: $129
  • 2 paint "samples" matched to Benjamin Moore Medici Malachite: $6
  • Paint finishing wax (optional): $10
  • Knobs: $0!  (I raided my own knob collection)
  • Towel bar: $5
  • TOTAL: $212.50 (not including tax)

If I had used cabinets for an island, the price would have EASILY been double, most likely triple.  For a piece that takes the kitchen from nice to WOW, it's totally worth it!


DIY Book Dock

What do you get when you mix a thrifted book and an exacto knife with a diy addict? Obviously, you get an iphone dock. Duh!

DIY iphone dock 3

Ok, so maybe that wasn't so obvious... but anyway...

I was very sick of just having a lone charger cable snaking around on my night stand, so I decided to do something about it.  I found this book at the Habitat for Humanity ReStore for a whopping 50 cents and it had a very pretty cover.  Don't even ask me what stories are inside, because I didn't even pay attention- I'd have to look at the spine to answer that, all I know is that the cover is very pretty.

I started by determining where I wanted my iphone to sit and tracing the bottom (with it's cover on).

DIY iphone dock book

Next comes the fun part!  Start cutting!  I should have used a new exacto blade for cleaner cuts, but I didn't.  My only excuse is laziness- finding a new blade would've taken me like 5 minutes- ain't nobody got time for that!

DIY iphone dock cuts

Once that was deep enough to hold the phone upright on it's own, I started on the hole for the cable itself.

DIY iphone dock hole

I started very neatly with the exacto, but when I realized it would take me half the day to make such a small hole through so many layers of paper, I busted out the drill.  #ilovepowertools.  The drill wasn't as neat, but it got the job done!  Warning: drilling paper creates a lot of dust.

DIY iphone dock drill

Once I was able to fit the connection part in the aforementioned hole, I needed to cut a channel for the cord to exit (very technical, you see)

DIY iphone dock cord

When I closed the book, the cord was nicely tucked in and the lightning connection was sticking out the top of the phone slot like so.

DIY iphone dock book2

All that was left was to move it to my nightstand, plug it in, and style!

DIY iphone dock 1

DIY iphone dock nightstand

The lamp may or may not be another DIY target in the near future.  (hint: it may also involved the wood veneer I showed you last week)

Everything looks so much neater without stray charging cables hanging around.  Bonus: now I don't have to worry about the cable sliding off the table and having to fish it off the floor or from behind the nightstand!  Win-win!

DIY iphone dock 2


Liquid Gold

Among my lofty plans for this here lil'ol' blog this year is to share at least one DIY with you guys each week.  My goals were only reinforced when I discovered that my DIY infinity scarf (and dorky headless selfie that went with) has been my most popular post on pinterest to date!  If you're new here from pinterest, Welcome!!!  Even if you aren't new here from pinterest, I still love you- there's enough to go around! Last week, I told you about all my super duper exciting (to me) living room plans.  And I am impatient.  Unfortunately, my built in bookcase will be waiting until I'm done working on Frankie-the-Fliphouse, and a new sofa won't be purchased until said fliphouse is sold, so if I want to get started on this room, I have to start small.

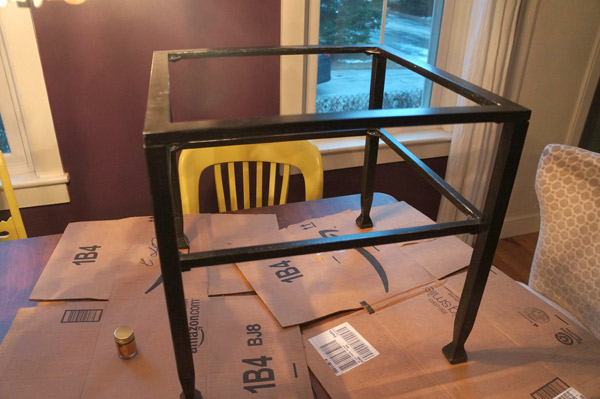
Like painting a coffee table.  or rather 2 coffee tables.  Our coffee tables are these from Overstock and they are perfect for our space.

coffee-table-before

As I mentioned in my plans post, I'll be dialing back a bit of the high contrast in the furniture (don't you worry, much excitement will come with the accessories), so I decided our black and glass coffee table should be less black.  and more gold.

coffee-table-painting

Nothing was wrong with the black per se, I just think the gold will go better with the end result of the room.  I decided to give liquid leaf a try as opposed to a flat-looking spray paint.

coffee-table-paint

For such a small jar, this has a very strong odor, so be warned.

coffee-tables-gold-black

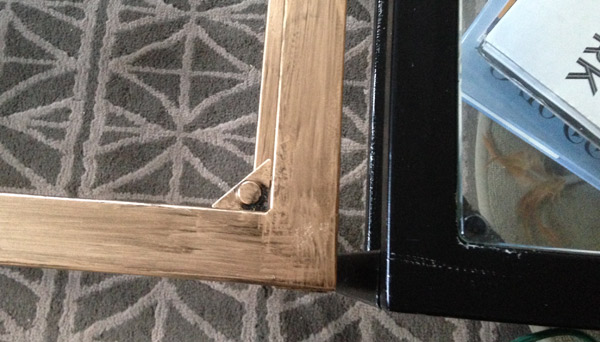
After one coat, I debated leaving it streaky for a pseudo-deliberate antique look, but decided to go whole-hog and make it all solid gold.  Aside from the stench, I'm so far pleased with the finish that the liquid gold achieved- it's a little bit more dimensional than most gold paints and somehow looks more 'real', although that may just be me trying to justify the time this took vs. spray paint.

gold-table-closeup

I still have to do a few small touch-ups and seal it somehow, but so far I totally dig it.  Once the rest of the space transforms, they'll fit in perfectly.  And if they don't, the miracle of spray paint will transform them magically back to black, but I have a feeling they'll have a long life in their new gold forms.

gold-coffee-tables

I hope I'm not the only one with the urge to paint everything gold lately- maybe I'm just craving a little sparkle in the dull winter months.  That must be it.  Sound's like a plausible excuse reason to me.