Before & After

UP-Dated Built-in

WARNING: long post ahead!  But don't worry- it'll be informative AND have a few pretty pictures! When I'm coming up with my plans for my flips, there's a delicate balance between keeping original charm and getting rid of dated design features.

Exhibit A

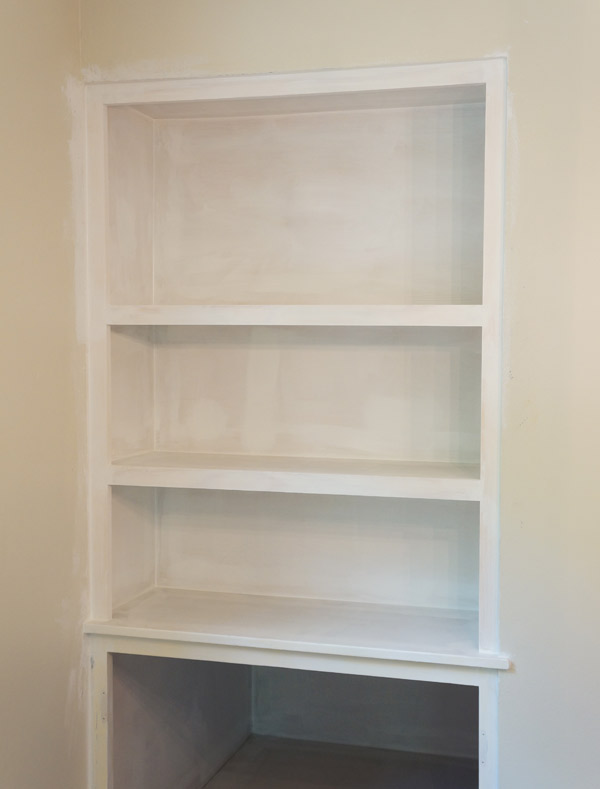
Dated scalloped built in before

Built-in = original charm..... almost arm-deep = awkward......scallops = dated!

I think the scallops were the first thing I ripped out in the house.  I attempted to remove the fake wood paneling from all 3 sides of the shelves, but I just couldn't get in there without causing injury (even my attempts caused several bruises and band-aids).  For the past 4 months, the poor built-in has sat in this sorry state:

build-in-demo

build-in-demo-ceiling

But I had a plan for it!  And now, I think it's hitting all the right notes!

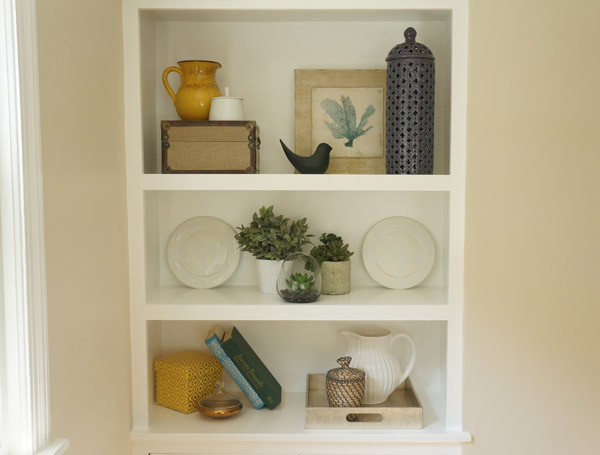
Dated built in after via year of serendipity

Original charm- CHECK

Fresh and clean-CHECK

Usable space-CHECK

Free of awkward and dated design features- CHECK CHECK!

Dated built in styled via year of serendipity

It surprisingly only took me a day to build.  Wood working projects are probably the most fun for me- that and tiling.  You see things come together right before your eyes.


Supplies:

2x4s for structure

thin plywood for the sides, back and 'ceiling' on the top shelf (I actually used materials left over from the bathroom paneling)

1x2 pine decorative trim

Screws and nails


Half of the work in projects like this is just the figuring out and planning what you want to do.  The other half is playing with power tools (fun AND fun!)

My first step to make my plans happen was to create a new structure with 2x4s to reduce the size of the shelves.  I pre-drilled screw holes using my Kreg jig, however, even the best laid plans don't always work out.
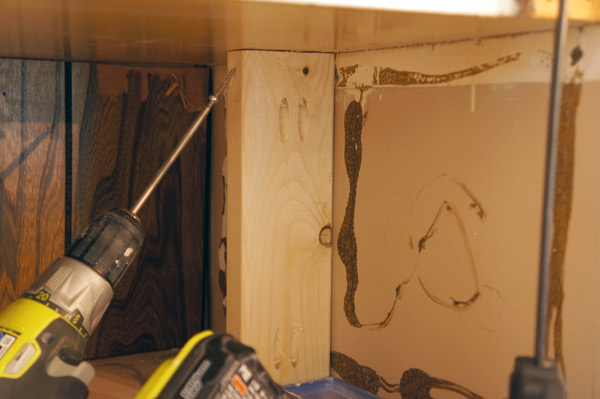
built-in-building

I forgot to take into account the size of the drill and it wouldn't fit in the 2 shorter shelves to allow me to use my carefully planned holes.  Womp womp.  Luckily, I was able to screw in the side and no one will be able to tell in the end.

When installing the 2x4s, I made sure to use my level so that each piece of the hidden structure would be straight.

built-in-structure

Next it was ply-wood's turn.

build-in-plywood

I put a piece of plywood on the new back as well as on both sides since the side walls were a bit damaged.  I'll admit, the back 'wall' between the 2x4s is a little bouncy, but since the back is purely decorative, I opted not to add additional structure.

build-in-plywood-done

Looking better already!  Next it was time for the finish trim.  This was the part that really modernized this project.  Sides first, then I measured in between.

built-in-trim1

To install the trim, I used my nail gun and 2" finish nails, to attach them both the the walls and the shelves.

built-in-trim2

To spare you additional boring pictures, I patched holes, primed, and then sanded before getting to caulking all the corners.  I used my go-to caulk method: a squeeze tube of caulk (easier to maneuver than a caulk gun), and a small bucket of water.  I use the bucket to both dunk my hand before wiping down a bead of caulk, but to also wash the caulk off my hand as I go- it get's very sticky otherwise.  The caulk magically filled all the gaps at the joints and gives it a professional, finished look.  In the pic below, just look at the contrast between the bottom, caulked shelf and the top uncaulked shelf.

built-in-caulk

Ta da!

built-in-sans-paint

Meanwhile across the room, the doors were getting fresh paint and new pulls.

built-in-paint-doors

Once all the caulk was dry, the built-in got several layers of white semi-gloss trim paint. I allowed the paint to dry overnight before I layered on the tchotchkes..... I mean styled it.

Updated built-in styled via year of serendipity

Updated built-in styled via year of Serendipity

Faux plants Dining room styled via year of serendipity

Just updating the built-in makes the entire open living/dining area look clean, fresh, and updated, but will still charm the pants off of any buyer.

Built-in styled and updated via year of serendipity

Get your wallet ready... you can buy this house NEXT WEEK!!!  Can you tell I'm excited to finish up?


Caught White Handed

plant-hand-shelf-closeup.jpg

Oh no, she got hold of the spray paint again!!  Every man for themselves! hiding-hand

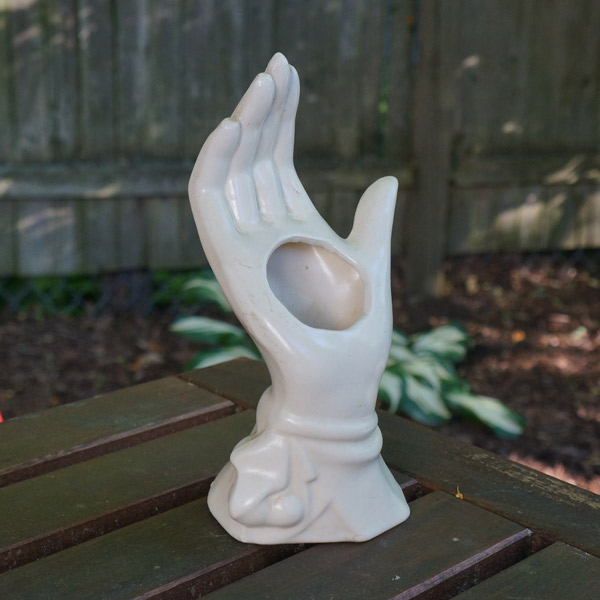
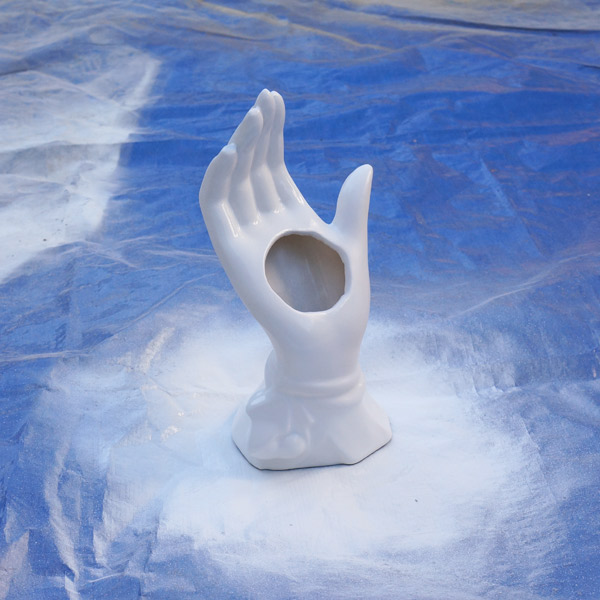
I'm not sure what spoke to me about this hand vase (must have been sign language...), but when I saw it at an estate sale this weekend, I felt compelled to pick it up immediately.  $4? Ok, if you insist.  I've never seen anything like it before.  Even the strangest things can look elegant in white ceramic, right?

dirty-hand-before-1

I tried cleaning it up, but it still looked like dingy old off-white with a bad manicure.

dirty-hand-before-2

After checking it to make sure there were no markings that this was a priceless heirloom (spoiler alert: it wasn't), I took to it with some fine sand paper before I let her have it.

spray-paint-hand

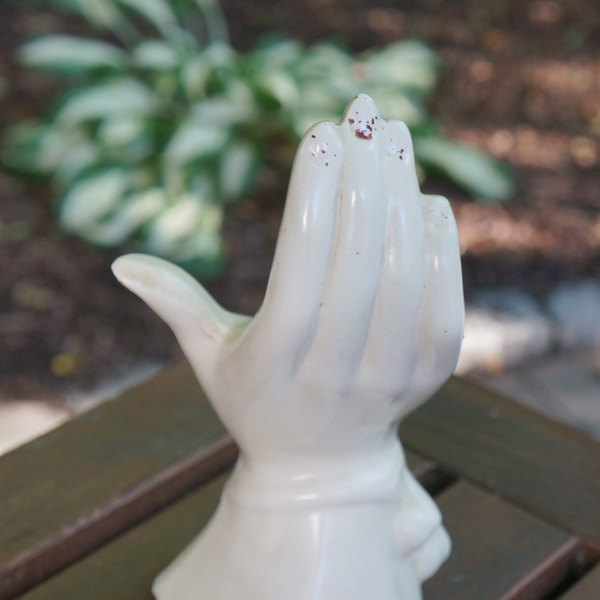
Flat white spray paint was all I had on hand (pun intended, but also true).  The white paint was just what this piece needed to make it look fresh and clean.

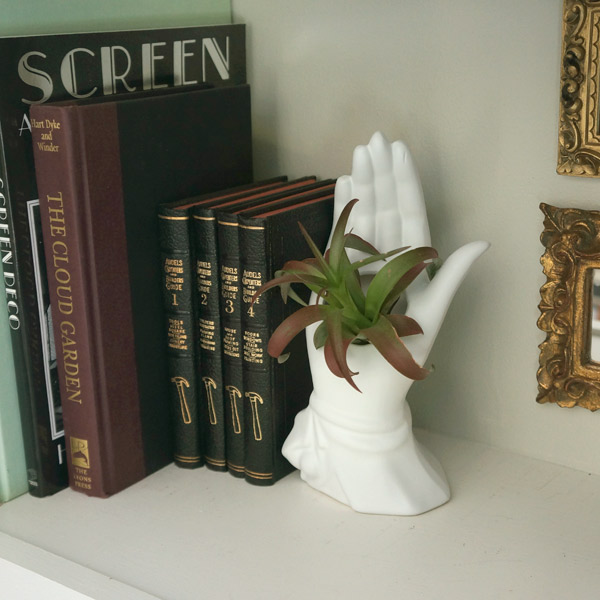
I borrowed an air plant from the kitchen to test out my vision.  I need to get some more air plants.  In the past year I've only killed 1 out of 5.  That's pretty decent for me with plants- I've kept 4 alive!  Throw me a parade- I'm a saint here!  Too far?  Anyway, so HAND!

plant-hand-shelf-closeup1

For $4 you could get a fancy latte at Starbucks, but I think spending it on weird hand vases is so much more fulfilling.  It looks exactly how I pictured it on my shelf and I kind of love it.  High five! Sorry, sorry, I'll stop with the hand puns, scouts honor.... ok that was the last.  really.

plant-hand-shelf

I've been picking up cool old books at tag sales and estate sales, so my living room bookcase is just screaming for a full restyle in the very near future and not just the shelves that end up in hand photo shoots.

Apparently I'm feeling very cheeky pre-coffee this Monday morning.  My apologies if my cheese level was off the charts- I'll try to be more docile in Wednesday's post.  No promises.

Happy Monday!

5 Ways to Quickly Update Furniture

Welcome to my new series "5 Ways"!  Once a month I'll be sharing 5 ways to do something, whether it be 5 ways to style a shelf, 5 ways to stage a house on a budget, 5 ways to make sure your husband doesn't divorce you due to all the furniture you hoard.  I'm not sure on the last one yet.  I only have one way- be cute and bat your eyelashes.  But I think you get the point of "5 ways".  If you have a topic you'd like for me to touch on, I'd love to hear it! Now, without further ado...

5 ways to quickly update furniture

1. Paint it

Painted restore dresser/island before and after

Didn't see that one coming, did you?  Paint can be the easiest way to update a piece without too much effort.  If repair isn't needed, sometimes a quick shot of spray paint can give a simple piece an instant refresh in less than an hour!

2. Switch out the hardware

IKEA kallax hack with updated hardware

A standard piece from IKEA suddenly becomes a whole lot less standard with vintage pulls.  A plain dresser can become so much more with the right jewelry!

3. Clean it up

restore-a-finish wood clean up

No, I don't always paint furniture.  Don't get me wrong, it happens rather often, but I do come across pieces that it would just be wrong to paint.  If your piece is in good shape but is just showing a bit of wear, it can be refreshed with furniture polish, rubbing walnuts on scratches (seriously), or my personal favorite- rubbing it with fine steel wool and Restore-a-finish.  It hydrates the wood, blends minor blemishes and helps the wood come back to life.

4.  Add an unexpected pop of color

mcm ombre dresser with unexpected pop of color

Oh how nice, an ombre dresser... BAM green and orange.  Maybe not the highest impact transformation, but its a bit of unexpected whimsy.  Think about adding color to the less obvious places- inside a cabinet, the side of a drawer or the back of a shelf.

5. Add some bling

gold dipped side table

Yes, I have a gold spray paint addiction.  No it's not a problem, I can quit any time... but who would want to??  Adding a bit of metallic to a piece adds instant glamour.  If your feeling gutsy, why not mix metallics?  They are all neutrals, after all!