Building

Project Flashback: DIY Wine Rack

wine-rack-angle.jpg

Have you entered Monday's giveaway yet?  Time is running out! With no flip still (trust, me, we're TRYING but this spring market is just too hot!  I wish I was selling a house now!), I'm itching to break out the power tools.  For some reason though other projects like planting and mulching the yard and cleaning out the basement for a well over due tag sale are taking precedent.  Instead of a new project to add to my to do list, I thought today we could reminisce about an old one.

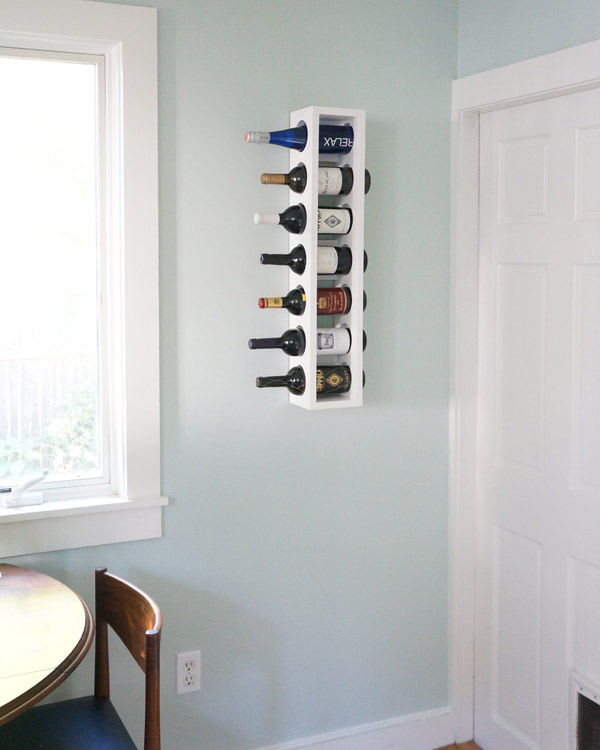
Still one of my favorite projects- and still in use- is my kitchen wall-mounted wine rack.  Here's original post from back in 2013:

It's time for some wine!

DIY wine rack close-up

We've had a severe lack of wine in this house lately, because we haven't had space for a wine rack.  Hubby's been challenging me to make a custom wall-mounted one for months, so with the kitchen reno (hopefully) nearing an end, I realized this was the perfect time.  (and who am I to say no when Hubby request a DIY)

It all started with a quick sketch when I was watching tv one night last week.

DIY wine rack sketch

The dimensions got modified a bit as the project progressed, but this was a great place to start.  I enlisted Handy Dad's help for another set of hands (and maybe for his tools as well... maybe).

The materials:

  • 8' length of 1x6 poplar
  • Kreg jig screws
  • Wood glue
  • Toggle screws (for mounting to the wall)

The tools we used:

  • Chop saw
  • Drill press (a regular drill could work too, but it would be a bit more work)
  • 3 1/4" hole saw drill bit
  • Clamps
  • Kreg jig

The first step was to cut the boards to the desired length and mark out where my holes will go (this is where the dimensions got modified a bit).

DIY wine rack marks

Actually cutting the holes was the most difficult part.  We clamped the 2 side boards together so that the holes would line up perfectly.  To prevent as much splintering as possible, we drilled most of the way through one side, then completed the hole by drilling from the other side.  Slow and steady...

DIY wine rack drill press

This was my attempt to take a photo of all the pieces on a white background.  #whitebalancefail

DIY wine rack pieces

As you can see on the back pieces, I used my Kreg jig to drill pocket holes.  My friend Kreg is awesome- it's a very simple drill guide and special bit that makes it super easy to strongly join 2 pieces of wood.  I first read about it on Young House Love, and I quickly jumped on the Kreg bandwagon.

Next came assembly.  Every joint got wood glued and clamped, and the back supports were screwed together with Kreg screws for extra support.

DIY wine rack assembly

After assembly, I sanded the bejesus out of it, painted it with 2 coats of paint, and mounted it to my kitchen wall with toggle bolts (when all filled, the rack can weigh almost 30 pounds!)

DIY kitchen wine rack

So, what do you think?  I think it fits perfectly in it's new home!

I originally had staggered the direction of the bottles, but Hubby and I both liked it a bit better this way.

DIY wine rack

I can't wait to reveal the whole kitchen to you- it's really becoming my favorite designed room in the house!

DIY wine rack closeup

Back to 2016 now- this project has held up perfectly!  Aside from a few scuffs from a rotating array of wine bottles being slid in and out, it still looks as good as the day it was built.  Some other projects don't even last 3 months in this house let alone almost 3 years!

Have an awesome weekend!

Build It: TV Cabinet

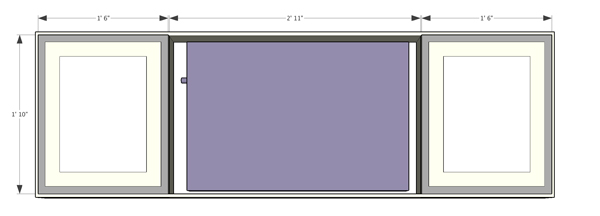
I'm so pleased to say that progress has been made on a project that I introduced you to a month ago!  The wall mounted TV cabinet for my office is finally all assembled and ready to be patched, sanded, and painted!  Let's chat about the whole super exciting building process today. I enlisted Handy Dad's help- when building things we're generally a pretty good team (plus he has more tools and space than I do).  Before breaking out the tools, though, I 'built' the TV cabinet in the 3d program Sketch-up so that we could really visualize how to make it happen.  The tv cabinet would have sliding panels on the front that would hide the TV when I'm in office mode and frame the tv nicely when my office turned into the den.

Build it: DIY tv cabinet - via Year of Serendipity

Build it: DIY tv cabinet - via Year of Serendipity

Over the past month, Handy Dad and I have cut out the pieces and routered a few pieces which I'll explain in a minute.  Let me first show you the breakdown of the parts.  I used 1/4" plywood for the backs and for the sliding door panels and 1x5 pre-primed pine boards for the box.

Build it: DIY tv cabinet - via Year of Serendipity

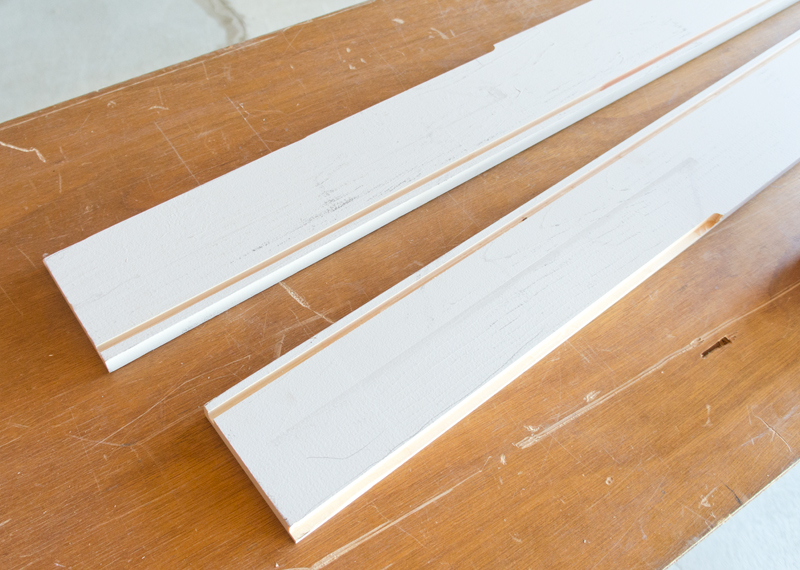
We used the table saw to create a few depths for the pieces.  The 4 outside pieces are the deepest and the inner pieces are narrower so that they can allow the door panel to slide past them with ease.

Once all the pieces were cut, Handy Dad and I used the table saw to add a groove into the top and bottom pieces for the door panels to sit and slide in.

Build it: DIY tv cabinet - via Year of Serendipity

Next we turned to what will be the back of the pieces and routered out a notch so that the back panels can be inset and the tv cabinet box can sit flush against the wall.  This needed to be done to the end pieces, the 2 middle verticals and to a section on each end of the top and bottom.  We over-routered a bit due to poor planning but that's totally patchable, so crisis averted.

You can really see the different depths of the boards in the pic below- the outside are the deepest, the vertical supports next and the horizontal shelves are cut even narrower since they will essentially be sitting on the pack panel and didn't need to be routed out for it.

Build it: DIY tv cabinet - via Year of Serendipity

Now came the fun part- assembly!  Wood glue and a nail gun are your bffs.  It was helpful for this to be a 2 person assembly, but it could be a 1 person job if you had the right clamps.  The first piece to get put on was one of the end pieces.  Putting wood glue on the joint before lining it up and nailing together.  You can see the routed notch a bit better in this pic too.

Build it: DIY tv cabinet - via Year of Serendipity

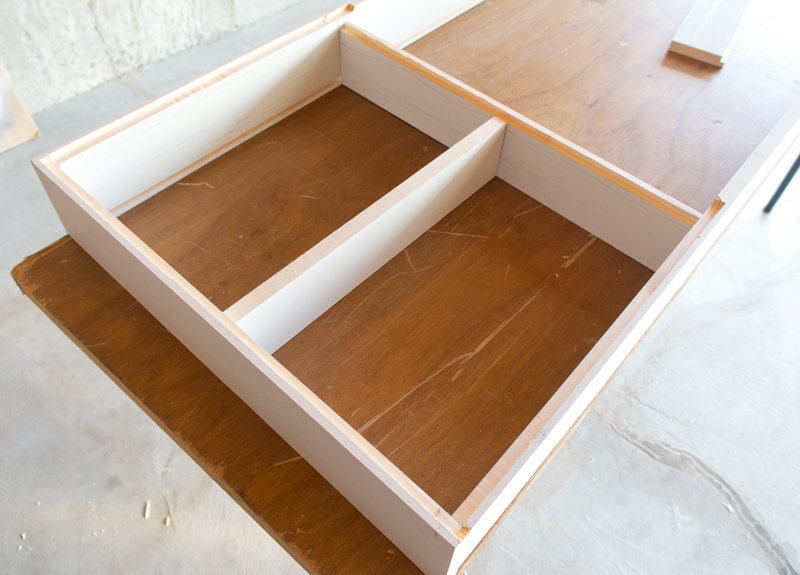
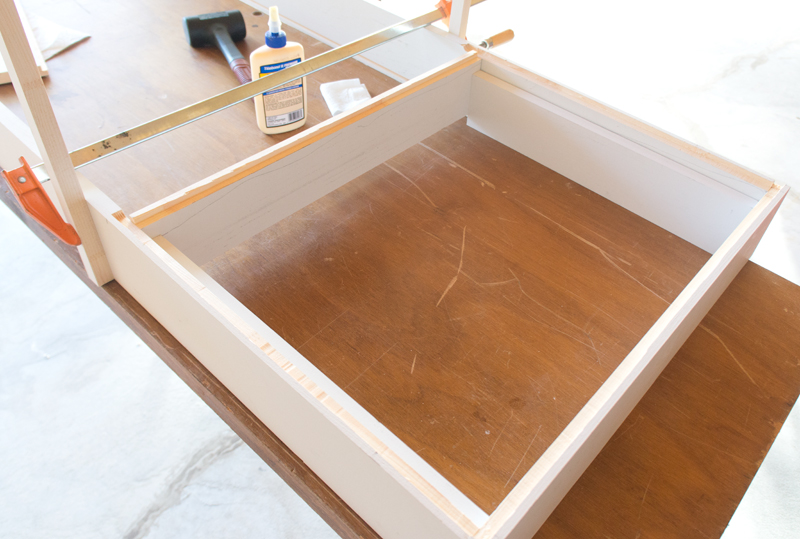
With the first end piece on, we then attached the middle vertical on that side.  Let me orient you a bit.  We're working with the cabinet face down, and since the doors will slide past the supports and shelves, they are getting inset a bit.  The clamp you see is keeping the vertical support aligned with the back of the cabinet and raised off the table by about a 1/2".  We used what will be the shelves to ensure consistent spacing, although they aren't attached yet.  Glue and nail.

Build it: DIY tv cabinet - via Year of Serendipity

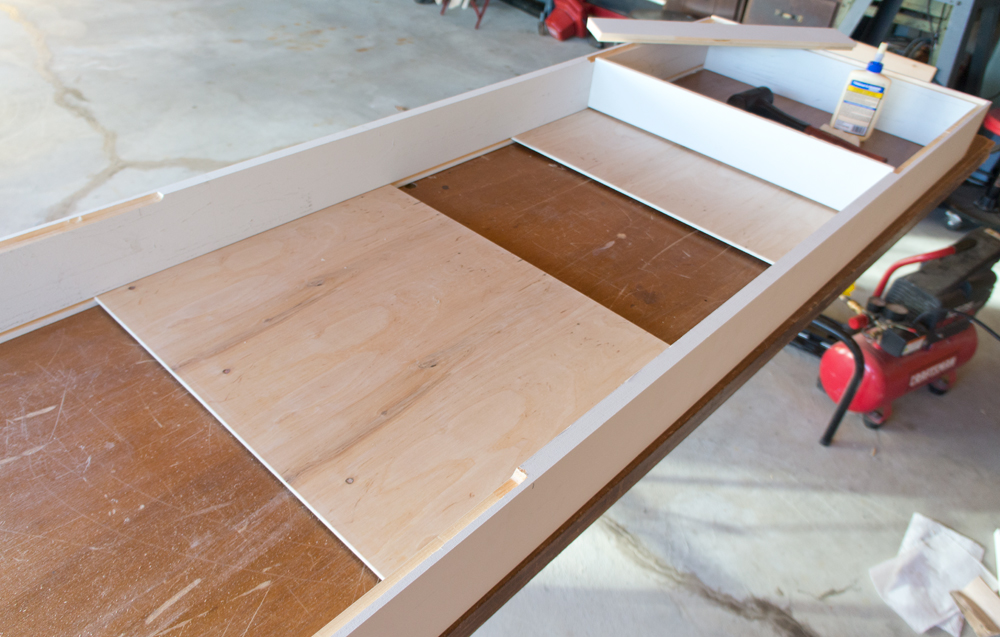
Now it's starting to look like something!  Before we could attach the other end piece, we needed to slide the door panels into the groove.

Build it: DIY tv cabinet - via Year of Serendipity

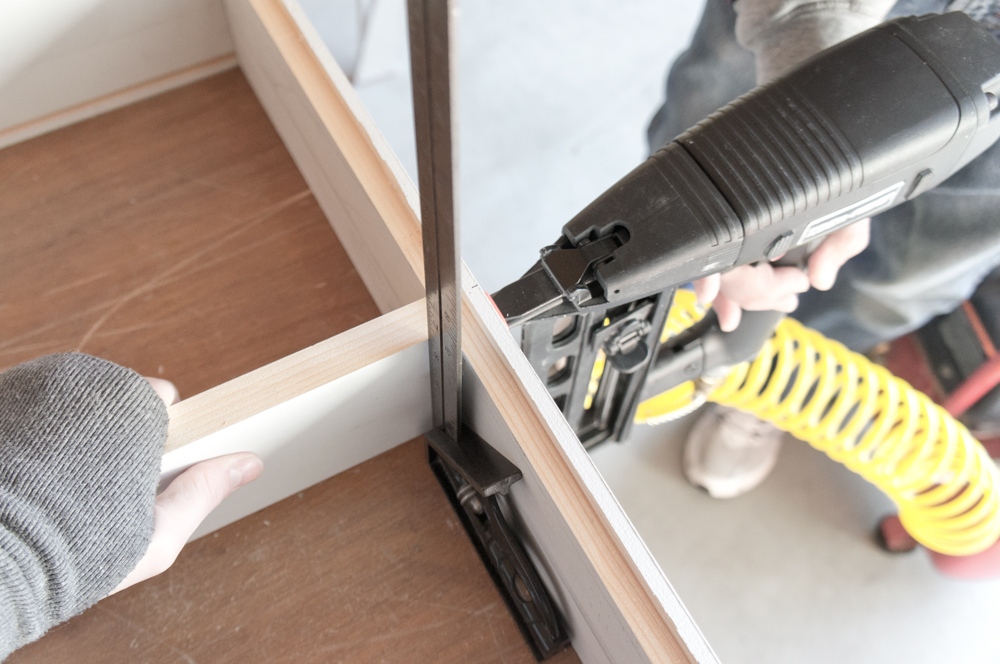
Rinse and repeat with the end and the vertical support on the other side.  With both end panels and both vertical support pieces attached, it's time for the horizontal shelves.  One of us held the shelf and made sure it would be square while the other nailed it in.

Build it: DIY tv cabinet - via Year of Serendipity

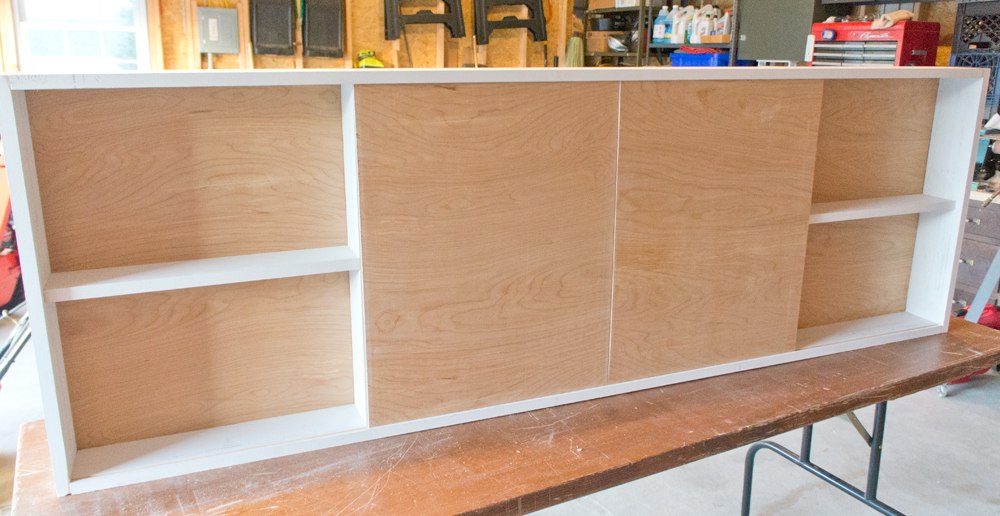
The last pieces to get attached are the pack panels.  We applied a generous bead of wood glue around the inside of the routed groove and on the back of the shelf.  Before the panel got nailed in, we put it in place and wiggled it around so that it and the glue really bonded.  I'm relying on these back pieces for a lot of the support!

Build it: DIY tv cabinet - via Year of Serendipity

As I mentioned above, we got a little router-happy, though luckily nothing that couldn't be remedied with a small scrap of wood and some wood filler.

Build it: DIY tv cabinet - via Year of Serendipity

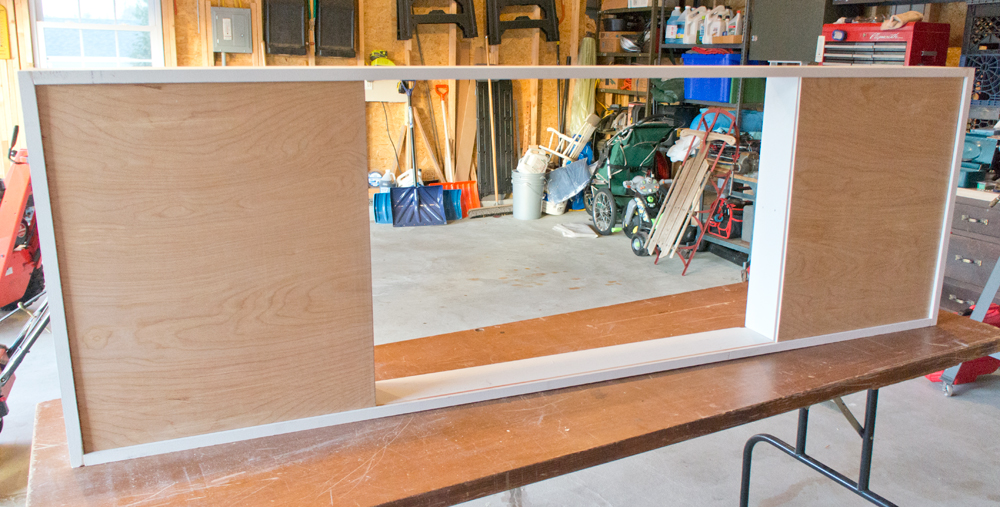
My favorite part is always the last step: standing back to admire what you just accomplished.

Build it: DIY tv cabinet - via Year of Serendipity

Peek-a-boo Handy Dad's garage!

Build it: DIY tv cabinet - via Year of Serendipity

I cannot wait to get my new tv cabinet all finished and hung on the wall!  For the next few days, this guy will be chilling out on my dining room table (the only surface in my house big enough that's not a central floor space) so that I can patch, sand, and paint it.

Hopefully by next weekend, I'll have this all set and Hubby can help me hang it.  A 6' long wall cabinet is not a one-person install job.  Are you as excited as I am to see this finally come together??