DIY

Coffee Table Transformations

dscf40052.jpg

I am BEYOND excited to share this project with you!  It's seriously one of my favorites that I've done.  It makes me giddy! Last week I told you a story about a lonely coffee table that needed a new lease on life.  As a part of the Pinterest Challenge: Fall Edition, I decided to give it a drastic make-over.  Mission accomplished!!

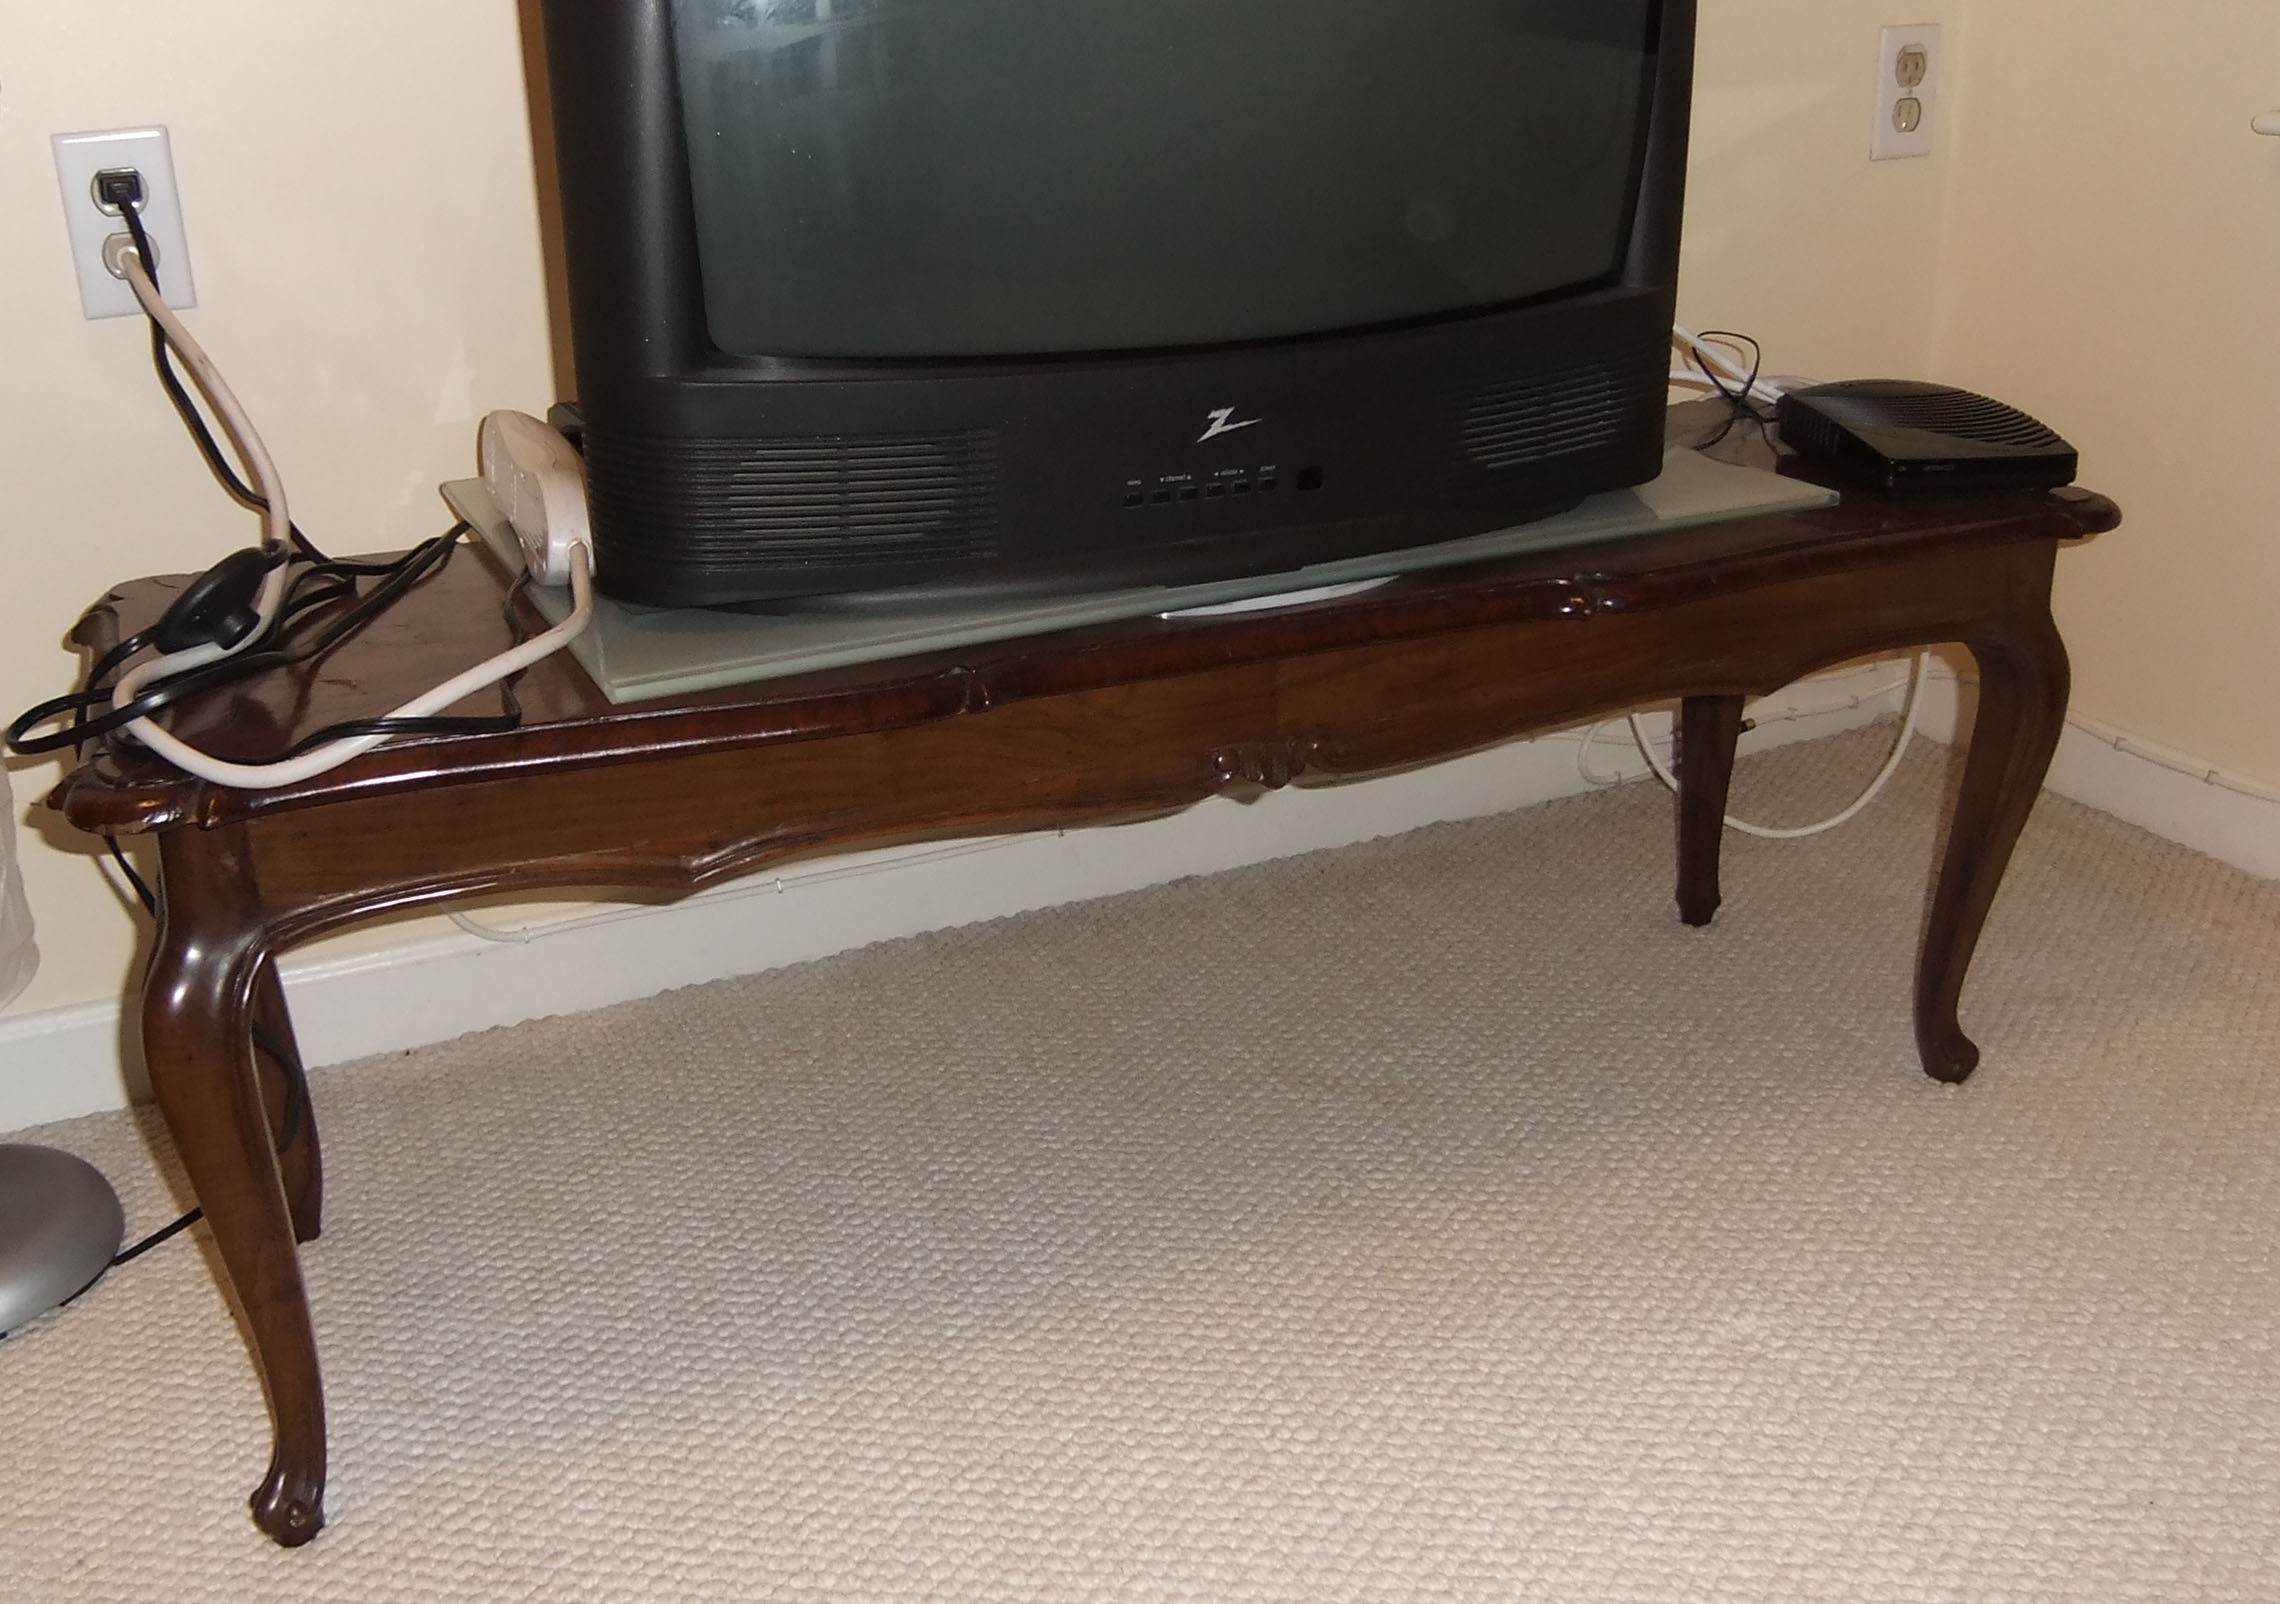
The coffee table started out in a sad state.  It was structurally stable and had great lines, but there were a lot of aesthetic issues.

Two corner pieces were completely broken, there was some popping veneer at the seams, but the worst issue was the burl wood center of the table.  It was warped and cracked beyond repair- I could see through the cracks to the floor underneath.

With its flaws, this coffee table was not so functional as, well, a table.  But a week later, it's a refinished, functional, beautiful bench!  I re-glued the popping veneer, glued pieces back into place, filled in the gouges and cracks and sanded the crap out of it.  A few coats of stain and a brand new cushion later and....

VOILA!

Can you see me grinning from ear to ear?  This is totally what the bedroom needed!  It works so much better as a bench than its previous purpose as a substitute tv stand.  Looking at my pictures, they seriously don't do it justice.  It looks amazing in person, if I do say so myself.

Here's a reminder of where my new bench was hanging out last week.

And NOW:

How amazing is the yellow chevron??  I'm swooning over it.  Seriously.  (I ordered it on Tonic Living a few months ago for another project, but never got around to it).

I do need to get used to it being at the foot of the bed, though.  I kinda walked right into it when turning off the alarm this morning.  Ouch.

See how I did this project here (I figured I'd spare you a novel post today and split it in 2- you are welcome).

_____________________________________________

Did you partake in this season's Pinterest Challenge?  Post your link in my comments, I'd love to see it!

_____________________________________________

Random side note: I think it's time I took a photography class, my skills are abysmal, please accept my apologies!

Pin and Tell: DIY Edition

I'm taking a different twist on this week's "Pin and Tell" post.  Are you excited?!  Well, you should be!!  You'll still get to see a "Pin," however that's only the first part. A group of bloggers extraordinaire have once again issued a Pinterest Challenge!  And of course, I can't resist a good DIY challenge.  I'm such a sucker.

The point of the Pinterest Challenge is to do a DIY project inspired by something you pinned.  And you have a week to do it.

My chosen project is........

drum roll please...........

A coffee table turned into a bench!

So here's my story.  Once upon a time there was an antique coffee table that we inherited from friends.  He had seen better days and his veneer top was cracked.  But he had such character we couldn't bring ourselves to part with him.  In our previous apartment trusty coffee table was used for his intended purpose, but he never felt at home in our house.  He's been subbing for a tv stand in the guestroom, but with our new tangerine chest, he's become obsolete.  (sad trombone) What's a coffee table to do?  He was heartbroken, wandering aimlessly from room to room trying to find a place in our house life, until he wandered into the bedroom.  "The foot of the bed could use a bench!" the coffee table exclaimed.  So the coffee table decided to get a make-over....

Coffee Table's big make-over will be revealed next Wednesday.  I can't wait to get started!

Check out the amazing bloggers who issued the challenge at:

Young House Love

Bower Power Blog

Ana White Homemaker

House of Earnest

Refreshing Tangerine

A day later than anticipated, but it's done!!! (for now...) I purchased this little tangerine chest/commode the other weekend at the Preservation Worcester yard sale for $30.

Adorable, no?  I happen to like the tangeriney-orange aged paint on it (Hubby not so much) and I think the scale is perfect for our guest room.

I decided that before it made it into the house, it needed some minor work/refreshing.  The top was pretty damaged- you could see ghosted newsprint among the other stains.  Also, whoever painted it orange wasn't nice enough to remove the hardware first, so it was nice and caked onto the handles.

First order of duty was to use furniture stripper to take the paint off the top only.  The wood underneath was beautiful with few blemishes, so I totally lucked out.  This was only my second stripping project (my first was my dining table seen here), so I'm still figuring out the best way to do things.  I used Strip-X Fast Furniture Stripper that was left over from my previous project and spread it onto the top with an old paint brush very carefully (so I got it ONLY on the top).  After it set for about 15 minutes, I used a putty knife and scraped it off.  I repeated this to get through all the orange.  Once stripped, the top got a quick sand and wipe-down and dried overnight before I hit it with stain.

I had gotten Dark Walnut stain for another project, so I decided to give it a try on here.  4 coats of stain later, and I got it close to the desired color.  That's also why this post is a day late.  You have to wait ...........about ..............4 ............hours ...............between ................coats.  I much prefer spray paint in that vein where you only have to wait minutes before the next coat. Or I should have just started with a darker stain.  C'est la vie.

In Friday's teaser post, I mentioned using a crock pot.  I even had Handy Dad stumped about that one until I revealed my plans.  I found this article from This Old House detailing how to remove paint from hardware using a crock pot and I HAD to try it!  I dusted off my crock pot, purchased Reynolds crock pot liners, and went to town.  I 'cooked' the hardware in water with just a touch of laundry detergent (per This Old House's advice) for a just over a day.  It would have been fine in 1/2 that time, I'm sure, but I didn't get to it sooner.  All the hardware needed was a quick scrub with a toothbrush and the paint crumbled off.  It was quite exciting (and messy, so be sure to cover your worksurface first) to see how easily it came off!

I then hit the hardware with a few coats of Valspar Brilliant Metal Silver spray paint.  I was going for a more chrome look than it resulted in, but I don't hate it.  It's shinier than your standard silver spray paint, so the contrast on the orange is quite nice (if I do say so myself).  For future reference, though, do you know of any spray paint that comes out with a finish closer to chrome?

Here's what it looks like all finished.  Not a dramatic change, but enough to freshen it up a bit.

Hubby's not currently a fan of the orange, but I'm hoping that it'll grow on him.  If not, we'll repaint the orange parts sometime in the future.  But I want to give it time to make him agree with me see how he feels.

What do you think of my refreshed tangerine chest?