DIY

Art: Generic to Custom

In an effort to try and 'finish' my living room, I wanted to introduce a mini-gallery wall surrounding the TV.  After taking inventory of the art in my house piled up and waiting to be hung, some made the cut.  To my surprise, most of the framed pieces we have are around the same size.  I wanted to play with sizes a bit, so I headed to HomeGoods (as usual) to scout accessories.  I absolutely love HG for most accessories, but their framed art can sometimes look cheap and generic. When I found this lotus print, the colors called to me.  The plastic on plastic frame, though was just about as classy as Jersey Shore.

The print and frame was only $20, so I decided to play with it a bit.

By cutting the print into 3 pieces, I was able to create a playful triptych in exactly the scale that I was looking for.

I have a few finishing touches in order to really pull together the art on this wall, but I'm excited to show it to you next week.

Have an amazing weekend!

Thrift to Fab

One of my latest addictions is the local thrift store.  I've been stopping in semi-regularly hunting for deals for my sister-in-law's apartment, and last week I hit the jackpot.  A Broyhill Premier mid-century credenza for a whopping $35.  It had obviously been in a basement for the recent history, but it was still in wonderful condition.  There were a few chips and scratches but certainly NOT a candidate for refinishing- its too beautiful. I'm going to be cruel and make you wait to see the full piece, but I will divulge my secrets. So, what's the best way to breathe life back into a quality thrift store find?

Steel wool is your best friend on a project like this.

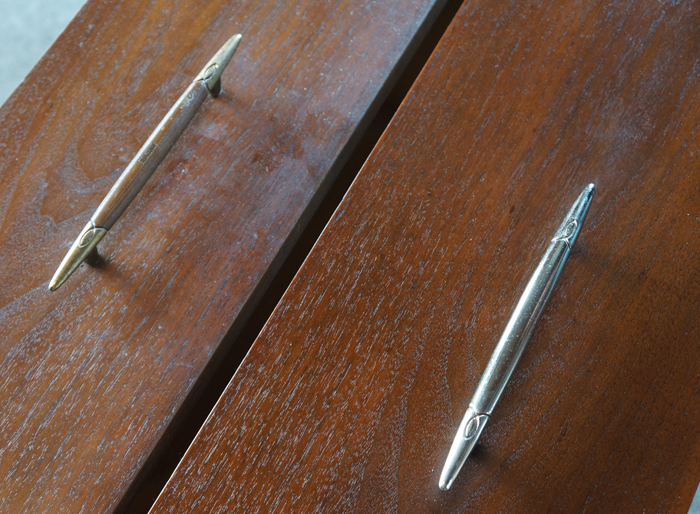
First thing I did was remove the handles from the drawers.  Use a fine steel wool to polish off the old finish and hopefully reveal a shiny fresh surface underneath (this won't work with all metals, so try it first on the back of the knob or someplace that won't be easily seen).  In this case, the faux wood grain and the brassy finish both came off with a little elbow grease.

As I was wandering the paint isles of Home Depot looking for the best way to refresh the piece without restaining, I came across exactly what I was looking for.  I picked up a 'wood finish restorer' and it did the trick.  Apply the restorer to another piece of fine steel wool and rub it into the wood.

I would let it sit for a day before using to allow the refinisher to set in.  The change isn't drastic, but it really brightens up the entire piece. Definitely something to keep in mind next time you're perusing vintage furniture.

Check back tomorrow for my results of the Pinterest Challenge Summer Edition!

Here We Go Again!

Remember when all my blogger crushes got together and issued the past Pinterest Challenges? (Check out my projects for those here, here, and here) Well, they're at it again!

The amazing ladies issuing the challenge this time are:  Sherry @ Young House Love, Katie @ Bower Power Blog, Kate @ Centsational Girl, and Michelle @ Ten June.

For those of you unfamiliar with the Pinterest Challenge, it's a way to get us pin-addicts to stop pinning and start doing.  We have a week to do a project inspired by something we pinned on Pinterest.  And since they issued the challenge on Tuesday, next Tuesday you'll get to see the results.

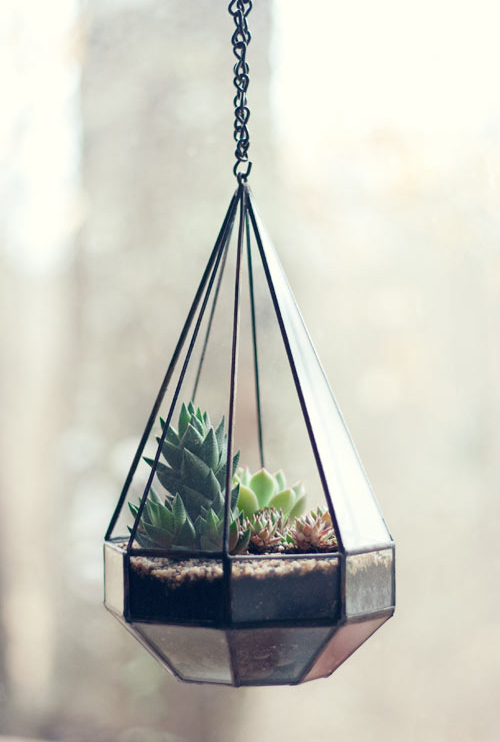
This time, I've decided to jump on the succulent terrarium bandwagon.  Here's my inspiration pin:

I already have a vessel in mind for my new terrarium.  In fact, I've been planning this for a while, but it keeps getting pushed down the to do list.  I guess that's the point of the Challenge, right?  Stop talking about doing a project and DO the project.

If I get really ambitious, I might even try doing more than one challenge project.  I'm not going to hold my breath, but there's a remote possibility.

Check back on Tuesday to see what I come up with!