DIY

Happy Hooks

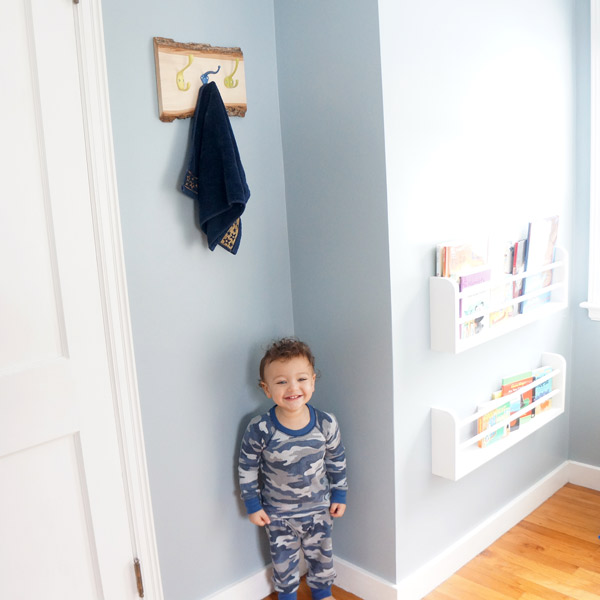
For longer than I care to admit, my sister had been not-so-subtly hinting to Crafty Auntie Karen, that Cutest-Nephew-Ever Eli needed wall hooks in his room for his towel and bathrobe. (phew, that was a mouthful of a sentence!)  Well, for Christmas, I finally delivered. Boys room hooks

This was such a quick project, but I love how it turned out!  Cute enough for a little boy's room, but not so cutesy that it'll get swapped out when his interests change.

I apologize for not taking any progress pics, but I can assure you they'd be very boring since this project is so self-explanatory.

multi-color rustic kid hooks

The piece of wood started it all.  I found it in the woodworking section at Michael's and with a coupon, it ended up being right around $5.  2 of the hooks I already had, and the third came from from Hobby Lobby for just a couple bucks (on sale as well).  The hooks, which started as silver, white and black, got sprayed with spraypaint that I already had in my paint collection, and were then screwed to the wood.  I did splurge on new screws so they'd be uniform and shiny.  After it was all said and done, this cute set of hooks cost less than $10!

So to recap the exhausting process:  spraypaint 3 hooks.  attach 3 hooks to piece of wood.  hang on wall.  Ta da!!

multi-color rustic kid towel hooks

This project could easily be fancied up for a girl with different colors or more detailed hooks.  Seriously, the possibilities are endless!

I consider this a monstrous success simply with how happy Eli is with them.  If you ask to see his hooks, he'll happily take your hand, lead you upstairs to his room, then proceed to yank everything he can reach off the hooks.  Just look at that innocent face.

Eli and his hooks

Yeah... maybe innocent isn't the right word.... anyway, he's still adorable, and I'm happy that he loves his new hooks!


Liquid Gold

Among my lofty plans for this here lil'ol' blog this year is to share at least one DIY with you guys each week.  My goals were only reinforced when I discovered that my DIY infinity scarf (and dorky headless selfie that went with) has been my most popular post on pinterest to date!  If you're new here from pinterest, Welcome!!!  Even if you aren't new here from pinterest, I still love you- there's enough to go around! Last week, I told you about all my super duper exciting (to me) living room plans.  And I am impatient.  Unfortunately, my built in bookcase will be waiting until I'm done working on Frankie-the-Fliphouse, and a new sofa won't be purchased until said fliphouse is sold, so if I want to get started on this room, I have to start small.

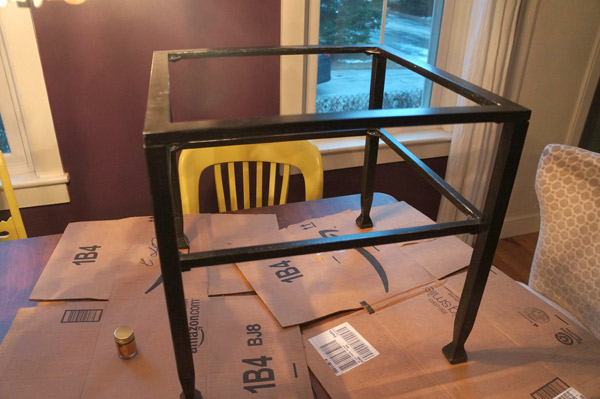
Like painting a coffee table.  or rather 2 coffee tables.  Our coffee tables are these from Overstock and they are perfect for our space.

coffee-table-before

As I mentioned in my plans post, I'll be dialing back a bit of the high contrast in the furniture (don't you worry, much excitement will come with the accessories), so I decided our black and glass coffee table should be less black.  and more gold.

coffee-table-painting

Nothing was wrong with the black per se, I just think the gold will go better with the end result of the room.  I decided to give liquid leaf a try as opposed to a flat-looking spray paint.

coffee-table-paint

For such a small jar, this has a very strong odor, so be warned.

coffee-tables-gold-black

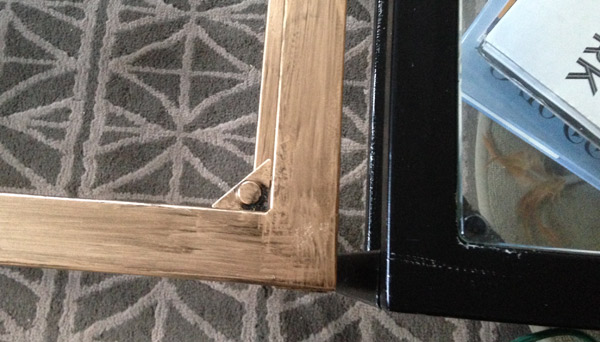
After one coat, I debated leaving it streaky for a pseudo-deliberate antique look, but decided to go whole-hog and make it all solid gold.  Aside from the stench, I'm so far pleased with the finish that the liquid gold achieved- it's a little bit more dimensional than most gold paints and somehow looks more 'real', although that may just be me trying to justify the time this took vs. spray paint.

gold-table-closeup

I still have to do a few small touch-ups and seal it somehow, but so far I totally dig it.  Once the rest of the space transforms, they'll fit in perfectly.  And if they don't, the miracle of spray paint will transform them magically back to black, but I have a feeling they'll have a long life in their new gold forms.

gold-coffee-tables

I hope I'm not the only one with the urge to paint everything gold lately- maybe I'm just craving a little sparkle in the dull winter months.  That must be it.  Sound's like a plausible excuse reason to me.

Sayonara Scallops

Happy Monday! I know that's extraordinarily cheerful for a Monday, but I'm just excited- today, we bid adieu to the pink bathtub!  Naturally, I'm going to make you wait until Friday to see it, though, in my weekly flip update.  OK, maybe I'll put a sneak peek on instagram if you're lucky.

On the topic of saying farewell to dated 50s home elements, let's visit my parent's house.  It's been quite a while since we visited one of their home projects.  My parent's approach to DIY is a lot like mine, but more productive and strategic (unlike my usual philosophy of "I'll figure it out as I go").   Even they're 'little' projects are pretty awesome.

Check out the latest transformation in their dining room:

hutch before and after

By just removing the scallop and switching out the doors, the built-in went from 50s not-so-chic to pretty darn timeless!

new hutch doors

I should also mention- Handy Dad built the new doors from scratch (go Dad!).  This is why I beg let him teach me how to make/build/fix things.

Cheers to a productive week and updating antiquated 50s design elements!