DIY

DIY Disbelief

Have you ever completed (or mostly completed) a project, then stepped back and were in disbelief that you actually just created that?  That's where I am right now with my bookcase. I'm channeling Steve Urkel- "Did I do that??" Apparently I did.

The construction is complete, and it's time to start on the finish work- patching, priming, painting.... but OMG guys, it looks fantastic!!!  The decorative trim really makes the piece!

built in bookcase completed

Naturally, it took longer to get here than I wanted.  Originally, I though I could maybe get it done in a weekend.  Maybe the ACTUAL building took a weekend, but the planning and prepping took much longer.  Totally worth it though!

Like I mentioned on Friday, Remodelaholic's step by step bookshelf DIY was an amazing place to start and really helped me wrap my head around how to build this beast.  On Friday, I showed you the basic skeleton, and shockingly it came together pretty easily from there.  I'll show you the over-simplified steps.

Getting the top and bottom attached were the most time consuming, since, as I've mentioned before: my house = not level.

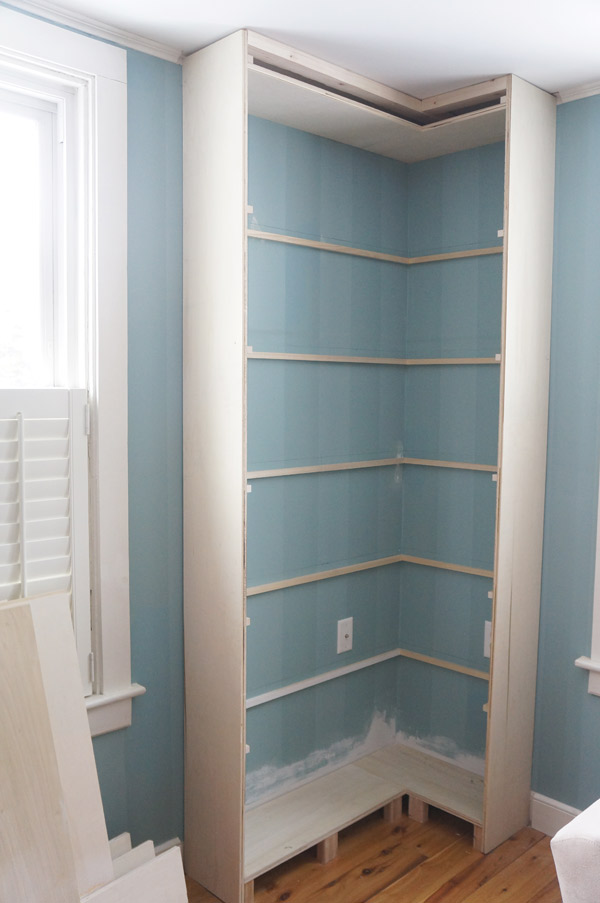
Once I got the top and bottom attached like I showed you Friday, I attached the sides, then the shelf supports.

built in bookcase progress

Once all the supporting pieces were in, it was time for the fun part- nailing in the shelves and starting to apply the finish trim pieces.

built in bookcase progress2

Once I had all the basic trim pieces up, it was starting to look pretty sturdy.


built in bookcase progress3

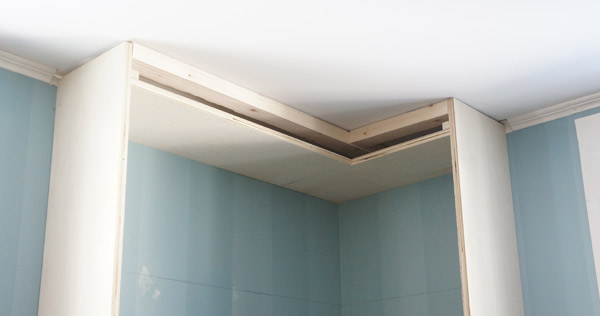
My absolute favorite step was the decorative trim and crown.  Totally took it to the next level!

built in bookcase completed top

built in bookcase completed trim

I still need to patch, caulk, sand and paint like a mad woman, but I'm so excited to have this built!

built in bookcase completed 2

Now the only thing left to debate is: should the back be white or should I paint it gray for a little contrast?

UPDATE: check out the finished built-in and my first attempt at styling it here.

UPDATE #2: If you love this project, check out my latest build- a DIY TV cabinet here.

Save

DIY Problem-Solving

I'm not sure how it got to be Friday, this week has been a blur of last minute plans, fighting sickness, and trying to trouble-shoot a few DIY projects. DIY problem #1- making attempts to permanently fix a dresser promised to a friend that keeps balking at me and coming unfixed when I turn my back.  When will people stop leaving perfectly awesome furniture out on the curb in the rain??  If they had just put it for free on craigslist, I wouldn't still be arguing with a warped top that refuses to stay where I put it.  That being said, it MAY be fixed now, but I'm waiting to make sure before it gets painted.  I WILL NOT let a dresser get the best of me!!  Rant over.

My other DIY problem to solve is a bit more fun and a bit more photogenic currently.

bookcase build sketch

It's less of a problem and more of a puzzle- figuring out how to put all the pieces together to build the corner bookcase of my dreams.  Lucky for me, I don't have to reinvent the wheel.  When I was starting to plan for this project, after I had my plans sketched out, but before I really planned out the construction, I came upon this:

remodelaholic bookcase tutorial

Remodelaholic's detailed plans for a corner built-in bookcase.  Not only do they tell how they created it, they show it step by step in 3d.  Thanks guys for the awesome tutorial!!  I obviously need to modify it a bit to make it work for my space, and I'll be adding on another level of detail to make it match the existing wood detailing that's right across the room:

dining room trim detail

but Remodelaholic's plans were such a great place to start!  Finding the tutorial helped make the project a lot less intimidating.  Phew!

So far I have the whole thing planned out and the shell constructed on my wall.  I've added a little extra blocking on the top to make it easier to attach my small crown molding (which I have discovered is not true crown, but actually "bed molding" since it's so small),

bookcase top structure

and also added a little extra blocking at the base to help me level it with my not-so-level-114+-year-old house.  All the gaps at the floor, ceiling, walls, will be covered with trim and caulked to make it look like it's always been here.

bookcase bottom structure

I'm already shocked at how sturdy it feels, I can imagine it'll only get sturdier the more I glue/nail together.  Today it'll get shelves!  and maybe I'll even start applying some finish trim... we'll see how it goes.  I can not wait for this project to be finished!!

I hope you have some fun projects planned for this weekend too!

Upholstery Progress

Wow, Wednesday totally snuck up on me.  It is Wednesday, right? Hubby and I are a little under the weather today, but I'm doing my best to power through it.  I always seem to feel better when I distract myself than when I just take it easy... Which is good because I have several larger projects that I'm determined to get done this week.  I'm showing some teasers on instagram, but I'll wait until I have the completed projects to show you.

Tonight especially I need to power through this stupid cold, because it's upholstery night!  I LOVE upholstery night!!

Last week when I left my beautiful antique chair at the end of the class, it was finally starting to look like something.  The entire chair is newly cushioned, covered in muslin, and ready for the pretty fabric on top.  That starts tonight.

antique chair progress 1

Once all the fabric gets attached to the front, then the outside of arms and bottom of the back will get closed up last.  One huge thing that I've learned about reupholstery (especially on a piece like this), is that the most important thing is the order in which you do things.  The seat needs fabric before I can attach the back and arm fabric.  I find the process fascinating.

antique chair progress 2

Even though it's been a bit nerve-wracking tearing apart a chair that I love so much, the result is totally going to be worth it.  My living room is going to thank me!  What's even better is that I still have this chair's sibling- the formerly matching settee- sitting in the basement.  Knowing how to reupholster the chair will give me the ability to reupholster it's slightly wider counterpart in the future.

Now back to today's regularly scheduled programming projects.  Have an awesome Wednesday!