DIY

Creating More Work

Sorry guys, I'm at a bit of a loss this morning.  I think I've successfully caught up on the jet-lag, but I haven't exactly caught up on stuff around the house. Well, in all honesty, I pretty much created more work for myself once I got home.  We are planning a group tag sale next weekend with several of our friends and I need to get my act together!  Apparently in my mind, getting set for a tag sale also means finishing a few unfinished/untouched DIYs so I can demand a few extra bucks at the tag sale. That means, painting and reupholstering a few extra chairs and sprucing up this little luggage rack. luggage-rack


When I bought it a few years ago, I think I was under the delusion that we'd eventually use our tiny 3rd bedroom as a guest room.  This is the room now known as my office.


I'm also hoping that I can find the time this week... after 2.5 years... to refinish this awesome desk for hubby so we can finally sell his old IKEA desk.

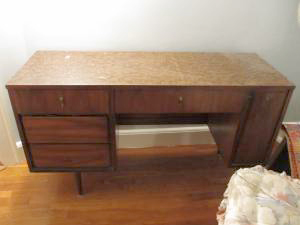
midcentury desk

The desk has only been residing in the basement since I scored it off craigslist for $25 over 2 years ago.  Tsk tsk, Self, tsk tsk.  By posting this, I'm hoping to shame myself into action.  I've always had a 2-tone plan for this desk since it's not in perfect condition.  My 2 options are:

White frame, stained drawers

midcenturydesk_ba_3

via Design Sponge

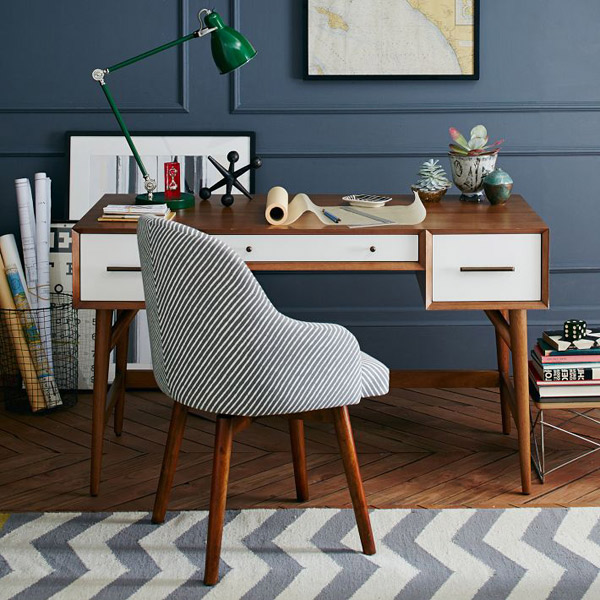
Or the reverse: stained frame, white drawers

west-elm-2-tone-mcm-desk

via West Elm

I think the desk will dictate which way to go once I really dig in.  Which direction will hide more blemishes?

What's your vote for the desk?  And please tell me I'm not the only one who creates more work to prep for tag sales?

Happy Monday!


DIY Tassel Key Chain

Before I get to the promised DIY..... I knew there was a subconscious reason why I was putting off blogging this morning.  After waiting a day and a half for a counter of our counter offer on Grover, we JUST ACCEPTED AN OFFER!!!  We've been listed under a week, didn't allow any showings until Sunday's open house and received the offer on Monday.  So essentially we sold the house without a single showing!!!  I'm in disbelief right now.  Especially considering how long it took us to sell Frankie.  I'm going to be holding my breath until the inspection and appraisal come in, but I don't anticipate any issues.  Dude- staging sells.  Who knew??? Ok, now I'll get back to what I planned to share today!

I had this idea back with the first flip, but it just didn't end up working in.  With Frankie's closing on Friday, I wanted to leave the new owners with a little something: a hand made keychain and touch up paint for their new house.

Personalized 'kit' for the new owners of a flip

I know I'm not reinventing the wheel here with a leather tassel key chain, but it was a quick, fun DIY that I hope the new owners will appreciate.  And it cost me nothing since I already had all the supplies- even better!

DIY-tassle-key-chain-supplies

All it took was 2 small rectangles of leather and a key ring.

DIY-tassel-steps

As you can see, I marked out where to cut my tassels on the back of the leather.  I find that a rotary cutter is the easiest for cutting leather like butter.  After that it was as simple as hot gluing on the loop, then hot glue and roll the rest.

Does it get much simpler?

DIY leather tassel key chain via year of serendipity

For the touch up paint to pass to the new owners, I didn't want to leave them the whole cans since there's enough for me to use again.  Enter $1 mason jars and printed labels that I whipped up in 5 minutes!

Mason jar touch up paint labels via year of serendipity

I really hope that the future owners appreciate the personal touch.  No heartless flippers here!!

DIY leather tassel key chain via year of serendipity

I'm still happy dancing about the accepted offer.  :)  What a great treat for the middle of the week!


UP-Dated Built-in

WARNING: long post ahead!  But don't worry- it'll be informative AND have a few pretty pictures! When I'm coming up with my plans for my flips, there's a delicate balance between keeping original charm and getting rid of dated design features.

Exhibit A

Dated scalloped built in before

Built-in = original charm..... almost arm-deep = awkward......scallops = dated!

I think the scallops were the first thing I ripped out in the house.  I attempted to remove the fake wood paneling from all 3 sides of the shelves, but I just couldn't get in there without causing injury (even my attempts caused several bruises and band-aids).  For the past 4 months, the poor built-in has sat in this sorry state:

build-in-demo

build-in-demo-ceiling

But I had a plan for it!  And now, I think it's hitting all the right notes!

Dated built in after via year of serendipity

Original charm- CHECK

Fresh and clean-CHECK

Usable space-CHECK

Free of awkward and dated design features- CHECK CHECK!

Dated built in styled via year of serendipity

It surprisingly only took me a day to build.  Wood working projects are probably the most fun for me- that and tiling.  You see things come together right before your eyes.


Supplies:

2x4s for structure

thin plywood for the sides, back and 'ceiling' on the top shelf (I actually used materials left over from the bathroom paneling)

1x2 pine decorative trim

Screws and nails


Half of the work in projects like this is just the figuring out and planning what you want to do.  The other half is playing with power tools (fun AND fun!)

My first step to make my plans happen was to create a new structure with 2x4s to reduce the size of the shelves.  I pre-drilled screw holes using my Kreg jig, however, even the best laid plans don't always work out.
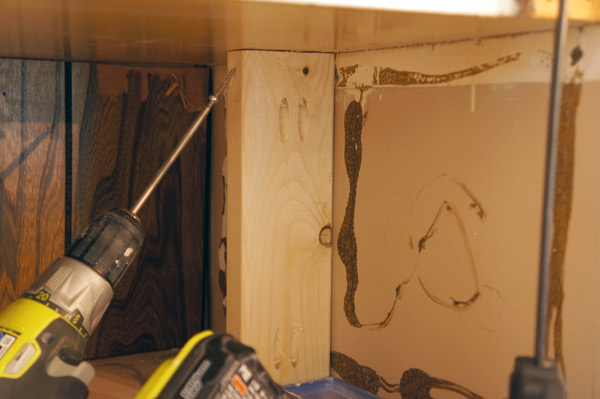
built-in-building

I forgot to take into account the size of the drill and it wouldn't fit in the 2 shorter shelves to allow me to use my carefully planned holes.  Womp womp.  Luckily, I was able to screw in the side and no one will be able to tell in the end.

When installing the 2x4s, I made sure to use my level so that each piece of the hidden structure would be straight.

built-in-structure

Next it was ply-wood's turn.

build-in-plywood

I put a piece of plywood on the new back as well as on both sides since the side walls were a bit damaged.  I'll admit, the back 'wall' between the 2x4s is a little bouncy, but since the back is purely decorative, I opted not to add additional structure.

build-in-plywood-done

Looking better already!  Next it was time for the finish trim.  This was the part that really modernized this project.  Sides first, then I measured in between.

built-in-trim1

To install the trim, I used my nail gun and 2" finish nails, to attach them both the the walls and the shelves.

built-in-trim2

To spare you additional boring pictures, I patched holes, primed, and then sanded before getting to caulking all the corners.  I used my go-to caulk method: a squeeze tube of caulk (easier to maneuver than a caulk gun), and a small bucket of water.  I use the bucket to both dunk my hand before wiping down a bead of caulk, but to also wash the caulk off my hand as I go- it get's very sticky otherwise.  The caulk magically filled all the gaps at the joints and gives it a professional, finished look.  In the pic below, just look at the contrast between the bottom, caulked shelf and the top uncaulked shelf.

built-in-caulk

Ta da!

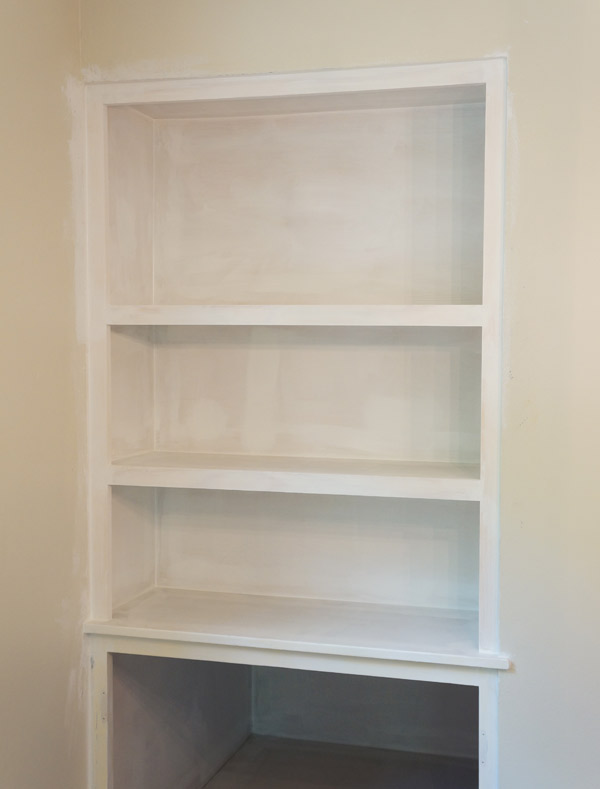
built-in-sans-paint

Meanwhile across the room, the doors were getting fresh paint and new pulls.

built-in-paint-doors

Once all the caulk was dry, the built-in got several layers of white semi-gloss trim paint. I allowed the paint to dry overnight before I layered on the tchotchkes..... I mean styled it.

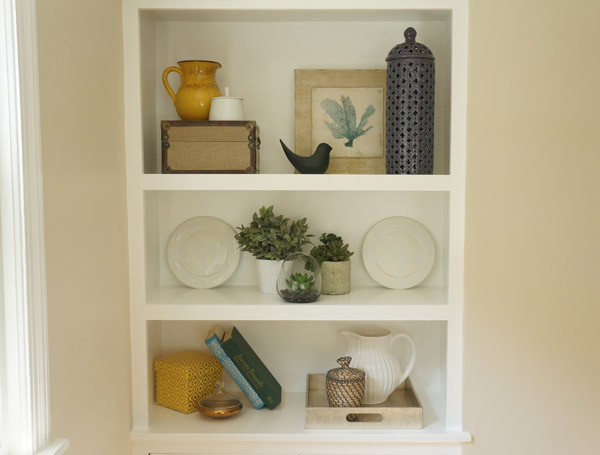
Updated built-in styled via year of serendipity

Updated built-in styled via year of Serendipity

Faux plants Dining room styled via year of serendipity

Just updating the built-in makes the entire open living/dining area look clean, fresh, and updated, but will still charm the pants off of any buyer.

Built-in styled and updated via year of serendipity

Get your wallet ready... you can buy this house NEXT WEEK!!!  Can you tell I'm excited to finish up?