DIY

Concrete Tile Art

Now that the new railing is installed and the 12' entry and stairwell are painted (phew!), the upstairs hall was screaming for something special.  While I enjoyed the previous acoustic tile 'art' that had been chilling there for 3 years, it's time for an upgrade. When I purchased my antique newel posts, I also made an impulse purchase- 4 salvaged concrete tiles.  Seriously impulse- they had a single concrete tile sitting at the checkout, so when I went to buy the posts it was love at first sight.  They pointed me to the pile of 20 and I shoveled through the broken or hopelessly chipped and rescued the best 4.

trunk-tiles

Once home, then I started trying to devise a plan of how to hang concrete on a wall.  My mind went through tons of complicated contraptions and finally settled on the simplest solution.  Gorilla Glue, wood, & 3m picture hangers.                   *side note* No sponsors, just trusty products that I keep finding new uses for

The back of the tiles were jagged- let's call it rustic.

concrete-tile-backs

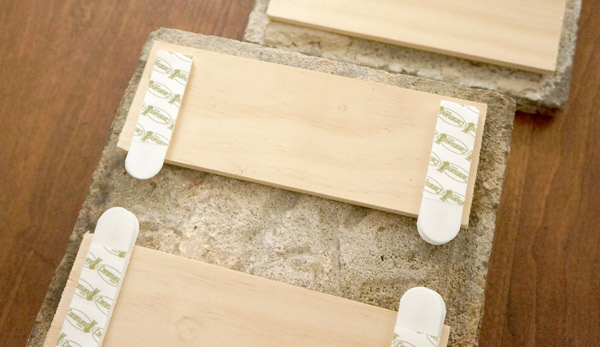
The picture hangers wouldn't stand a chance sticking on the concrete, so I needed to provide them a flat surface to adhere to: wood.  And what better way to get wood and concrete to marry than some serious glue.

concrete-tile-glue

After spending several hours stacked with a lead weight on top, the romance between wood and concrete became enduring.

concrete-tile-weight

Next came picture hangers rated for 12lbs.  Each concrete tile isn't even close to 12lbs, but I'd rather be safe than sorry.  I think I'd cry if these things came crashing down on my gorgeous, but soft refinished pine floors.

concrete-tile-hangers

I'm so happy to see this new art hanging at the top of the stairs!

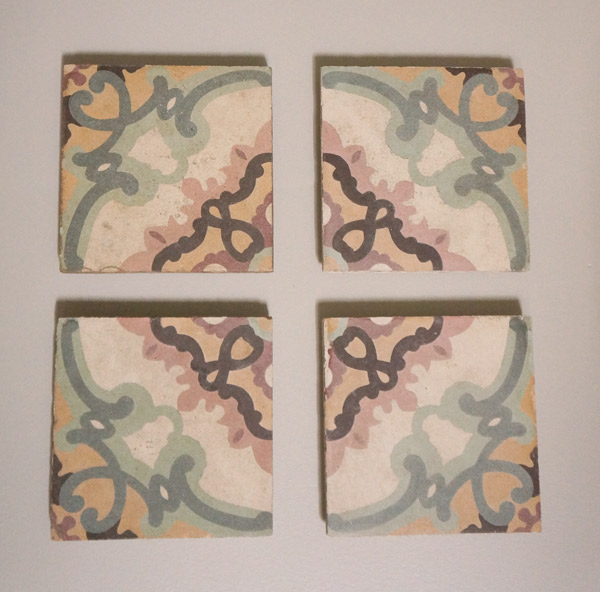
Concrete tile art

Concrete tile art

What's even more exciting is: if I get sick of the pattern as it currently stands, I just need to flip the tiles (requiring no modifications or reconfiguring to hang differently thanks to the picture strips) and a new pattern emerges.

Concrete tile art- alt pattern

How cool is that?

I can't help but wonder about their origin.  Were they in grand foyer perhaps?  Or maybe a posh powder room?  I wish I could have seen them in all their original glory!

Antique Newel In Progress

I feel like I'm juggling 2 jobs right now- the flip and our own house reno which is seemingly never ending (aren't they always?).  Luckily we are able to function in our house now, but shockingly (or not) my 'little' floor refinish project has snowballed.  Aside from needing new baseboards with the new floors and replacing the railing on the newly finished stairs, I'm using the floors as an excuse to fix a lot of my annoyances with the house- one BIG project instead of ten thousand little ones- makes sense, right?  RIGHT?? The next big step in the project is the stair railing.  This needs to happen asap so Hubby and I don't take a header down the steep steps.  Before that can happen, however, these antique newel posts that I picked up need to be rejuvenated.

antique newel posts before

Aside from the degraded finish, I needed to patch several holes from old hand rails and these suckers needed to be about a foot taller.  People were apparently shorter 100 years ago... or didn't mind having low handrails.

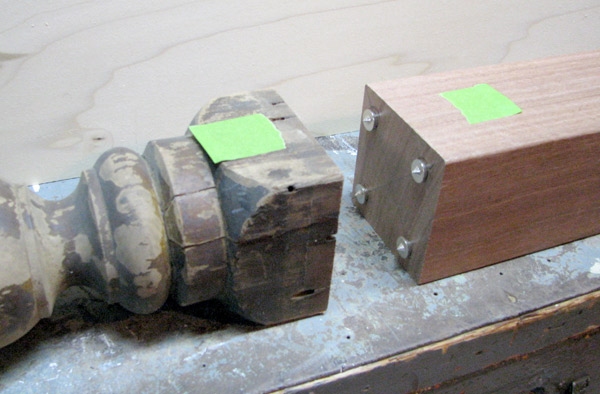
Handy Dad helped me to tackle the height issue and we devised a plan to marry the existing post with a mahogany 4x4.

First we cut down the bottom of the newel posts so we had a flat surface to attach the 4x4 to.

antique newel posts trimmed

Then, Handy Dad took over and doweled the newel post and the 4x4 together.  Essentially he drilled holes on one piece, then used transfer points to mark the other piece.

antique newel posts progress

Insert wooden dowels, wood glue, and clamp.

antique newel posts progress

Once the glue was dry, it was time for me to patch and sand my butt off.  I cut filler pieces out of the scrap we had from trimming the bases and glued them into the old slots- one on one railing and two on the other.

antique newel posts progress

And then sand for what seems like forever.  I started with a low grit and worked my way up to 220.

antique newel posts progress I would LOVE to be able to stain these newel posts and the railing to match, but sadly with all this patching regular stain is not an option.  Never fear, I have a plan!

While a solid stain alone would look flat and like I just painted the posts, a solid stain with a slightly darker stain/poly mix over it just might add the dimension that I'm hoping for.  Please disregard the ribs in the wood itself below- I was using the back of a floor board from my scrap wood pile.

antique newel posts color test

And since this is where I currently stand, this is where I leave you for today.

Will I be able to make these old newel posts look good?  Will my experimental finish work?  Stay tuned next week for the thrilling newel post conclusion!

Friday High Five

millie-kitchen-after-19.jpg

Phew.  After sprinting to the finish line with Millie the fliphouse, I finally have a little down time. This week was also my birthday week so I gave myself permission to take a break (of course by take a break I mean do laundry, start to clean our own house, do minor Millie work, some design work, and start to sort piles of staging stuff and flipping tools).  One thing I'm still working on catching up with is reading other blogs.  I'm such a blog addict and I've barely read any in the past 2 months!  So now that I'm trying to catch up on the amazing happenings in the blogosphere, here are 5 things that grabbed my attention. **links seem to be a big glitchy this morning. Until I can add proper links, click on the images to go to the source**

1.  Ok, sorry, gotta start with some shameless self-promotion here.  Did you see my week of reveals on Millie??

millie-kitchen-after-5


2.  I'm positively swooning over this DIY fabric patent art over at The Gathered Home.  Amazing image and the perfect way to showcase it! (and that wall color is just the cherry on top)

DIY Frameless Floating Art 7


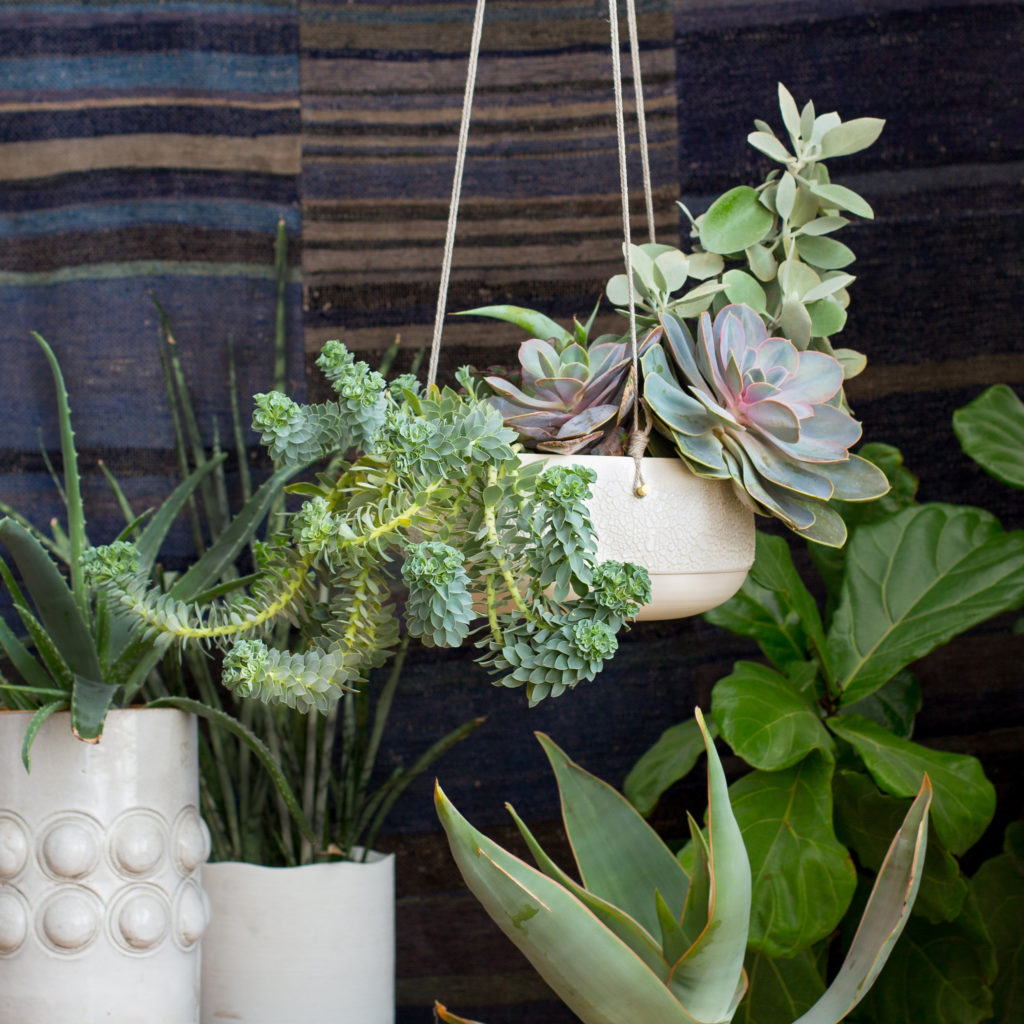
3.  I love love LOVE when Emily Henderson let's her readers into her styling world and we get to see that images like this aren't just a quick and effortless shot.

Pigeon_Toe_Succulent_Planter1

Those succulents aren't some celeb who just wake's up perfect.  It takes trial and error to create the perfect vignette.

Styling_Planter_Process_GIF


4.  How adorable are these DIY clay planters from Design Love Fest??  Not sure if my sculpting skills extend this far, but let's just say I wouldn't be upset if these were hanging on my wall.

plant01


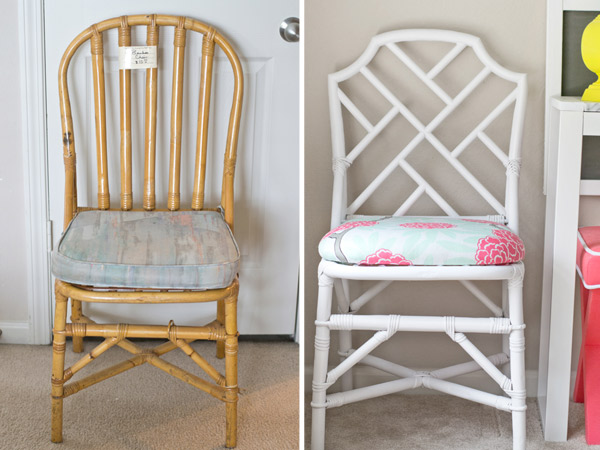
5.  And in un-plant related news, Sarah and her hubby over at Sarah M. Dorsey Designs took this rather ho hum rattan chair and completely transformed it!  I like to think I'm a creative person, but I would never in a million years have thought to do this.  Job well done!!

diy-chinese-chippendale-smd


I hope this got your ideas flowing.  Have a wonderful weekend!!