Flipping

A Numbered Statement

After several weeks of being numberless and confusing a delivery guy or 2, Millie once again is identifiable. Craftsman bungalow wood backed house number DIY via Year of Serendipity

After the painting finished up, I knew I needed to add a bit of a warmer touch to the house.  I debated putting shutters back, but ultimately decided that beefing up new house numbers would totally do the trick.  I love high impact projects for low wallet impact.

The font and the newly curb appealed terrace side both got numbers for less than $20 a piece.

Craftsman bungalow wood backed house number DIY via Year of Serendipity

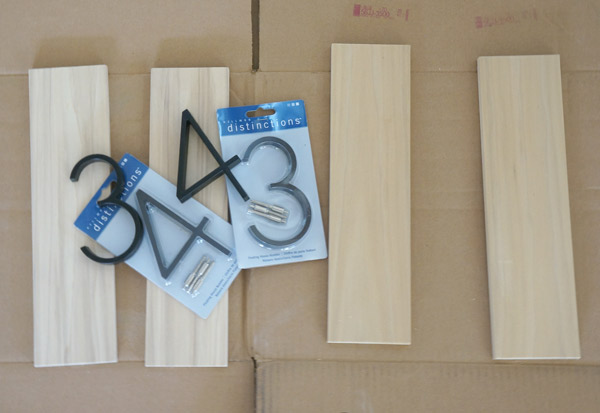
It all started with $6 Home Depot numbers, a piece of 1/2" poplar, and some stain.

DIY wood backed house number supplies via Year of Serendipity

I laid out the numbers to determine the size of the wood and cut 4 equal pieces- each house number backer would be 2 boards side by side.

DIY-house-number-stain

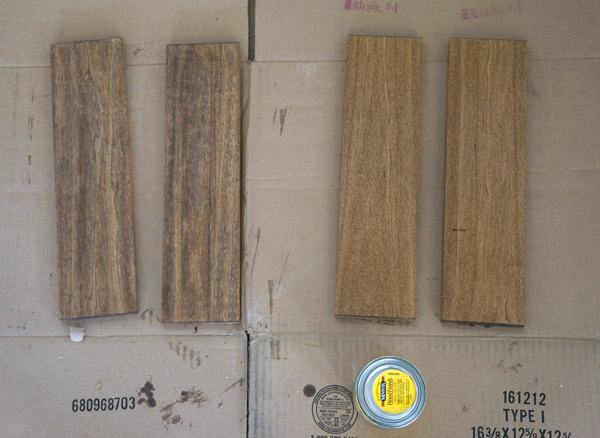
The 2 boards on the left were bought new, the right were left over from a previous project.  Although they're the same wood, I was surprised how differently they took the stain.  Luckily it didn't matter since 2 boards were going on one side of the house and 2 on the other.

At first my brain tried to over-complicate this installation.  I thought about using my kreg jig to attach the boards to one another and then attach the numbers before putting the assembly on the house, then about how to hang it on the house.....  Luckily I came to my senses and simplified.

First step was figuring out the placement on the porch posts.

House-number-placement

I decided that I wanted them just over a foot above the railings.  Using my level (which also has a handy ruler on it as well) I also figured out where to place the first board for the finished product to be centered.

DIY wood backed house number placement via Year of Serendipity

Holding that one board in place, I picked up my finish nail gun and placed a nail in the center of the board.

House-number-nail-gun

This holds it in place while I adjust it.  Even though I used my level, it's more important to have it parallel to the porch post.... which in a 100 year old house probably isn't 100% level anymore.  Once piece one looked level, I nailed piece number 2 next to it also with just one center nail.

DIY wood backed house number placement via Year of Serendipity

After stepping back and being pleased with their placement, I put a couple more nails into each board for stability.  I have to say, if you've never used a nail gun, you have no idea what you're missing.  I swear this is one of the most useful tools that I have!  Plus it's fun and helps me build pretty things.

With the backer board in place, it was time to install the house numbers themselves.

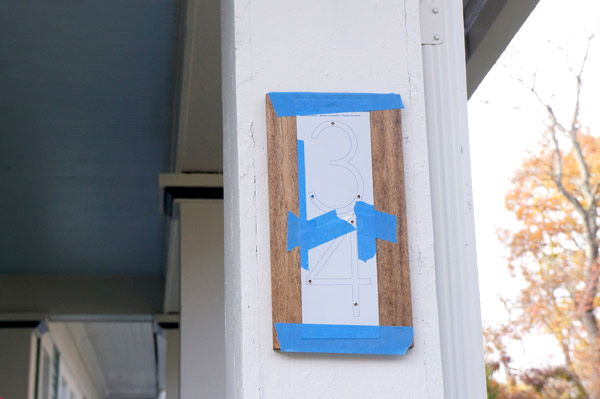
house-number-template

All I did here was follow the directions that came with the house numbers.  Place template, drill holes, put spacers onto numbers, glue/caulk spacers into drilled holes.

Craftsman bungalow wood backed house number DIY via Year of Serendipity

I'm kind of in love with them.  It's just what the outside of this house needed!

A big house needs house numbers that stand out.

Craftsman bungalow wood backed house number DIY via Year of Serendipity

Bonus if they make me smile.

Craftsman bungalow wood backed house number DIY via Year of Serendipity

Craftsman bungalow wood backed house number DIY via Year of Serendipity

The house is starting to coordinate with the fall decor delightfully.  I totally planned it that way...

Craftsman bungalow wood backed house number DIY via Year of Serendipity

Millie: Week 10

I hope you enjoy these weekly updates as I learn to navigate through the business of flipping houses.  This flip, Millie is the most challenging and most exciting yet! You can find more about this house and about my 3 previous flip houses here. After 10 long weeks, the exterior of the house is almost done!  If we just look out here, I can pretend the whole house is almost done!  I'm throwing a lot of before pics into this post because they really show how far this house has come.

When we bought her, Millie was an overgrown gray box, remember?

Millie-exterior

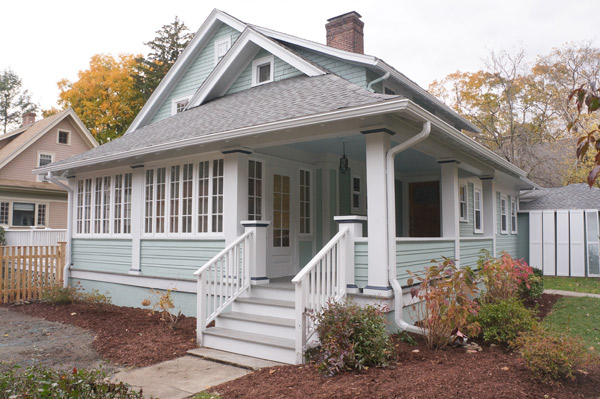
Aside from a few minor touch ups, painting is done!

Millie week 10 painted house front via Year of Serendipity

As I mentioned a few weeks ago, as I uncovered the house from the weeds, I realized that the side was intended to be the curb-appealed front, so I treated it as such.  You never would have known before-

Millie-Ext-1

but this was hiding underneath.  Wow I took out a lot of trees/bushes.  Now I just need the grass to grow there! (The painters also painted my yet-to-be-installed new garage door as you can see leaning on the garage)

Millie week 10 painted house curb appeal via Year of Serendipity

I'm ridiculously happy with the new fence that my contractor installed on this side.  The old fence spanned the length of the yard,returned to the front porch stairs and was about to fall down.

millie-before-old-fence

The new fence extends only to the end of the back deck, letting the sun room and front porch become the 'front'.  And it's pretty.  And has a gate so you can actually get a lawn mower to the back yard.  What a novelty!

Millie week 10 craftsman fence via Year of Serendipity

If you haven't noticed in the front yard pics, new mulch has been spread throughout the entire yard.  66 bags to be precise, and my back is tired.  BUT the result is so worth it.  I apparently don't have any pics of this view of the back yard before we started attacking weeds, but even from this week 2 progress pic

Millie-w2-back-yard

there's a little bit of a change.  Looking a little less jungle-like in my opinion

Millie week 10 back yard transformation

And just for effect, let's look at the side yard again.  The side yard was wholly unusable due to weeds before.

Millie-Ext-13

It's almost hard to believe that the overgrown holly at the corner of the deck above is the same nicely groomed one below.  Not pulling your leg, I swear.

Millie week 10 side yard

The other side of the house, or the lanai as I like to call it

Millie-Ext-11

also got some new fencing (to replace rotten fencing) and more mulch, but nothing drastic.

millie week 10 lanai

Traveling inside, I was destructive once again.  In the kitchen, I pulled up the top layer of linoleum and it's accompanying plywood and started to remove about 5 kagillion staples.  I know it doesn't look like much since there are still 3- THREE!!- layers of vinyl tile that still need to go away to reveal my hardwoods underneath.

Millie week 10 kitchen floor

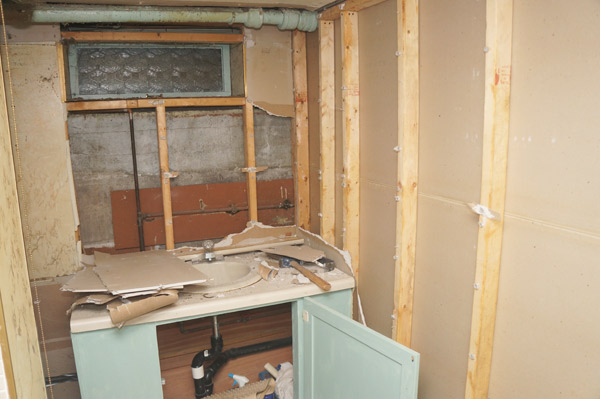
And in the anticipation of my plumber getting started next week, I smashed more- this time in the icky basement bathroom.

millie week 10 basement bathroom

But since the outside is far and away the prettier view currently, I'll leave you off with that view.

Millie week 10 curb appeal via Year of Serendipity

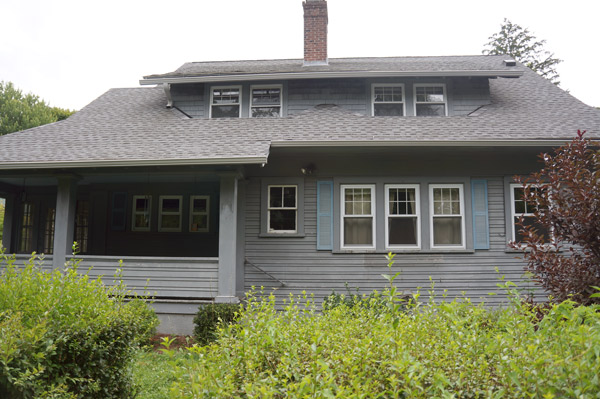
Still left on the exterior is fence completion on the lanai side, trim and door repair on the garage, exterior lights, growing grass (or sodding, we'll see), fixing one broken pane of glass, replacing door knobs/locks/deadbolts, repairing the front door, installing a screen door on the back door, and adding house numbers.  Seems like nothing compared to how far she's come already!!

Happy Halloween and have a great weekend!!

Millie: Week 9

I hope you enjoy these weekly updates as I learn to navigate through the business of flipping houses.  This flip, Millie is the most challenging and most exciting yet! You can find more about this house and about my 3 previous flip houses here. Despite the wet wet weather we've had here in MA the past few days, the house painters were able to get a bit of work done early in the week.  It's looking so much better than the previous gray box already!!

millie-w9-ext-1

This is take 2 on the house color.  Take 1 was a shade lighter and not good.  Not good at all.  I sucked it up, had them buy a new color of paint and I'm still not 100% on it.  I think I'm officially crazy.  Take 1 was Ben Moore Wythe Blue HC-143 and looked super beachy.  Take 2 here is HC-142, Stratton Blue.  In the interest of full disclosure here, if I could go back again I'd pick a grayer, darker color.  But it is what it is at this point and it doesn't offend me.  I'm hoping that a little touch of a darker accent color will really make this color pop.

millie-w9-ext-2

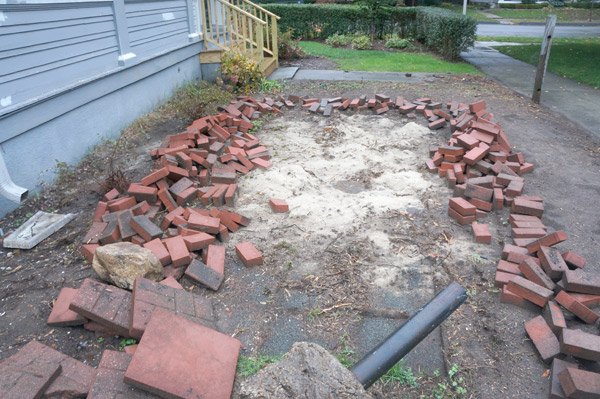
At the beginning of the week, I also rushed to beat mother nature and get the rest of my new grass seed spread before the wet week.  Last week's previous patio pit

millie-w8-yard Is now on it's way to being a nice front-ish lawn.

millie-w9-ext-3

The bricks in the front and going across the lawn are only temporary borders until grass grows and I can mulch.  The brick line going across in the middle of the lawn is where the new fence will be going up.  Hopefully today- fingers crossed!

And with the wet weather, I went inside and got more smashing done.  I'm getting very sick of the demo in this house.  It's been 2 months already!  I'm beyond ready to start the interior rebuilding!! *rant over*

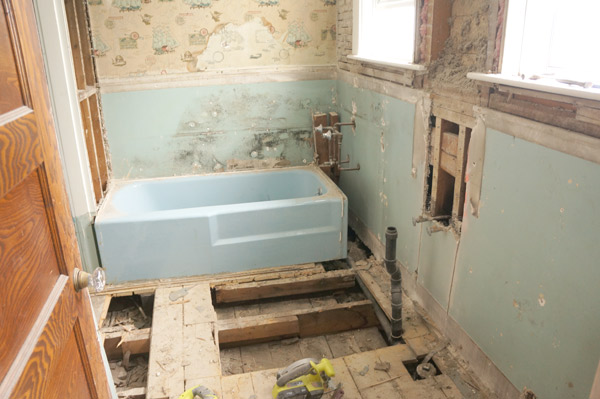
My demo this week focused on where the plumber would need access to replumb the existing bathroom and plumb for the new bathroom.

millie-w9-bathroom millie-w9-wall

Demoing part of the ceiling in the basement was a particularly terrible task.  Not only is it above you so all the debris is falling ON you.... there's no power or functional windows down there so I had to demo this guy with just a headlamp and a prayer.  It'll be worth it once the new master bath gets installed above.

millie-w9-basement-ceiling

I have decided, however, next time..... I'm throwing money at demo.  As fun as it is to swing a sledge hammer, the novelty wears off in about a week.  Can someone remind me of this on the next house?

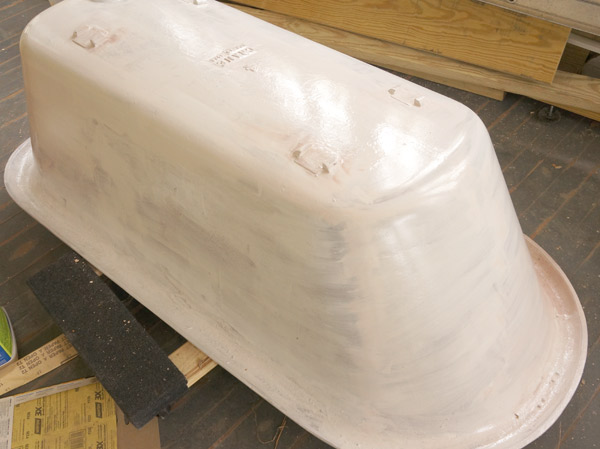
I did squeeze one fun thing in this week, though: bringing life back into the claw foot tub.  So far it has received a coat of rusty metal primer (just to be safe) and one coat of Rustoleum Gloss White.  Today, it'll get sanded smooth and coat 2. I have a feeling it'll take several coats for the desired finish, but she's gonna be a beaut.

millie-w9-tub

The feet are just waiting to be reattached after getting completely stripped and repainted themselves (and no longer look like Jar-Jar).

millie-w9-claw-feet

I'm hoping I can get all my contractors in line this coming week and get marching on the inside!  Plumbing, electrical, and asbestos removal all need to happen before I can have my REAL fun of putting the house back together.  I'm already anticipating seeing each room near completion.  That's what's keeping me motivated right now.  Keep your eye on the prize, Karen!