Millie the Fliphouse

Millie: Week 12

I hope you enjoy these weekly updates as I learn to navigate through the business of flipping houses.  This flip, Millie is the most challenging and most exciting yet! You can find more about this house and about my 3 previous flip houses here. Week 12 always gets me.  Clark's week 12 post was the reveal.  Clark, the less than 1000sf one level 50 year old house that only needed a bathroom, kitchen and a little floor love.  Then we come back to Millie, the 2550sf 100+ year old 2 story house that needs so much more than some new finishes in the kitchen and bathroom.  I supppoooose it makes sense why I'm only a fraction in, but guys, I'm impatient!!

It was a bit of a strange week for me progress-wise.  I was in and out due to other appointments, so my personal accomplishments this week are smaller tasks that were a bit all over the place.  I fixed the garage door install, added the springs to it so it now works, demoed more in the bathroom so my plumber could do his thang, demoed more plaster and lathe ceiling in the basement so the electrician can do his thang...

millie-w12-plaster

And demoed more in the kitchen.

millie-w12-kitchen-demo

Yeah, that wasn't part of the plan.  But neither was a completely rotten sink cabinet.  It looked pretty salvageable from the outside, but the second I started peeling back the layers of the shelf-liner, my problem became apparent.  New plan!!  The cabinets that were original to the house stay, the bank of cabinets from the 60s are getting totally replaced and not just refaced.

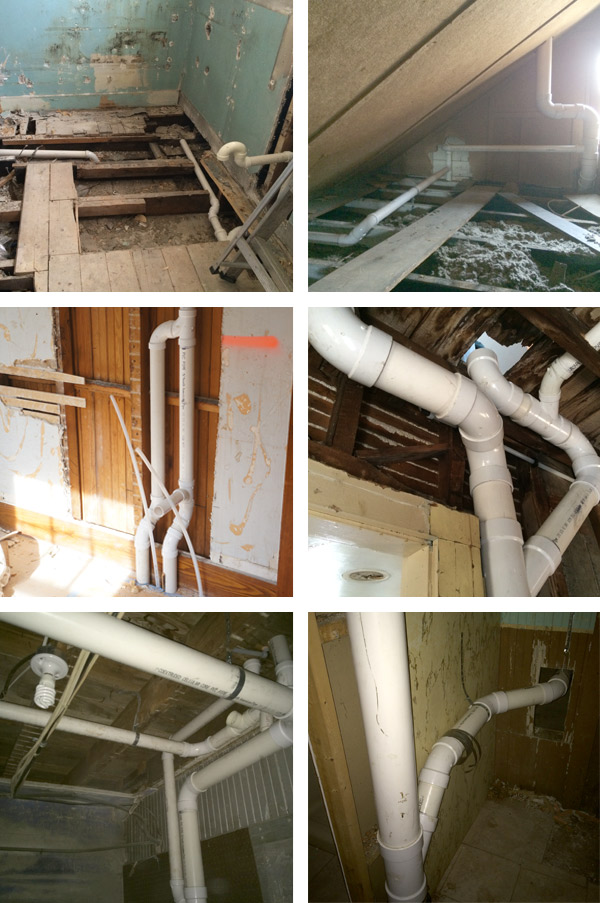
While my focus was everywhere and nowhere at the same time, my plumbers thankfully were well focused.  Plumbing is going in everywhere and it makes me so happy.  Replumbing the old bathroom, new plumbing for the new bathroom, as well as a new stack and all proper venting for the house means that we have plumbing work going on in the basement, first floor, second floor, and attic.

millie-w12-plumbing

I love knowing that it will be done right and the future owners wont have to take a shower with inches of water at their feet thanks to improper venting (speaking from experience...)

Meanwhile outside, my electrician was working on upgrading the power supply to the house from 100amp to 200.

millie-w12-elec

And while I'm super excited to have the house systems being actively upgraded, this visual gal is sick of being in the mess and is ready to put everything back together.  I've discovered a way to cope- buy pretty things for the house.  Things like tile and light fixtures.  This house is going to have the prettiest tile on the block!

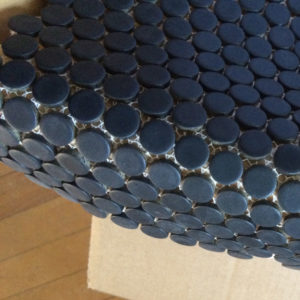
Black matte penny tile in the entry way,

millie-w12-penny-tile

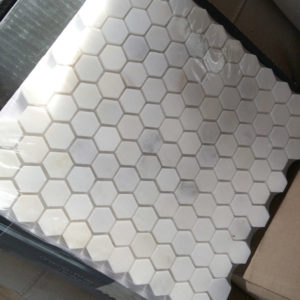
and marble hex tiles in the family bathroom,

millie-w12-marble-hex

and a marble herringbone for the kitchen backsplash that I'm picking up today.

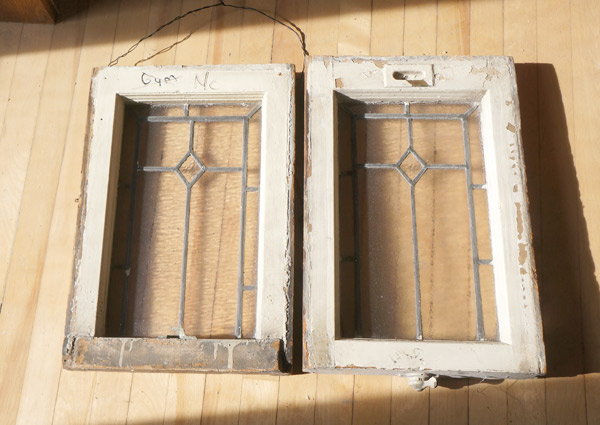
By far the prettiest thing that I procured for this house this week was at an architectural salvage store.

millie-w12-stained-glass

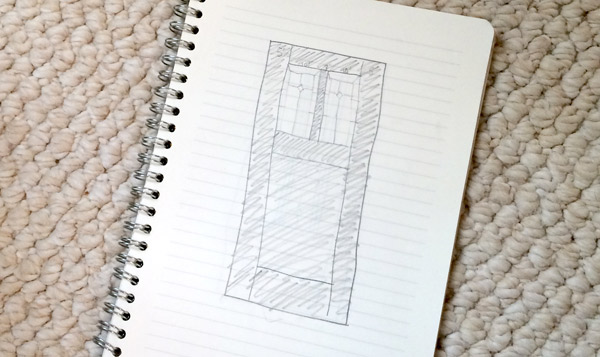
These 2 windows will, hopefully in the near future, become a door.  The pocket door to the new master bathroom to be precise.

millie-w12-door-sketch

I did a few (very) crooked rough sketches of different window configurations within the door, but this one was the clear winner.  Fingers crossed that they work and my definitely not-to-scale sketch is close to what it could be.  Fingers crossed!  I have high hopes for this one!

I'm super duper excited for next week.  By next week, the rough plumbing will be done and inspected, meaning I can start putting floors and walls back.  On top of that, I'll be having the asbestos guys take care of the ugly kitchen tiles and random asbestos early next week and new walls for the master closet can start going up!  Basically, that all means that next week I can finally stop smashing everything and start putting this darn house back together! #tiredofsmashy

Have a great weekend!


Millie: Week 11

I hope you enjoy these weekly updates as I learn to navigate through the business of flipping houses.  This flip, Millie is the most challenging and most exciting yet! You can find more about this house and about my 3 previous flip houses here. It isn't until I write this post every week that I realize how the time is flying on this flip.  Week 11 already??  And the interior work is just picking up steam.  Between the sheer amount that needed to get done in this house both inside and out and the time of year where all my contractors are finishing out their busiest season I'm very much behind where I thought I would be at this point.  Ce la vie.

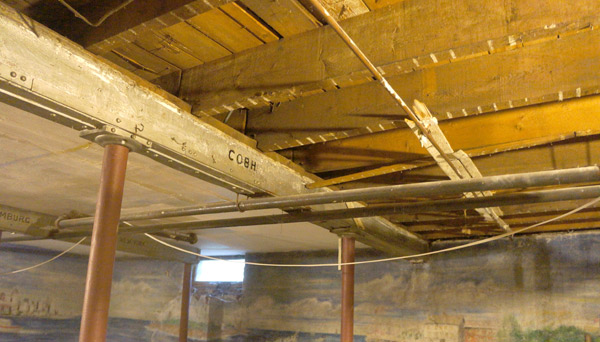
One task that I was hoping to avoid but wasn't able to consumed a large portion of my week: demoing the plaster and lathe basement ceiling.

millie-w11-basement-demo

Sadly I have much more of this ahead of me since I've only gotten half of the room demoed.  This is primarily so that my electrician can get to all the wiring and avoid having to poke any unnecessary holes into my finished walls on the first floor.  All this work for the sake of new wiring.  It'll be worth it in the end, it'll be worth it in the end, it'll be worth it in the end....

millie-w11-basement-ceiling

Demoing plaster above your head is a great work out.... one that in retrospect, I should have outsourced.  My arms and back will thank me next time.

Heading outside, you already saw Millie's spiffy new house numbers in Wednesday's post:

millie-house-numbers-4

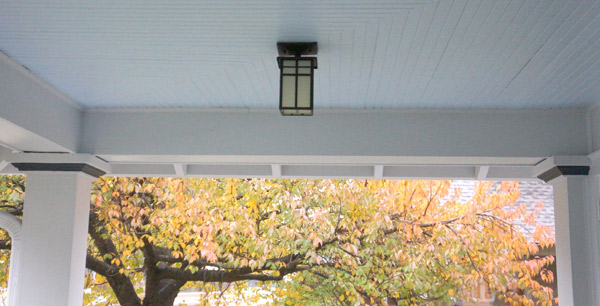
And one of the 2 porch lights is up!  The other had to be reordered since the first came in broken.  BUT, if you look at this view of the porch we can pretend it's all done!

millie-w11-porch

Thankfully this week also brought the right kind of weather for grass-growing.  I think it heard me threatening sod and knew it needed to get it's act together.  Grow little grass, grow!

millie-w11-grass

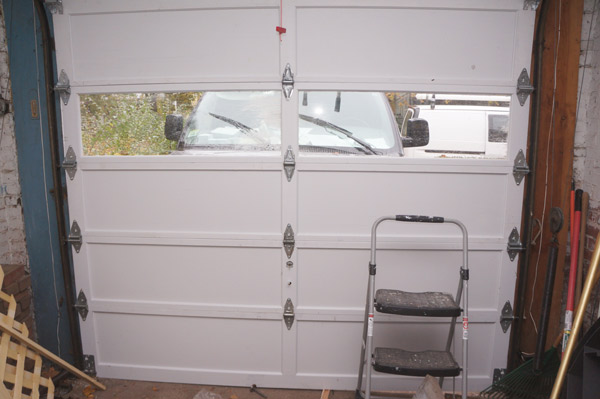
It also came time this week to bid the old broken garage door adieu.  I decided to take it upon myself to install the door that I purchased on craigslist.

millie-w11-garage-door

The new door still isn't functional yet, though- once I got to this point, I realized that the second to the bottom panel where the handle and lock live is upside down.  Phooey.  Easily fixable but phooey

Meanwhile, back inside my electrician was plugging away and my plumbers were getting started on the home's total plumbing overhaul.  Starting with removing the entire stack.  I presume the buyers won't want a corroding sewer pipe in their wall.

millie-w11-stack-pipes

Blue tubs also stand no chance in my houses.  The plumbers eradicated my blue tub problem and the existing bathroom is now a blank slate!

millie-w11-bathroom

Just in time for me to refinish it's new (old) tub!!  The first claw foot tub that I purchased is finished being painted and has moved into the house only to be replaced by the next tub that needs love.

millie-w11-tub

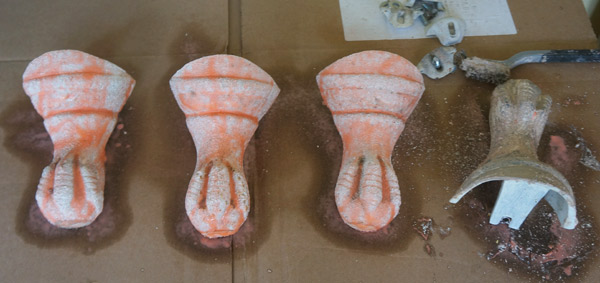
Another Habitat for Humanity ReStore treasure, this tub doesn't nee a full refinish- just some new paint on the base and feet!  The feet are already in the midst of getting stripped for their new finish, but the tub is just getting sanded before it's new coat.

millie-w11-tub-feet

The feet are going white on this one.  If only I could decide on a color for the tub itself.  This tub will be in the family bathroom (the existing one I showed you above) with white subway tile walls and marble hex floor tile.  I'm thinking it definitely needs to be a color- maybe a light blue or a refresh of it's current yellow?  Or maybe a striking green?  What's your vote??

A Numbered Statement

After several weeks of being numberless and confusing a delivery guy or 2, Millie once again is identifiable. Craftsman bungalow wood backed house number DIY via Year of Serendipity

After the painting finished up, I knew I needed to add a bit of a warmer touch to the house.  I debated putting shutters back, but ultimately decided that beefing up new house numbers would totally do the trick.  I love high impact projects for low wallet impact.

The font and the newly curb appealed terrace side both got numbers for less than $20 a piece.

Craftsman bungalow wood backed house number DIY via Year of Serendipity

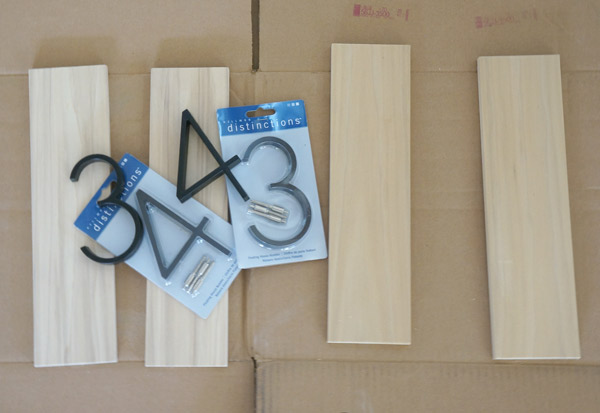
It all started with $6 Home Depot numbers, a piece of 1/2" poplar, and some stain.

DIY wood backed house number supplies via Year of Serendipity

I laid out the numbers to determine the size of the wood and cut 4 equal pieces- each house number backer would be 2 boards side by side.

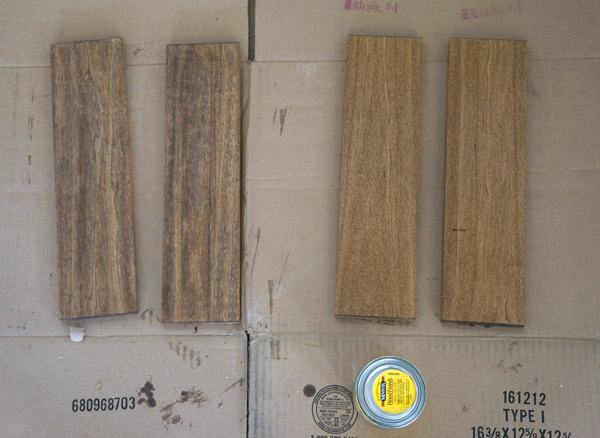
DIY-house-number-stain

The 2 boards on the left were bought new, the right were left over from a previous project.  Although they're the same wood, I was surprised how differently they took the stain.  Luckily it didn't matter since 2 boards were going on one side of the house and 2 on the other.

At first my brain tried to over-complicate this installation.  I thought about using my kreg jig to attach the boards to one another and then attach the numbers before putting the assembly on the house, then about how to hang it on the house.....  Luckily I came to my senses and simplified.

First step was figuring out the placement on the porch posts.

House-number-placement

I decided that I wanted them just over a foot above the railings.  Using my level (which also has a handy ruler on it as well) I also figured out where to place the first board for the finished product to be centered.

DIY wood backed house number placement via Year of Serendipity

Holding that one board in place, I picked up my finish nail gun and placed a nail in the center of the board.

House-number-nail-gun

This holds it in place while I adjust it.  Even though I used my level, it's more important to have it parallel to the porch post.... which in a 100 year old house probably isn't 100% level anymore.  Once piece one looked level, I nailed piece number 2 next to it also with just one center nail.

DIY wood backed house number placement via Year of Serendipity

After stepping back and being pleased with their placement, I put a couple more nails into each board for stability.  I have to say, if you've never used a nail gun, you have no idea what you're missing.  I swear this is one of the most useful tools that I have!  Plus it's fun and helps me build pretty things.

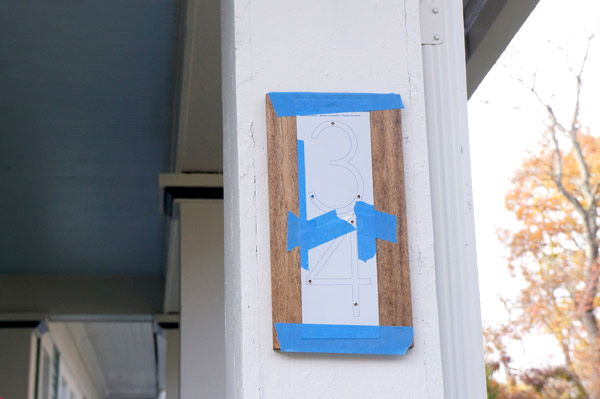
With the backer board in place, it was time to install the house numbers themselves.

house-number-template

All I did here was follow the directions that came with the house numbers.  Place template, drill holes, put spacers onto numbers, glue/caulk spacers into drilled holes.

Craftsman bungalow wood backed house number DIY via Year of Serendipity

I'm kind of in love with them.  It's just what the outside of this house needed!

A big house needs house numbers that stand out.

Craftsman bungalow wood backed house number DIY via Year of Serendipity

Bonus if they make me smile.

Craftsman bungalow wood backed house number DIY via Year of Serendipity

Craftsman bungalow wood backed house number DIY via Year of Serendipity

The house is starting to coordinate with the fall decor delightfully.  I totally planned it that way...

Craftsman bungalow wood backed house number DIY via Year of Serendipity