Projects

Monday Recovery

So it's Monday, huh?  I turned my brain off this weekend, so I guess it's time to get it back in the game.  Sorry, no exciting post today.  Since I don't need to spend my day at Clark, instead I need to dig through the mess and find our other house- ya know, that one we actually live in.  It's somewhere here under the piles of laundry and displaced tools and DIY supplies.  Somewhere. I also have some gardening to do to clean up my yard.  Mom and I ran to the flower nursery yesterday, although it looks like I should wait a few more days to plant- the weather is threatening frost over the next few days (?!).

flowers

We're a little behind on the garden and veggie garden this year.  Weeding and mulching are high on the catch-up to do list.  I also have to figure out a way to make our garden guest, the chipmunk (see his hole), decide to relocate to a new home.  Any suggestions?

planter box

I just hope the weather's back to being warm and sunny by the end of the week, because I'm excited to go to Brimfield on Friday!  A gigantic antiques flea market is my idea of a vacation.

Clark has his second showing today, keep your fingers crossed for us!

Meet Clark 2.0

(aka "Clark: Week 12", aka "Clark's Big Reveal", aka "OMG Did I Just Do That?") If you’re new to my weekly progress posts, Clark is my first ever flip house (named for the street that he’s on). Check out my previous posts here.

Twelve weeks ago, I introduced you to this misfit of a house.  He wasn't quite an eyesore, but he had been neglected for years and foreclosed on and just needed to be shown some love.
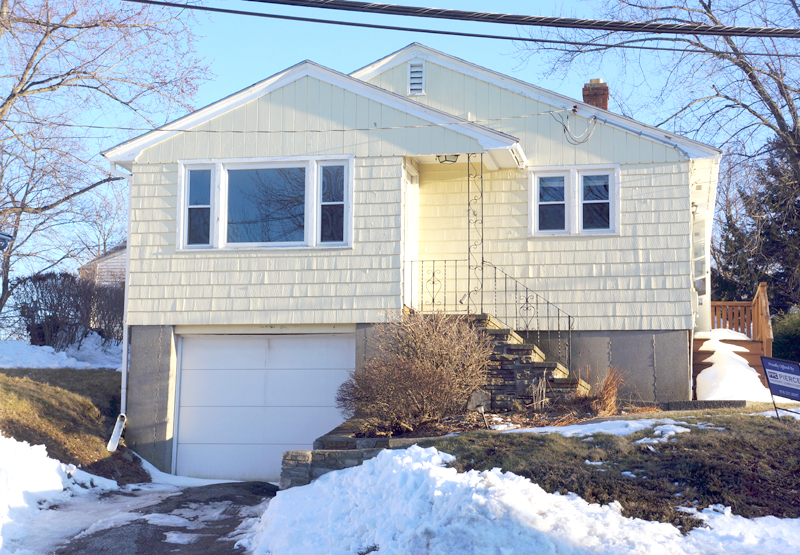
clark before

Twelve weeks later, Clark has been given a new life and is ready for a new family to love him.

clark ext complete

It's just beginning to really sink in to me- I flipped a house in 3 months.  I flipped a house.  In 3 months. ME?!

But my own disbelief in my abilities isn't why you're here.  You want to see the big reveal!!!!!

Photo shoot day (yesterday) was dreary and gray here in Massachusetts and I wasn't about to make you wait any longer, so the lighting in the pics was a bit challenging.  You've been warned.

But, without further ado.....

Come on it, take off your shoes, and enjoy the tour!

w12 ext 1

First room on the tour is the living room.  The formerly burnt orange living room.

Clark before living2

I bid farewell to the burnt yuk color and welcomed a creamy color called Canvas.

w12 living room

And I opened up the wall between the living room and kitchen.  It makes the space feel enormous (which is paramount in a house under 1000 sf)!

clark before living1

The textured ceiling is still there in a crisp new white.  I swear the room is a cream color, not green.  It's the only room without an overhead light, so it's suffering from the dreary day outside.  (someone also needs to take some photography classes- hint: it's this girl)

w12 living room 1

Once upon a time there was a closet in the living room, but it was sacrificed for a good cause: the kitchen.  Speaking of which....

front door before

Oh hai kitchen.

w12 living room opening

Remember what it looked like when we bought it?  Not enough room for modern appliances and cabinets that were about 25 years past their usable life.

Clark before kitchen1

How do you like dem apples??  Now that's a kitchen!

kitchen after

How about another?

w12 kitchen 1

And another.  If this kitchen doesn't sell this house, I don't know what will!

w12 kitchen 2

I guess there are a few other rooms in this house too if you ever decide to leave the kitchen (and really, who would blame you if you didn't).

w12 hallway

The three bedrooms didn't get any drastic changes- paint (trim, ceilings, walls), new light fixtures, and a good carpet cleaning

Bedroom #1- The artist formerly known as the red room.

Clark before redbed1

The murder red was thankfully covered up with a new color, Cloud.

bedroom 1 after

Bedroom #2 didn't undergo such a drastic color transformation.  It went from very badly painted gray...

Clark before graybed1

...to a lighter, neatly painted gray (also Cloud)

bedroom 2 after

The master bedroom (or at least the room I deemed as the master because it was marginally the largest room with the largest closet) started as another burnt something color.  Here's a good tip for picking colors- if you find it in a diaper, it's probably not a good color for a wall.  Rule to live by.

Clark before master1

Now it's always summer in here.  Literally.  That's the name of the new color, Summer.  It's a nice soft, buttery yellow to distinguish it from the other 2 bedrooms.

master after 1

master after 2

But aside from the kitchen, there's one other room that I spent a lot of time and effort in.

The bathroom!

The former owners (prior to the foreclosure) tried to put lipstick on a pig and had the gall to advertise this as an updated bathroom.  I'm sorry, if you have a cracked plastic shower surround and moldy linoleum, an updated bathroom it is not.  I don't care if you put a new pedestal sink in it or not, it was still disgusting.  The picture really didn't show it in all it's gory glory, you'll just have to take my word for it.

Clark before bathroom1

Remove the disgusting and add a boat-load of charm and that's what we see today.

w12 bathroom 2

Are those some sexy floors or what??

w12 bathroom 1

Only the pedestal sink and the tub remain from the original room.

w12 bathroom 3

I have a few very minor things left on my to do list, although most won't be noticeable to potential buyers... which is good because...  this guy is officially LISTED!!!  And he's going to charm the pants off of any potential buyers!

The listing went live on Monday (I know some of you peaked already), but we aren't doing any showings until the open house Saturday.  So if you're in the market for a 110% move-in-ready house in Worcester with more charisma than you can handle, come on by!

I'm like a proud parent with this house.  I didn't realize how attached I've grown.  I guess when you spend 40 hours a week pouring your soul into a space, you're bound to form a bond.

me clark

I just hope he finds a good family who will love him, and care for him, and feed him, and take him for walks...... did I take it too far?  I think I'm getting punchy at this point.  I need a vacation.

So, what do you think??

Spring Pinterest Polka Dots

pinterest spring If you're unfamiliar with the seasonal Pinterest Challenges (first of all, where have you been?!), it's a challenge to get pinterest users to stop pinning 'someday' projects and start DOING.  All you have to do is take inspiration from pinterest and put your own spin on a project.  This season's gracious hosts are Sherry @ Young House Love , Katie @ Bower Power Blog, Emily @ Sparkle Meets Pop, and Renee @ RedBirdBlue.  I can't wait to see what projects they tackle!

My previous season's Pinterest Challenge projects include sketch chair art, a DIY juju, and a coffee table bench to name a few (check them all out here).

I know I posted a pseudo-pinterest challenge on Monday,

elis one

but I'm an overachiever apparently and couldn't resist doing another project.

I've been loving pretty much any DIY project I see lately with gold polka dots:  Chelsea from Lovely indeed has tackled a gold polka dot photo backdrop, a gold polka dot table runner, and a suede and (you guessed it) gold polka dot mouse pad.  Cassie from Hi Sugarplum went to town on this gold dot vase.  So, I'm jumping on the bandwagon admittedly.

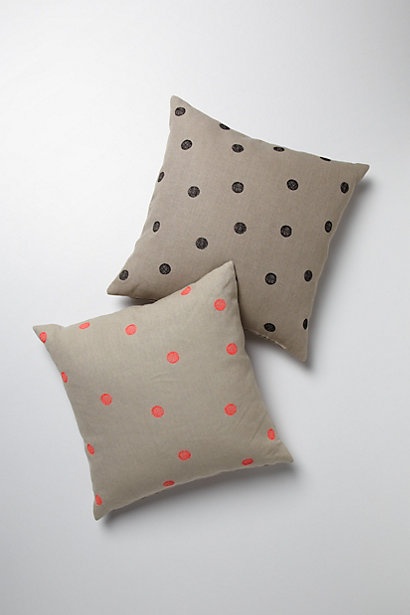
About a month ago, I pinned these pillows from Anthropologie

polka dot anthro pillows

When this season's challenge came along, it didn't take me long to decide on this.  And I did it in under an hour, so SCORE!

diy pillow settee

(Please excuse the picture quality- I forgot my good camera at Clark again so I had to rely on my iphone camera and I am not perfected in the science of iphoneography... side note to self for future iphone pics: zooming makes it grainy, zoom AFTER you take the shot.  Now back to our regularly scheduled programing.)

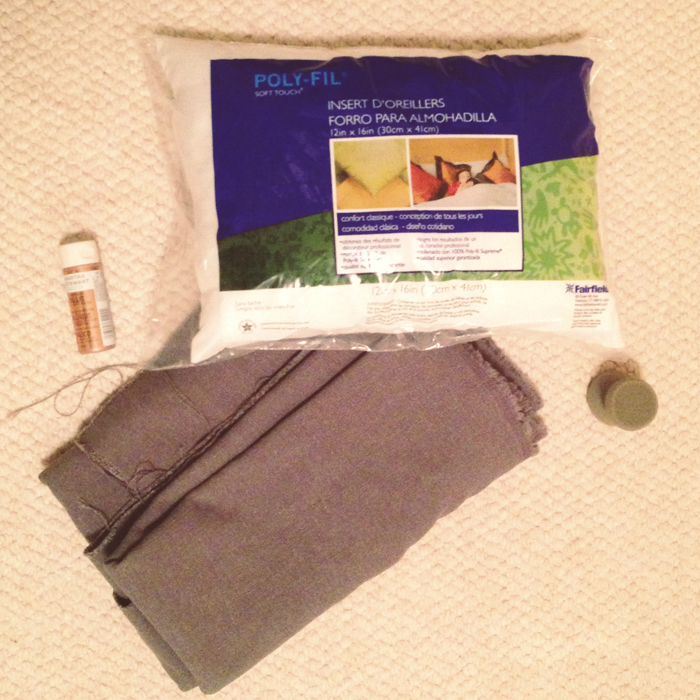
I already had the gray fabric, a pillow form and sponge, so all I needed to buy was a few dollars worth of copper paint.  I said it, Copper, not Gold.  Gasp! I thought the rosy quality of the copper would compliment the gray best.

diy pillow supplies

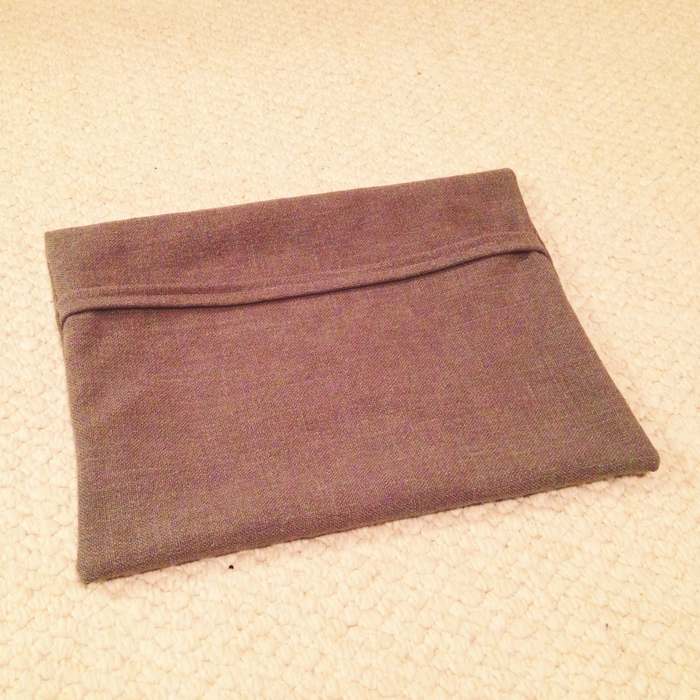
I chose to make an envelope style pillow because they're easy to make and easy to take off the pillow and wash.

First step is to cut your fabric- this will wrap the pillow with seams only on the 2 sides.  Make sure you allow for overlap for the 'envelope' part (I allowed 3 inches since I was using a small pillow form)

diy pillow cut to size

Next, fold over one of the shorter sides about 1/4 to 1/2 inch, then fold it over again.  Pin and sew- this will be exposed at your 'envelope' opening.

DIY pillow hem edge

Once that is sewn, fold your fabric into your pillow shape.  Make sure the 'bad side' of the fabric is out and the finished edge you just created in folded inside so that everything's corrent when you turn it all right side out.  I'm not a fan whatsoever of karate chopped pillows- I like them overstuffed, so I made my pillow cover 1 inch smaller than my pillow in each direction.

DIY pillow measure size

Once you sew up the 2 sides, you can turn the pillow cover right side out.

DIY pillow flipped

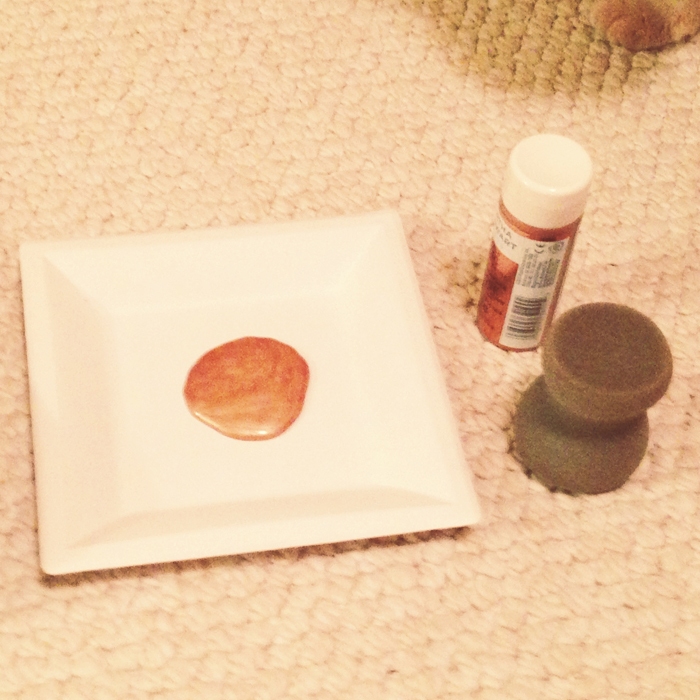
Now it's time for the fun part!!

DIY pillow paint

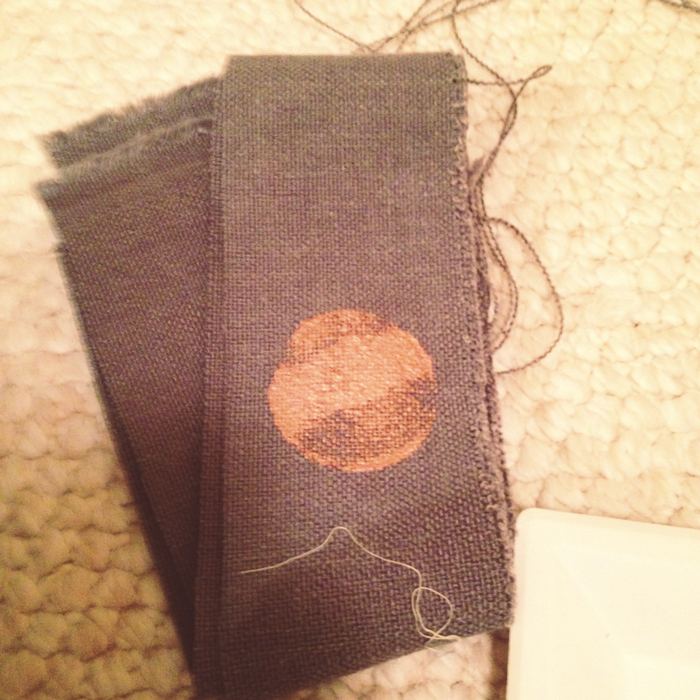
I did a few polka dot trials on a scrap piece to figure out my technique before I started on my pillow.

DIY pillow dot trial

I put the pillow into the cover still in its plastic so that I could paint my dots without worrying about the paint bleeding through to the pillow or the back of the fabric.

DIY pillow dots

I let it dry overnight before I took the plastic-covered pillow form out of the cover and re-inserted it sans plastic.

I'm swooning over the copper/gray combo and the scale of the dots!  Yes, I'm swooning over a pillow and yes, I know I have issues.  I embrace them.

DIY pillow

Bear approves.

DIY pillow bear

Are you loving it as much as I am??

diy pillow angle pic

I'd love to see your projects!  Link them up in the comments, or just say HI!