Projects

Liquid Gold

Among my lofty plans for this here lil'ol' blog this year is to share at least one DIY with you guys each week.  My goals were only reinforced when I discovered that my DIY infinity scarf (and dorky headless selfie that went with) has been my most popular post on pinterest to date!  If you're new here from pinterest, Welcome!!!  Even if you aren't new here from pinterest, I still love you- there's enough to go around! Last week, I told you about all my super duper exciting (to me) living room plans.  And I am impatient.  Unfortunately, my built in bookcase will be waiting until I'm done working on Frankie-the-Fliphouse, and a new sofa won't be purchased until said fliphouse is sold, so if I want to get started on this room, I have to start small.

Like painting a coffee table.  or rather 2 coffee tables.  Our coffee tables are these from Overstock and they are perfect for our space.

coffee-table-before

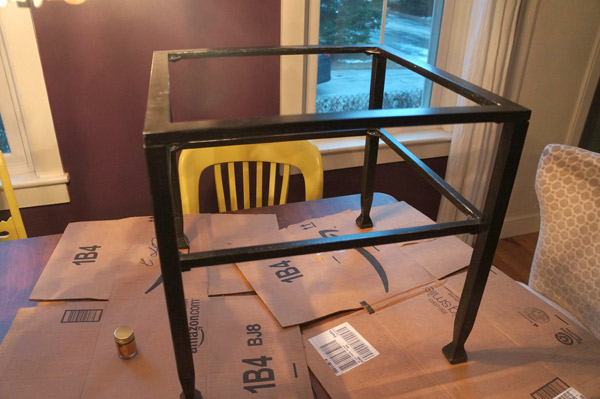
As I mentioned in my plans post, I'll be dialing back a bit of the high contrast in the furniture (don't you worry, much excitement will come with the accessories), so I decided our black and glass coffee table should be less black.  and more gold.

coffee-table-painting

Nothing was wrong with the black per se, I just think the gold will go better with the end result of the room.  I decided to give liquid leaf a try as opposed to a flat-looking spray paint.

coffee-table-paint

For such a small jar, this has a very strong odor, so be warned.

coffee-tables-gold-black

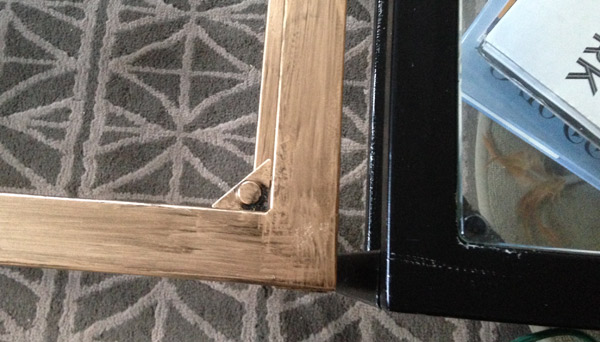
After one coat, I debated leaving it streaky for a pseudo-deliberate antique look, but decided to go whole-hog and make it all solid gold.  Aside from the stench, I'm so far pleased with the finish that the liquid gold achieved- it's a little bit more dimensional than most gold paints and somehow looks more 'real', although that may just be me trying to justify the time this took vs. spray paint.

gold-table-closeup

I still have to do a few small touch-ups and seal it somehow, but so far I totally dig it.  Once the rest of the space transforms, they'll fit in perfectly.  And if they don't, the miracle of spray paint will transform them magically back to black, but I have a feeling they'll have a long life in their new gold forms.

gold-coffee-tables

I hope I'm not the only one with the urge to paint everything gold lately- maybe I'm just craving a little sparkle in the dull winter months.  That must be it.  Sound's like a plausible excuse reason to me.

Frankie: Week 10

I hope you enjoy these weekly updates as I learn to navigate through the business of flipping houses.  Check out other posts about Frankie the Fliphouse HERE. One very big, very exciting thing happened this week at Frankie:

week 10 kitchen 1

The kitchen cabinets were installed!  I had totally forgotten how big this kitchen is!  It'll look even better with a backsplash and a dresser island- I can't wait!!   The view above is my favorite view in the whole house- you can see the cabinets and the totally done hallway.  Yay progress!  If you don't look at the rest of the house, this view looks almost done.

week 10 kitchen 2

Now I'm just impatient for the countertops to be installed (they got templated this week) so that I can get to the backsplash.  Oh the backslash.  It's gonna be sexy.  mad sexy.  and I can't wait to install it!  Especially since I'm 100% over painting at this point.  I got a ton of painting done this week, but there's still a lot to go.  Painting stained wood trim white in an entire house takes lots and lots of coats... who knew??

Paint roundup:

Kitchen: 95% painted (walls, trim, ceiling, closet: done, but the back door needs a second coat)

Bathroom: 95% painted (ceilings still need touching up)

Hall: 100% painted!! (including the hall closet!)

Back bedroom: 75% painted (all trim is done and there's a first coat on both the walls and ceiling)- this should be 100% by the end of today

Other 2 bedrooms: 20% painted (I haven't touched these rooms in weeks)

Living room: 5% painted (now that it's not taken over by kitchen boxes anymore, I can dig in here next week)

Basement: 0% painted.... I'll deal with this area once the more important upstairs is all done

week 10 closets

I'm especially tired from painting closets.  Among all the other painting, I've painted 3 closets in the past 3 days.  It's a great workout, though, doing multiple layers way up high and way down low... stair stepper and squats all in one.  My legs are thanking cursing me.

In a few much needed painting breaks, I also replaced a few more lights in the house.  Slowly, but surely, they'll all get replaced and be bright and beautiful.

week 10 lights

Whilst I was covering my hands and clothes (and maybe a few walls) in paint, the electrician was plugging away (I didn't notice the pun until I started proof-reading, ha).  As you may have seen on instagram, he replaced all of the old, dingy, yellow light switches and outlets for fresh, clean, white ones.  What a difference!  Even in the unpainted rooms, it looks refreshed!

week 10 switches

In addition, he also fixed the broken doorbell, updated the wiring and added outlets in the kitchen, and started on a box for the sconce above the sink.

With holidays and a last minute vacation in the midst of this flip, it won't be done in 12 weeks like Clark was, but I hopefully won't be too far behind.  I feel so behind when I look at Clark's week 10 update.  Our goal is still to list at the end of January, though.  Weather and window install are the only 2 items that might push it back a couple weeks, but I'm keeping my fingers crossed!

With the kitchen cabinets in, though, this house is finally starting to feel livable again and completion doesn't seem so far away.

To Infinity

Not beyond today, just infinity. This Christmas, I decided to have a bit of fun and make more gifts than I usually do.  In addition to all my boys (Hubby, Dad, nephew and brother-in-law) getting hand-knitted hats, several of my friends also received hand-made infinity scarfs.  I made it up as I went, but now it's kind of addicting since it was so easy.  If you can sew 2 straight lines you can make an infinity scarf.

infinity scarf tools

I started with a yard of jersey fabric.  1 yard length of fabric can vary in width- all of the fabrics I used for scarfs were around 59" wide.  Since I don't really have the floor space to layout fabric and photograph properly (and I had my sketchbook handy from my living room sketch) I decided to draw up some quick directions.

Open up the fabric and fold it length-wise (right sides together).  After testing a few stitches on a scrap of fabric, I decided to use a zig-zag stitch so that there would still be a little stretch in the seams.

infinity scarf step 1

Sew down the long side of your fabric to create a long tube.

infinity sewing

With the tube, you'll need to fold the fabric again, but a little differently this time (cuz remember, it's inside out).  You'll want to fold the bottom of your tube inside  so the bottom edge meets your top edge and you still have a tube.  I hope this makes sense- this is the step I wasn't 100% sure would work, but it totally did.  Sew your 2 layers together around the tube, leaving a few inches open so you can turn it right-side-out.

infinity scarf step 2

Do not just sew a straight line here across the top with all 4 layers.  Just won't work.  It won't be a tube anymore and no more tube means no more scarf.

Invert it all through the opening and you'll see an infinity scarf!!  See, I told you it was easy!

infinity scarf opening

To finish, hand sew your opening shut (I like to use an invisible stitch that my mom taught me, much like this one).

And voila, your neck will never be cold again!  Ok, maybe I'm overselling a bit, but for such a simple project, it has a great result.

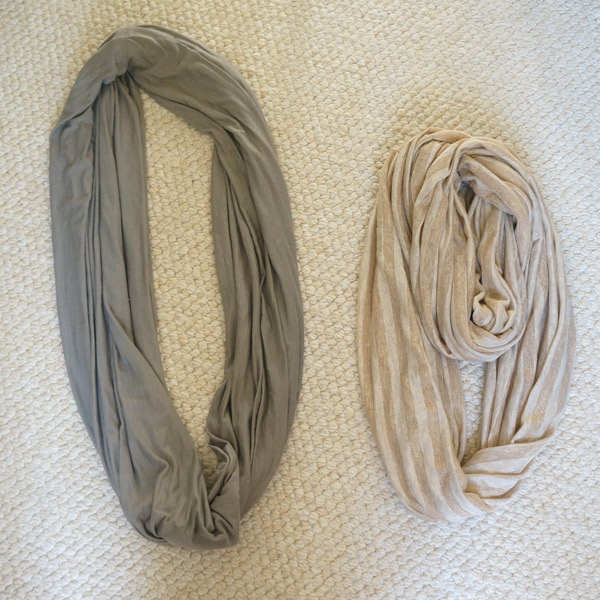
infinity scarfs

I think I made 4 in an hour, and that includes distractions for kittens and tv.  If I hadn't run out of fabric, I would have kept going!

And here's my attempt at modeling my new scarf without being too awkward (yup a headless camera selfie in the mirror, I'm cool like that....)

DIY infinity scarf tutorial

Have I inspired you to give it a try?  I hope so... making scarfs is fun... all the cool kids are doing it.