Projects

DIY Book Dock

What do you get when you mix a thrifted book and an exacto knife with a diy addict? Obviously, you get an iphone dock. Duh!

DIY iphone dock 3

Ok, so maybe that wasn't so obvious... but anyway...

I was very sick of just having a lone charger cable snaking around on my night stand, so I decided to do something about it.  I found this book at the Habitat for Humanity ReStore for a whopping 50 cents and it had a very pretty cover.  Don't even ask me what stories are inside, because I didn't even pay attention- I'd have to look at the spine to answer that, all I know is that the cover is very pretty.

I started by determining where I wanted my iphone to sit and tracing the bottom (with it's cover on).

DIY iphone dock book

Next comes the fun part!  Start cutting!  I should have used a new exacto blade for cleaner cuts, but I didn't.  My only excuse is laziness- finding a new blade would've taken me like 5 minutes- ain't nobody got time for that!

DIY iphone dock cuts

Once that was deep enough to hold the phone upright on it's own, I started on the hole for the cable itself.

DIY iphone dock hole

I started very neatly with the exacto, but when I realized it would take me half the day to make such a small hole through so many layers of paper, I busted out the drill.  #ilovepowertools.  The drill wasn't as neat, but it got the job done!  Warning: drilling paper creates a lot of dust.

DIY iphone dock drill

Once I was able to fit the connection part in the aforementioned hole, I needed to cut a channel for the cord to exit (very technical, you see)

DIY iphone dock cord

When I closed the book, the cord was nicely tucked in and the lightning connection was sticking out the top of the phone slot like so.

DIY iphone dock book2

All that was left was to move it to my nightstand, plug it in, and style!

DIY iphone dock 1

DIY iphone dock nightstand

The lamp may or may not be another DIY target in the near future.  (hint: it may also involved the wood veneer I showed you last week)

Everything looks so much neater without stray charging cables hanging around.  Bonus: now I don't have to worry about the cable sliding off the table and having to fish it off the floor or from behind the nightstand!  Win-win!

DIY iphone dock 2


DIYs in the Wings

After a super busy weekend, I've already fried myself working overtime on the flip this week, and it's only Wednesday!!  oy.  I was totally planning to have a super stellar DIY to show off to you today, but even with all the supplies ready, these projects won't do themselves.  Soon, my dears, soon! Rest assured, though, that I have several super cool DIYs coming up that I'm excited to tackle!

One involves receipt paper,

paper to diy

another will use a sheet of wood veneer,

veneer to diy

yet another will repurpose one of these thrifted books,

books to diy

and the one I'm most eager to do has something to do with this antique horn.

horn to diy

Are you intrigued?  Hopefully I've piqued your interest enough for you to come back on Monday to see which I tackled first!

See you Friday with Frankie the Fliphouse's latest (super sexy) updates!

Happy Hooks

For longer than I care to admit, my sister had been not-so-subtly hinting to Crafty Auntie Karen, that Cutest-Nephew-Ever Eli needed wall hooks in his room for his towel and bathrobe. (phew, that was a mouthful of a sentence!)  Well, for Christmas, I finally delivered. Boys room hooks

This was such a quick project, but I love how it turned out!  Cute enough for a little boy's room, but not so cutesy that it'll get swapped out when his interests change.

I apologize for not taking any progress pics, but I can assure you they'd be very boring since this project is so self-explanatory.

multi-color rustic kid hooks

The piece of wood started it all.  I found it in the woodworking section at Michael's and with a coupon, it ended up being right around $5.  2 of the hooks I already had, and the third came from from Hobby Lobby for just a couple bucks (on sale as well).  The hooks, which started as silver, white and black, got sprayed with spraypaint that I already had in my paint collection, and were then screwed to the wood.  I did splurge on new screws so they'd be uniform and shiny.  After it was all said and done, this cute set of hooks cost less than $10!

So to recap the exhausting process:  spraypaint 3 hooks.  attach 3 hooks to piece of wood.  hang on wall.  Ta da!!

multi-color rustic kid towel hooks

This project could easily be fancied up for a girl with different colors or more detailed hooks.  Seriously, the possibilities are endless!

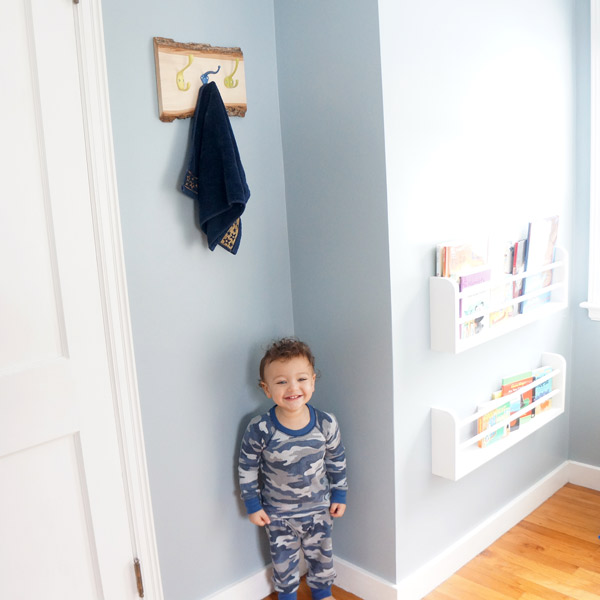
I consider this a monstrous success simply with how happy Eli is with them.  If you ask to see his hooks, he'll happily take your hand, lead you upstairs to his room, then proceed to yank everything he can reach off the hooks.  Just look at that innocent face.

Eli and his hooks

Yeah... maybe innocent isn't the right word.... anyway, he's still adorable, and I'm happy that he loves his new hooks!