Projects

DIY Horn Amplifier

About a month ago, I showed you a teaser of this antique horn I intended to DIY. antique horn

I snatched it up from an antiques market nearby for $10 and I knew exactly what I planned to do with it straight off the bat.

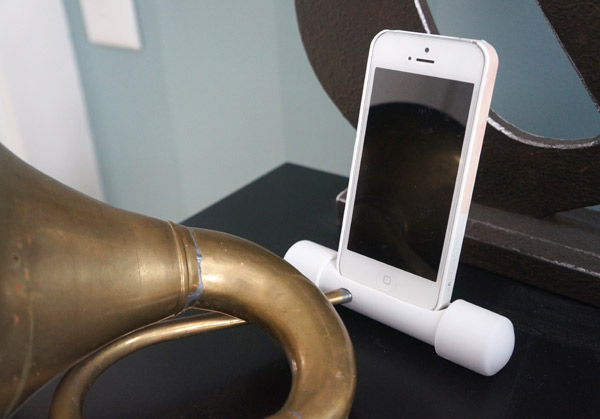
Doesn't it look like and iphone speaker/amplifier to you?

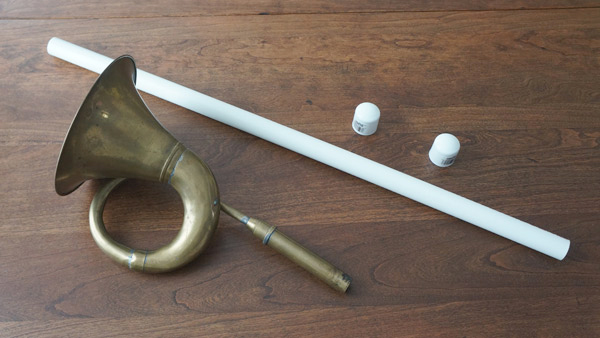
antique horn diy pieces

Ok, how about now?

antique horn iphone amplifyer / speaker DIY

And it works!  It almost doubles the sound output of the iphone speaker and it's pretty.  Sold!

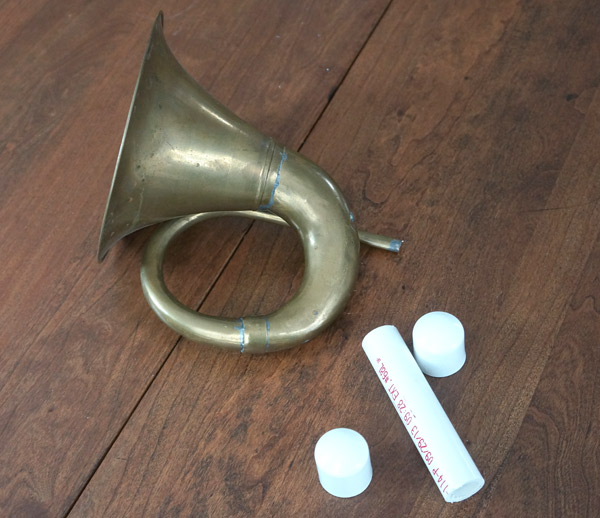
I started by trimming the extra length off both the horn and the pvc tube.

horn diy pieces trimmed

Then, with the end caps on the pvc, I neatly (ha!) traced approximately where my phone would sit.

pvc iphone trace

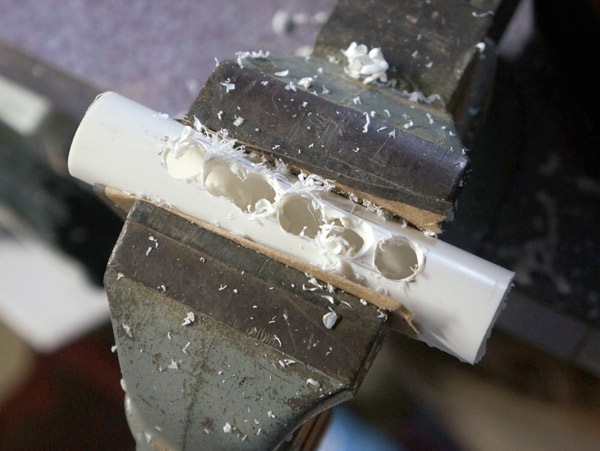
I placed the piece in my vice and used a drill to open up the slot.

pvc iphone drill

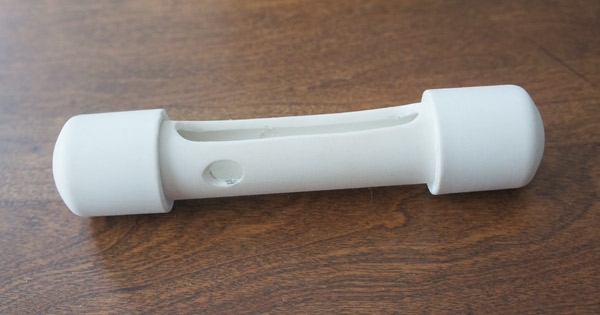
After drilling, I used a file and sandpaper to smooth out the opening and make it just right for my phone to sit in.  I also used a fine sandpaper over all the exposed pvc and end caps to remove any markings and shine.  Eventually, I ended up with this:

horn diy pvc

All that was left was putting this together with my cool horn.

antique horn iphone amplifyer / speaker closeup

How fun is it that a few cheap pieces of PVC and an old horn can turn into this?

antique horn iphone amplifyer

I love the idea reusing something probably close to 100 years old to enhance a piece of modern technology.  Are you swooning with me?

antique horn iphone amplifyer from above

I'm linking this project up over at East Coast Creative and throwing my hat in the ring for Creating with the Stars.  Come over and click on my project (I'm #61) and show your support!

antique horn iphone amplifyer style


5 Minute DIY Key Chain

I've been itching to play with leather for quite a while.  Now that Hubby and I are sharing a single key to our new (to us) car (a reluctant purchase to replace our falling apart old suv), we needed a keychain that we both could live with.  Challenge Accepted! DIY key chain parts

I picked up a remnant of leather from the fabric store and a rivet kit from Michael's (with a coupon) and decided to have a bit of fun.

DIY key chain cuts

I cut a piece of leather in the desired shape, then folded it through the key ring.

DIY key chain rivet

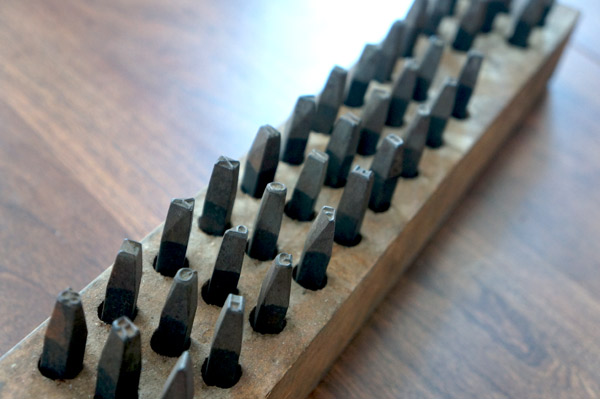
Once I followed the riveting directions (pun intended) I ended up with a cute leather unisex keychain, that took me a total of 5 minutes to make.   But I couldn't just leave it there, oh no, although I should have.  I had also been itching to use metal stamps once used by my grandpa and thought I might be able to get it to work on the leather.  Not my best idea.

metal stamp block

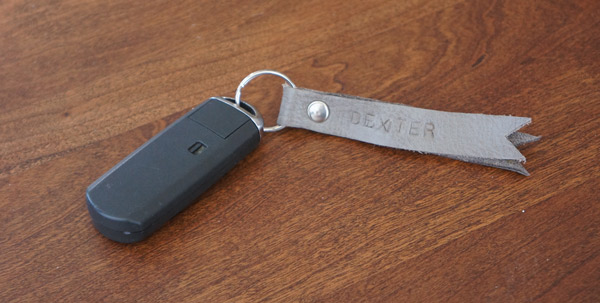
Although not an epic fail, it didn't exactly work as planned... I'm blaming it on the leather... it was too supple.  That's what I'm going with, ok?

DIY key chain stamped leather

Yes, Dexter is the car's name... yes, we name cars.... people probably think we have kids when we talk about who's taking Dex and who's taking Lola that day (yes, Lola is our other car.... she's kinda slutty and likes taking her top off....she's a convertible).

Anyway... I called a do-over and repeated this process without the stamping.  Much better.

DIY key chain leather

I'm already racking my brain to come up with awesome projects that I'll be able to successfully use the stamps metal on.  Oh the options!


Chalk it up

ikea-hack-home.jpg

Back when I was at IKEA shopping for Frankie's kitchen a few months ago, I picked up this guy, the LUNS chalkboard, with staging in mind. ikea luns board

It's lacking a bit of personality, but for $15 I knew I could Tim Gunn it ("Make it work!")

In reality, as you can see from the pic below, the wood was very light- nice for some spaces, but clashed a bit with the wood cabinets in the kitchen where I planned to put it.

ikea board hack before

Luckily, light wood is problem easily remedied with a bit of stain, so I attacked it with Minwax Polyshades in Bombay Mahogany that I already had in my arsenal.

After one coat, it wasn't drastic, but added the richness needed to stand up against the reddish-brown cabinets.

ikea board hack stain

Stain alone wasn't enough to kick up the personality, so I painted the box below the chalkboard with the wall color and added a fun corner detail.

ikea board hack paint

The top corners each got 2 strategically places screws (for decoration only) and sprayed with a hammered silver spraypaint.

ikea board hack corners

After everything had dried and I pulled off the painters tape, I listened to the little IKEA cartoon man's assembly instructions, then proceeded to have fun playing with chalk.

welcome home wall

To help orient you, this little section of wall is in between the living room (left) and the kitchen (right).  I'm also making an attempt at not-so-subliminal messages for potential buyers.  I think it screams "BUY ME!!" but in a classy way.

ikea hack board welcome

Just a few small items left to stage and the upstairs will be ready for it's photo shoot!

DIY ikea hack welcome home

The basement, however is another story.  Another messy, neglected story that I need to hustle on this week.  Let's all keep our fingers crossed for no more snow days and an amazingly productive week!