Projects

Grover: Weeks 1 & 2

The computer gods are not smiling on me today.  I'm currently blogging from Hubby's PC because attempting to plug an unapproved iphone cable into my Macbook caused it to implode (ok, maybe not implode, but suddenly go dark and not turn back on). boooo.  It has a dr. appointment at the Apple store this afternoon.  Wish me luck! Now back to your regularly scheduled programming.

I hope you enjoy these weekly updates as I learn to navigate through the business of flipping houses.  Check out  more about this flip, Grover, or check out posts about our last flip HERE.

I know I just introduced you to Grover last week, but this is technically the end of week 2.  Light demo started last week as I tried to work out my plans for this house.  With previous flips, I had my gameplan prior to closing and went in guns blazing on closing day, but since we closed on this when I was still finishing up Frankie, that was not the case here.  Good news, though, I have it figured out!  Now I just have to execute my plans.... the easy part.... right?

In the past 2 weeks, I've succeeded in making the house look worse.  It has to get worse before it gets better though.  (apologies for the quality iphone pics.... must remember to bring good camera...)

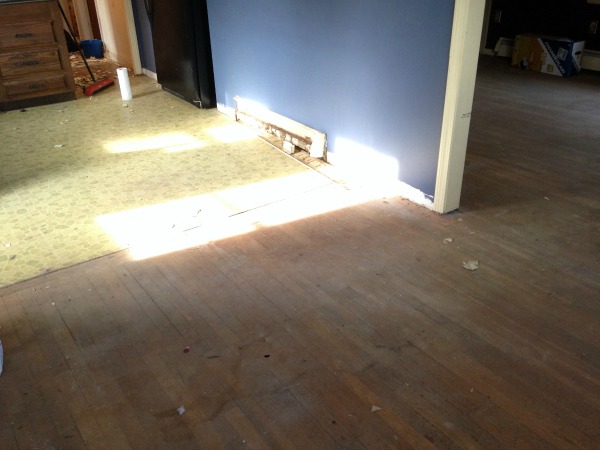
Original hardwood floors were hidden by horrific laminate.  They're covered in carpet adhesive and have a bit of pet staining, but they are going to buff up nicely!  To quote Nicole, HGTV's Rehab Addict "Why in the hell would you cover that up?!"

hardwoods

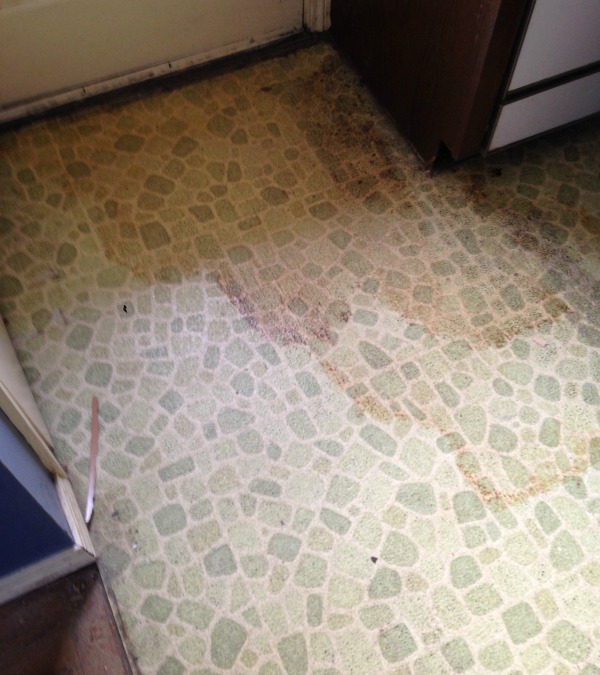
Those floors are really what I'm most excited about.  Especially since I'm planning to rip out the icky, stinky, linoleum in the kitchen:

kitchen floor

and replace it with gleaming new hardwood floors in there too!

kitchen floor wood

Since the hall and bedrooms still have the original hardwood floor as well, completing the wood in the kitchen will make it hardwood floor throughout.  Swoon.

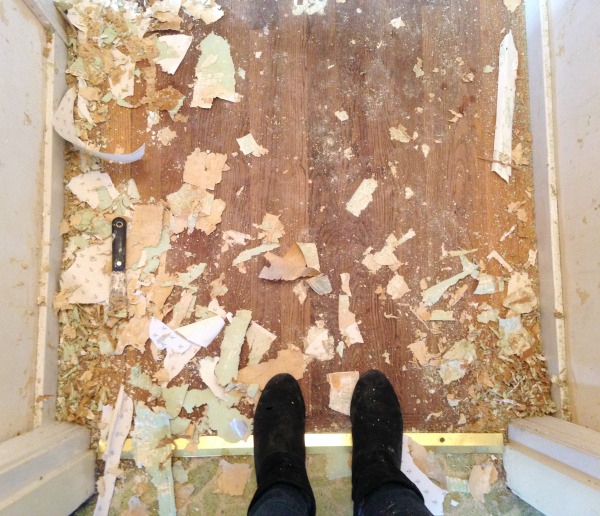
I haven't smashy smashy'd the kitchen yet, I've been focusing on much more tedious tasks such as tearing down multiple layers of wallpaper and removing tile in the bathroom.

wallpaper floor

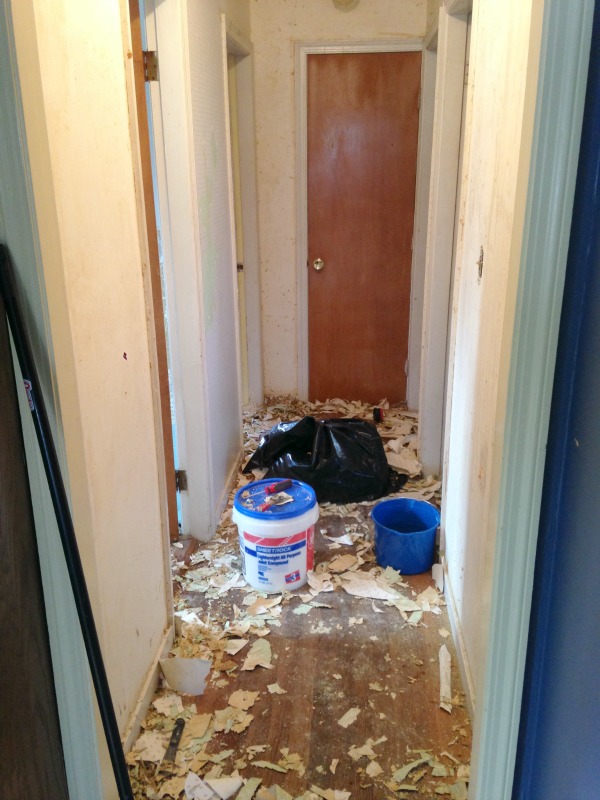
Ah wallpaper... what a fun task...  Thankfully, the hallway will be wallpaper free by the end of today (Wallpaper detail post coming next week, per request).  I've spend most of my week in one of the smallest areas of the house.

wallpaper hall

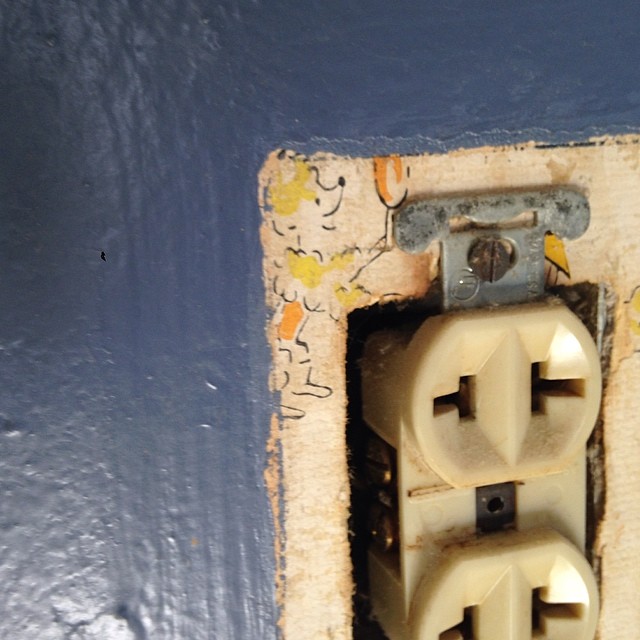
So far I have located 5 different wallpapers in the house.  2 layers in the hall, 2 hidden behind the bathroom mirror, and 1 that was painted over many many times in the kitchen.  Isn't the lollipop poodle cute?

poodle wallpaper

Since this was painted over SO MANY TIMES (and I'm taking down half of the wall anyway) I'm not actually removing it.  It's cemented in there by now and aside from at the switchplates, you can't tell there's any wallpaper there anyway.

And speaking of amazing wallpapers, when Handy Dad and I pulled down the bathroom mirror to find another remnant of wallpaper, "WOW" was the only word.

upic wallpaper

Let me assure you, it's much more impressive in person.  Neon green with gold glitter.  I'm framing this!

I have also started the de-blue-ification of the bathroom.  Bye bye blue tile.

bathroom progress1

Although I'm all for embracing retro tile if they're good quality, this tile was not.  The previous owners had even covered part of it up in the shower with cheap paneling.  shower wall

They had apparently taken a part of the original tiled wall out and layered up 3 sheets of backer board under the paneling... not exactly the way it should be done.  The shower will soon be gutted and done the right way.

The much less messy (and subsequently less interesting) things that have also been accomplished in the past 2 weeks are:

-getting quotes from electrician, contractor, flooring guy, window guy

-planning out the IKEA kitchen

-working out the budget

I still have a lot of work ahead of me, but with each house, it feels less daunting.  My next step is to work out the timeline and schedule.  What needs to happen in what order to be most efficient?  I really can't wait to get the kitchen wall down and get the floors in, though.  I just hope it's half as epic as the picture I see in my head!

Meet Grover

I hope you enjoy these weekly updates as I learn to navigate through the business of flipping houses.  Check out  posts about our last flip HERE. Flip #3 has officially commenced!

We closed on Grover just over a month ago when I was still finishing up with Frankie, so he got put on hold until I was ready to dig in.

WARNING: lots of pics of a dingy house ahead!

grover-before1

grover-before2

Lucky for me, the exterior doesn't need a TON of attention.... new lamp post, new mailbox, cleaning up, etc.  The inside requires much more attention.  I swear it gets worse the further in the house you get.

Just inside the front door, you find the very red living room with the worst laminate floor in history.

grover-before3

Why yes, that is door trim used as base board in half of the house.

grover-before4 grover-before5 grover-before6

Bad paint jobs, dingy trim, foggy windows, and dated built-ins are the things flipping dreams are made of.

grover-before8

Guess what wall I'm hoping to take down!  It is structural, so it'll take engineering and permits, but I think the results will be worth it for resale.

grover-before9

Yes, that is another fake wood laminate.  Not the worst kitchen by far, but oh so dated.  JUST WAIT until you see what I turn it into.  The possibilities make me giddy.

grover-before10

But it just keeps getting better.  On the way to the bedrooms and bath, you hit this lovely hallway.  Which has multiple layers of wallpaper.

grover-before11

And then comes the bathroom.

grover-before12


grover-before14


grover-before13

The bedrooms don't need a total overhaul, just a bit of love.

grover-before15 grover-before16

I swear my camera wasn't broken- the colors in this house play tricks on your eyes.

grover-before17 grover-before18

And in the basement there's a very strange room that I'm not quite sure what to make of....

grover-before19

And last but not least..... the neon seafoam garage...

grover-before20

I certainly have my work ahead of me with this house!

Copper Shopping (list)

Let's check another item off of my DIY teaser list.  A while back, I told you I had a DIY planned with this receipt tape. receipt paper to diy

Well, it's finally put to good use as a shopping list!

diy copper wood shopping list

I've seen this in my head for so long, I'm glad to get it out and into reality.

I used a block of wood, receipt paper, 2 sizes of copper pipe, and screws.  You don't get much simpler, I swear!

diy copper wood shopping list pieces

I decided to start from the bottom and work my way up.  To do the bottom piece that will hold the paper, I flattened out a portion of pipe.  I found the best way to get a smooth surface was the put the pipe between to blocks and hammer it that way.

flatten copper

With a flat-ish piece accomplished, instead of cutting it to length, I bent it until it broke in the intended spot.

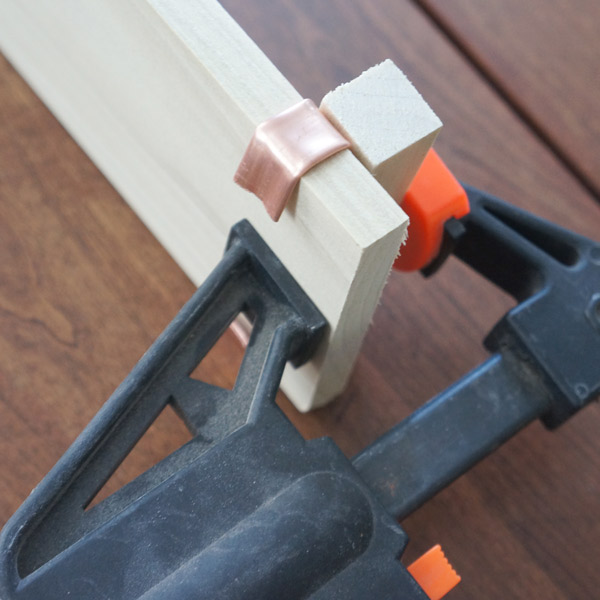
Next was to bend it around the wood to the desired shape.  I used a scrap piece of wood to bend this around so that if I made any mistakes I wouldn't damage the finished stained piece.

wood blocks

Isn't that a sexy backdrop?  I'm innovative, huh?  (the paper towel was originally for the stained piece to make sure it was dry, and I figured it shouldn't go to waste)  .... SO... to bend the copper without denting it, I clamped it in the desired spot with another block of wood, then bent the ends around the wood.

clamped copper front clamped copper

The upper piece was slightly trickier to bend because it took me holding the roll of paper in place.

list progress

I couldn't clamp this one because the roll would deform, so I had to hold with one hand and bend the piece around the wood with the other.  I'm just DIYing until my hand-modeling career takes off.  Man hands are the next rage.

On the front where I hadn't flattened the pipe, I used a hack saw to cut it to length- being very careful not to push too hard and deform the copper.

copper cut

I repeated the last few steps with a smaller piece of copper for the other side.

copper wood cut pieces

Then came assembly- always the best part!  I drilled holes in the copper where the screws would go, then attached the pieces where desired.  The back ends up being less than pretty, but since that'll be up against my cabinet door, it doesn't matter.

copper wood shopping list back

I'm using my favorite mounting method- 3m's re-positionable picture hangers so I can take the list down when I need to replace the receipt roll.

diy copper wood list

It'll actually be pretty simple when I need to replace a roll.  See how on the right, the smaller tube goes into the larger?  I'll just need to unscrew the smaller tube from the back and remove it, switch out the paper roll, then rescrew the small tube back in place.

diy copper wood list cabinet

Have you ever seen a sexier shopping list??  Methinks not!