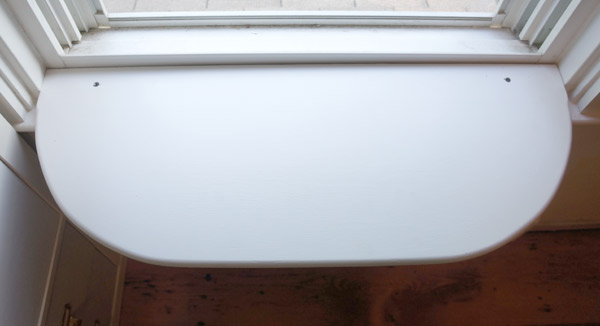
What crazy cat lady office would be complete without a custom diy cat perch?

For many many years (ok, 5), we've put up with having a not so pretty brown cat perch hanging out in our home. I'm pretty sure the people who mass produce affordable cat furniture are dog people who just want cat people to suffer with ugly cat accessories. It's a valid theory. But I kinda dig those crazy little furballs and they like sitting in the window, so it was a sacrifice that I was willing to make.
Since I took the floor renovation as good excuse to redo my entire office, that meant it was time to do something about the perch too. (side note: boy do I NOT miss that stained carpet, mismatched baseboard and exposed coax cable #rightdecision)
The only cost with this project was a few bucks for the shelf bracket. I used a shelf I removed from the hall closet for the perch itself and scraps for the other supports. After measuring the width of the window and marking my piece of wood, I also used a scientific tool for creating curves: I folded a piece of paper diagonally and cut out a curve and traced it... Hey, it worked!
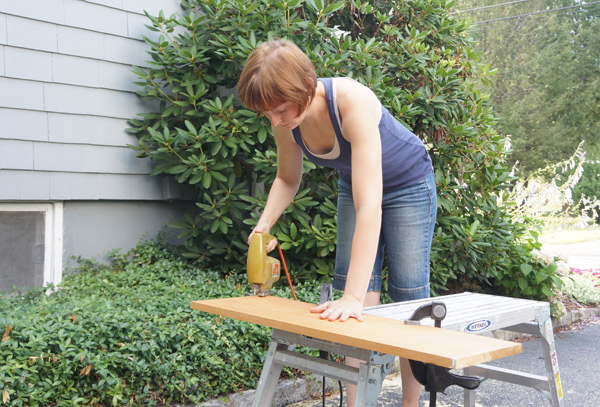
Once I had the shape all figured out, I brought out my delightfully modern jig saw. Check out that avocado color! Tres Chic!
Slow and steady, I cut the curves and I smoothed them out a bit with my palm sander.
My curves weren't perfect, but I decided not to stress about it- my intended audience wouldn't judge. Actually they would, but not about a crooked curve- they're more likely to judge about why I haven't fed them yet.
Since my window sills have a bullnose edge to them, I wanted to match the edge here. A router is one tool I don't have yet, so I always borrow Handy Dad's, but you could always skip this step and use sandpaper to ease the edges.
I routed both the front and back, then sanded quite a bit more. Fast forward and the perch and a few support pieces (you'll see their purpose shortly) miraculously got 2 coats of Dune White trim paint.
For the install, I started by screwing the perch directly into the window sill.
I was rather shocked at it's sturdiness already, so I made the executive decision to use only one shelf bracket below instead of the 2 I had originally planned. This is also where the support pieces come in: I didn't want to cut out the window sill, so I needed a few spacers (out of scrap pieces) to make the bracket work. I used this bracket from Home Depot.
It took them a few days to warm up to their new perch, but now, much like the old one, it's the place to be.
Aside from being much easier on the eye than the nubby brown one, this diy cat perch is also worlds sturdier than the last one. If I could fit on it, it would hold me. Too bad I only made it kitty sized.
I could keep talking about kitty perches for days, apparently, so I'll do exactly that- come back tomorrow for a quick post about how I made the coordinating cushion! UPDATE: check out the cushion how to here.


