
Back when I designed my nephew's room 2 years ago, I incorporated this print:

My sister fell in love with the sentiment and wanted me to incorporate those words into my niece's room. I've been rather cryptic with my plans but keep telling her "don't you worry, I have plans for it!" Well, Dear Sister, guess what's soon going up on your wall?

Cursive DIY wire word art. I'm calling this a 'teaser' post, since I have yet to install this beaut. I've wanted to include this in Lyla's room since I knew my sister was expecting again. The wire words just ad such a whimsy without being cutesy or kitschy- both of which we wanted to avoid in her house.
Once I sat down to try my hand at these words, I was pleasantly surprised how easy it ended up.

The only things needed to create this are:
- printed word templates- I use the font Halo Handletter and played around with sizes until I liked the scale
- aluminum wire- from the jewelry section of the craft store. Mine was copper finish, but was also available in black
- wire cutters
- steady hands
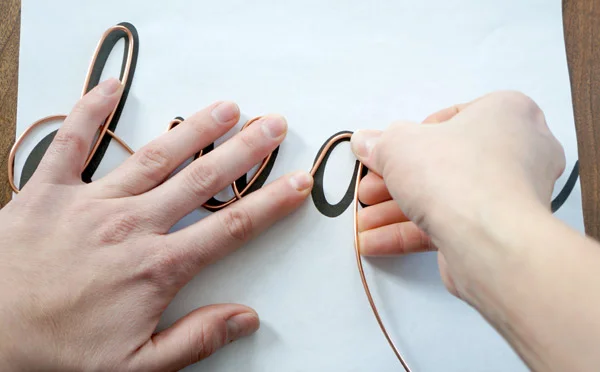
This is surprisingly easy to do once you have a template.
Starting your first letter, leave a tail of a few inches. This will allow for mounting later.

The wire is so pliable that all you need to do is gently hold it in place where you want to bend and slowly bend it following your template.

Perfectionism is actually a detriment to this project. Once you make a bend, only minor tweaking or smoothing can be done. If you man-handle the wire too much, you'll lose the smooth look and it'll start getting kinks.

If you're doing a longer word like "dream" here, for the second half takes a little bit more coordination to align it with your template. That's why an imperfect cursive font is ideal- if you letter is a bit off of the template, once complete, no one will be any the wiser.

Once complete, you have wonderfully economical statement art.
Now you just have to decide what you want to do with your words or phrase. If you plan to lean them on a shelf, you can simply trim off the tails at the beginning and end and style them on your shelves. Since I plan to hang this on a wall slightly offset, I bent my tails backwards. I'll go over what worked and didn't work for wall-mounting once I get them up in my niece's room.
I'm loving this project so much, I'm debating making them to sell in my etsy shop. Any buyers?