holidays

Blog it Forward

bif_badge_250x250.png

Blog it Forward with Wayfair This month, Wayfair is challenging bloggers to Blog it Forward.  Especially with all the unhappy things going on lately, I'm totally on board for spreading a bit of cheer!

Yesterday, I saw a news story about an 8 year old girl who lost her family in a fire in 2013.  Safyre suffered burns to most of her body as well, but she survived miraculously.  Despite her injuries and circumstances, this little girl, according to her aunt "wakes every morning with a smile on her face. She is the true definition of hope, faith and love."  If that isn't inspiring, I don't know what is!

This Christmas, Safyre told her aunt that she wanted to completely fill up a 4' tall card tree that her aunt had purchased.  Challenge accepted, Safyre!  After posting her wish to Facebook, Safyre's aunt has been overwhelmed by the response.  What better way to Blog it Forward than to put a smile on the face of a little girl.  The holiday cards that I had on hand seemed oddly appropriate, quoting Oscar Wilde "What is beautiful is a joy for all seasons..."

Blog it Forward with Wayfair- Joy for all seasons card

Right before I popped it in the mail, I thought about what might make an 8 year old smile.  I addressed it with a gold pen, and grabbed out my colored pencils to put a very quick doodle (don't judge- it's for a child...) on the envelope.  Then I added Daisy and Charlie's names to the inside of card "Meow."

Blog it Forward card for Safyre

If you'd like to send Safyre a Christmas card, here's the address: Safyre, P.O. Box 6126,  Schenectady NY 12306

There are so many other ways that you can share the love and hope this holiday season!  What about paying for a stranger's coffee, shoveling a neighbor's driveway or simply holding a door open with a smile? With so many people stressed out and rushing around, you'll be surprised by what a seemingly simple act of kindness can do.

#blogitforward

If you are also a blogger there's an extra special way that you can pay it forward as well: for each blogger in the month of December who posts about spreading cheer with the Wayfair Blog it Forward button above, Wayfair will donate $50 to Habitat for Humanity.  Win-win!

How do you plan to spread a bit of cheer this holiday season?


DIY Crepe Tassel Ornaments

While my Christmas decorating isn't quite done yet, the tree is set which makes me happy.  Few things set the tone for the season like the glow of a lit Christmas tree.  This year I wanted to add a little whimsy to the tree by making some crepe paper ornaments. DIY crepe paper ornaments -via Year of Serendipity

These are so easy to make and add a fun texture to the tree.

All you need is:

  • crepe paper
  • floral wire- 18 gauge
  • floral tape
  • scissors
  • wire cutters

DIY crepe paper ornaments -via Year of Serendipity

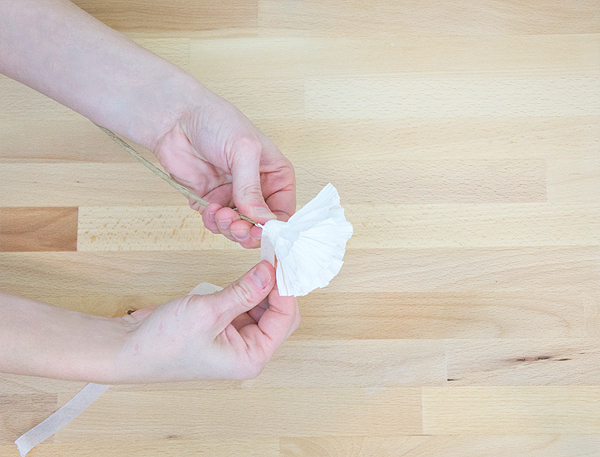
First you start with a strip of crepe paper about 2 inches wide.  For length, I cut them about as long as my arm.  You can make this longer or shorter if you want to make different thicknesses of tassels.  This is the hardest step.... are you ready?  Put the strip on the table and start bunching it together.  Use your fingers to pull the crepe paper toward your thumb, creating small, irregular pleats.

DIY crepe paper ornaments -via Year of Serendipity

DIY crepe paper ornaments -via Year of Serendipity

To attach it to the stem, use the 'gather and wrap' method... which is exactly what it sounds like.  Gather a pinch of the paper and put your stem into it.  Use one hand to hold the tassel and stem and use the other hand to gather another pinch of paper and wrap it around the stem.

DIY crepe paper ornaments -via Year of Serendipity

Continue to "gather and wrap" until you reach the end of the paper.

DIY crepe paper ornaments -via Year of Serendipity

Next, wrap your floral tape over the bottom pinch of the tassel where you see my fingers holding above.  Start at the bottom of the tassel and wind the floral tape at a slight diagonal, stretching it just a bit.  Wind it down from the tassel onto the stem a few inches.

DIY crepe paper ornaments -via Year of Serendipity

Voila, you made a tassel!

DIY crepe paper ornaments -via Year of Serendipity

To make this tassel into an ornament, use your wire cutters to trim the stem about an inch from the base of the tassel and fold it over.  This will give you a place to attach an ornament hook.

DIY crepe paper ornaments -via Year of Serendipity

Attach ornament hooks and start decorating the tree!

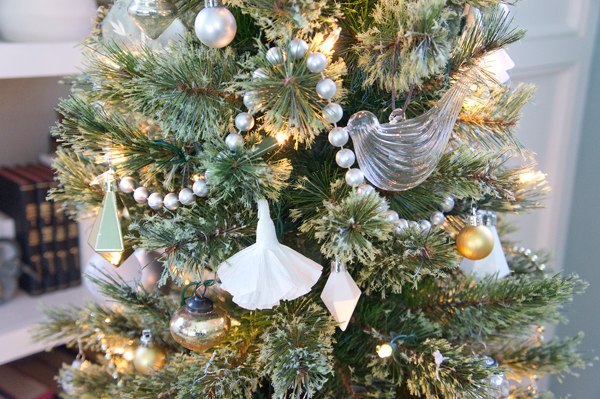
DIY crepe paper tassel ornaments- Christmas 2015 -via Year of Serendipity

After installing my floor to ceiling book shelve last year, the short, squatty, fake tree that I've had for years just felt out of proportion.  This year, when I stumbled on a 6' pencil thin tree, I knew it would be the perfect fit for the limited space in front of the book shelves.

DIY crepe paper tassel ornaments- Christmas 2015 -via Year of Serendipity

The crepe paper ornaments add a touch of fun and "fluff" to the mostly neutral tree.  I'm actually tempted to make a mess of these ornaments and adorn a tree head to toe with them.  Like little jazzy snowflakes.

DIY crepe paper tassel ornaments- Christmas 2015 -via Year of Serendipity

And because dancing ornament gifs make me smile, I'll leave you with the same image that started this post.  Happy weekend!

DIY crepe paper tassel ornaments- Christmas 2015 -via Year of Serendipity

DIY to TRY: Ornaments

Welcome back!  I hope you had a wonderful Thanksgiving!  Last week was a little blog break for me as you may have noticed.  I took some time to clear my head, brainstorm for a better blog, and naturally spend time with family over the holiday.  Sometimes a time out is just what is needed. Some years it takes me a bit to get into the Christmas spirit, but this year once we checked Thanksgiving off the calendar, it was game on.  I'm not one to do any over the top decorating, but I do love me some white lights, gold everything, and Christmas music filling the air.  It just puts a smile on my face.

I'll be DIYing some ornaments as I seem to do just about every year, but before I share those later in the week, here's a round up some awesome DIY ornaments that may also make their way onto my tree.

**Please be courteous and click through to the original sources and pin from there.  Thanks!!**

Clay ornaments aren't anything new, but they're still one of my favorites.  Simple and elegant with endless ways to adorn them.  These feathers from 100 Layer Cake are a fun twist on a classic.

100 Layer Cake- DIY clay feather ornament

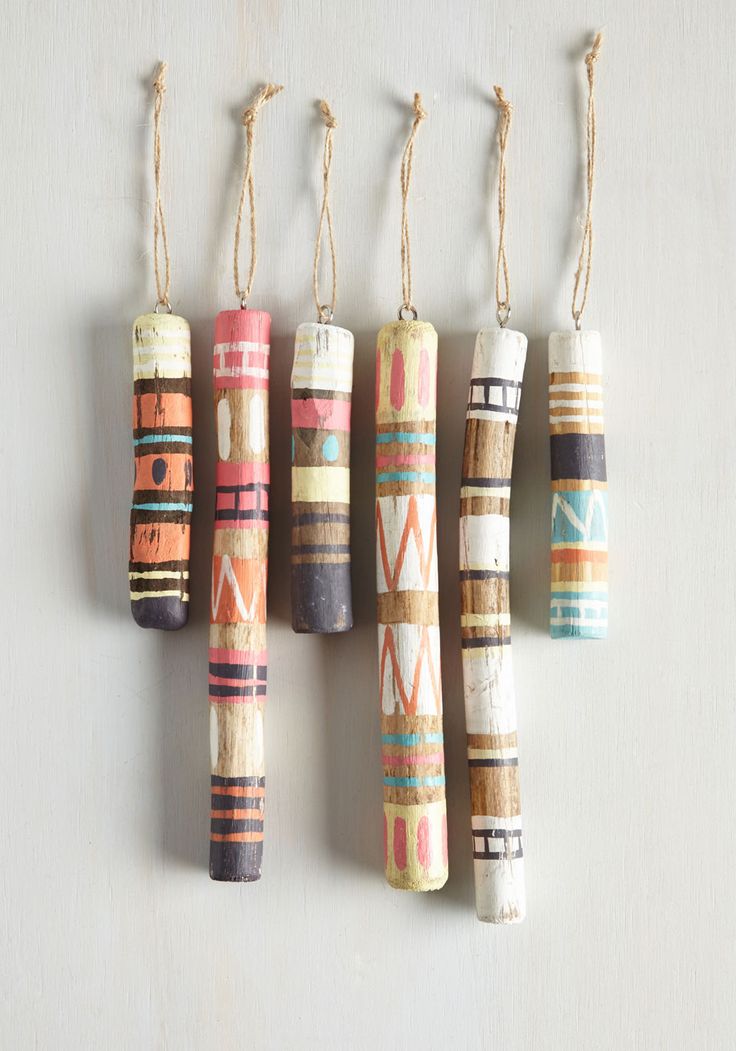
While these aren't currently a DIY, that's where my mind went as soon as I saw these on Modcloth.  Chop a stick, sand it smooth, paint it with fun patterns, sand lightly for distressing, and add hook.  So cute!

Modcloth painted stick ornament

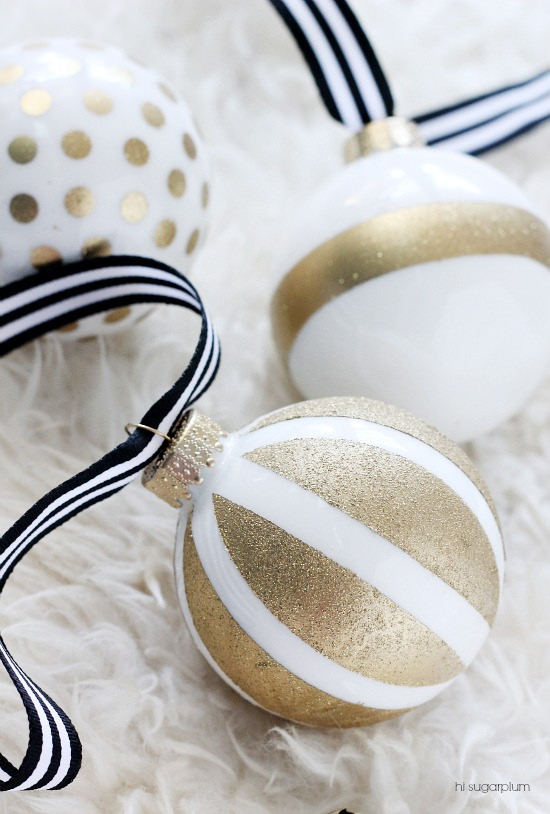
Another simple twist on a classic is these Kate Spade inspired ornaments from Hi Sugarplum.  So simple yet so fun.  I'm clearly a sucker for gold and white... especially with polka dots.

Hi Sugarplum- DIY-kate spade inspired ornaments

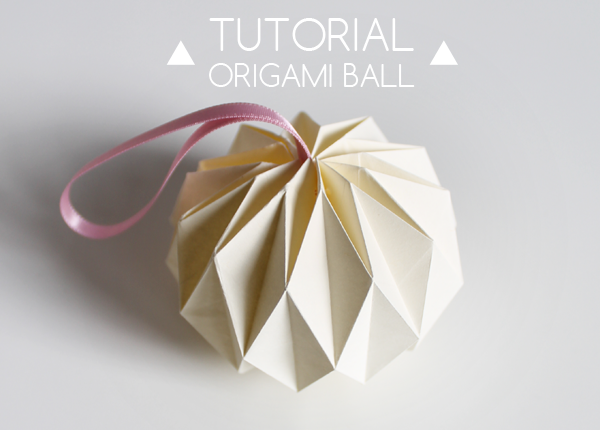
Origami ornaments are another that seem to win me over every time.  While quite involved, these origami ball ornaments from Giochi di Carta are gorgeous.

Giochi di Carta- DIY origami ball tutorial

For a slightly simpler version, these paper diamonds from Design and Form would look wonderful dripping from any tree.

Design and Form- paper diamond diy

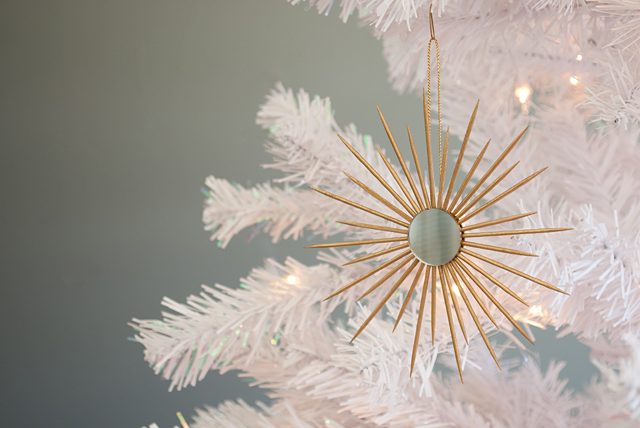
And since I clearly can't get enough gold, isn't this starburst ornament by Brynne of The Gathered Home simply divine?  I came across them when she shared them on eHow a few months ago, but she's sharing them over on her blog today too.

The Gathered Home- gold starburst ornament

What are you planning to DIY for the holidays?