office

DIY TV Cabinet Complete

I'm all done leading you on and ready to reveal my final DIY TV cabinet!  Before we get to the reveal, take a peek back at the building process. Now that I'm working primarily out of my home office/den I wanted to put more emphasis on the home office part instead of the den part.  This meant making the TV less of a focus.  I can't exactly hide the ugly elliptical that also sits in the room, but considering it's behind me while I'm at my desk I can pretend that it's not there.  There was no ignoring the big black box in front of me.

Office progress before

So like any crazy normal person, I decided to build a solution.  It still needs some minor tweaking to allow the doors to slide better, but HELLO!

DIY TV cabinet via Year of Serendipity

To mount it, I screwed the back directly into studs.  I wouldn't hang on it, but it's not going anywhere.

So during Copper Dot hours, the room is all business...

DIY TV cabinet via Year of Serendipity

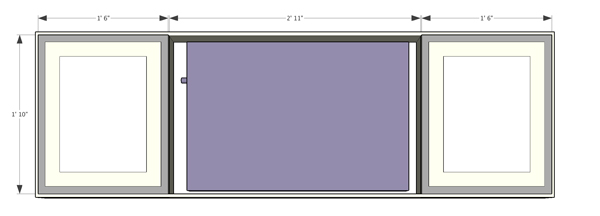
...and when work time is over, the room becomes the den once again and the frames slide open to reveal the TV.

DIY TV cabinet via Year of Serendipity

With the frames being the star (and currently sporting temporary DIY art) I wanted to keep the styling as simple as possible on the sides.

DIY TV cabinet styling via Year of Serendipity

Don't be surprised to see some of this art evolve by the time I get to the final completion of the space.  For now, the 4 frames are filled with art from a $3 Target calendar that I couldn't resist.  It was from "The Spot" so it's not on their site.  That little corner of Target is dangerous....

DIY TV cabinet via Year of Serendipity

Embrace the mess.  Amen!  It's killing me, but I can't find the source of this awesome print.  Even Pinterest and Google Images failed me.  It was a free download ages ago that I've just been waiting to incorporate somewhere.  If you know where it originated, please share- I want to give credit where it's due and share the source with you guys!

DIY TV cabinet via Year of Serendipity

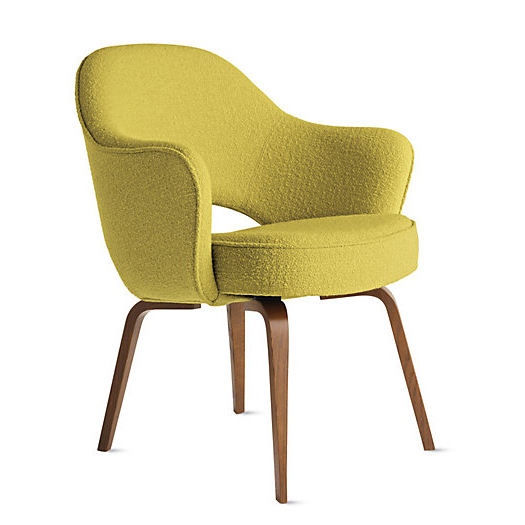
Seeing this part of the room come together just make me eager for the rest of the pieces to come together.  A roman shade, finishing my chair, and refacing the cubbie fronts will put the cherry on top of this make-over.

So what do you think??  Was my DIY TV cabinet worth the wait?


Franken-Chair Plans

Ever been so eager to start a project that you forget to take proper before pictures?  Me neither.  I would never do that...... Since reworking, rearranging my office and getting a proper desk a few months ago, I decided that this very sad vintage chair that I adopted at Brimfield several years ago was just the right piece to add some mid century pizzazz to the room.

brimfield-mcm-chair3

I'm ashamed to say that I've been sitting and working in this pre cat clawed (not from my cats!), musty, old pleather chair ever since.

brimfield-mcm-chair2

The seat height was a bit too low and I craved a chair on casters, so I held off on doing anything to it until I had a plan.  First step was to make sure that I wasn't sitting on a mid century gold mine.  The chair looks suspiciously like the Eero Saarenin Executive Armchair- even down to the color.  The official version of this chair is still available new for the paltry sum of $1800+.

eero_saarinan_walnut_chartreuse

Lucky for my franken-chair plans, mine is just a close reproduction.  Without a makers mark or tag, I had to rely on checking the dimensions against the original designer chair.  While close, a half inch shy of the designer width and thinner seat cushion told me my chair wasn't worth thousands.  It would be cool to own a vintage designer chair (that I procured for only $25), but I now have the freedom to make it the chair I want instead of the pressure to restore it originally.  Can you see my wheels turning?  I tried to think of how I could add casters and raise the seat, but no casters would work with those original legs.  I was at an impasse.

Enter trash chair.  (which was in 1 piece when I found it, but I swiftly picked it apart, whoops)

trash-chair1

trash-chair2

This beauty had been sitting in a neighbor's trash pile for days.  Since I'm a recovering chair-a-holic (ha recovering...), I was trying NOT to grab it even though it called to me every time I left my house and had to pass by the pile.  Finally I gave in.  At the end of a run one day I grabbed the chair and wheeled it down the street and to my yard without a plan for it.  I just knew that this cool old chair did not deserve to end up in a dumpster.  The wood part of the base was loose and the top had seen better days- much better days.  While not beyond repair, the top is certainly in the sorrier state and won't be needed for my plans.  I probably can't bring myself to get rid of the top, though, but it will be set aside and the base is getting a new life.  Because look at this beautiful base.  It's all about that base, that base...

trash-chair3

Wow, I wasn't planning on being so verbose today.  I guess I have a lot to say about chairs.  It's a real problem folks.  Check back next week to see how I plan to make these 2 vintage gems into the perfect office chair!

Feel free to feed my chair addiction on instagram and tag your chair discoveries with #chairhoardersanonymous


More Office Progress

Since my last Office Updates post, not a whole bunch has changed.  I should really know better by now than to try and do any projects in my own home while in the midst of a flip.  While the to do list hasn't gotten shorter, I have been making progress towards completion now that I've shifted my focus back home. To recap and refresh your memory (since it was months ago and who can remember that far back)... so far this room has gotten:

-Uncovered and refinished 100+ year old wide plank pine floors (happydance)

-New baseboards and trim to match the rest in the house

-Repainted walls

-A new layout and new (to me) antique desk

-Cable ran through the wall so it doesn't wind around the entire room's baseboard anymore (another happy dance)

-Custom cat perch

-A new light fixture

office-progress-3

The remaining To-Do list for this itty bitty room is:

-Create cabinet to hide TV

-Make pillows for settee (one is made!)

-Make or buy roman shade

-Reupholster and put rolly base on vintage chair

-New knobs and paint cubby doors

-Way way in the eventual- refinish antique desk (so far in the eventual that it'll probably be 5 years away, but a girl can dream)

-Hang plants in corner next to window

-Metal pipe picture rail above settee

-Style and organize! (let's add a few !!!!! to this item for good measure since it's the most fun part)


A rather long list for a room that's less than 100sf, huh?  But it's doable... I just need to DO it.

The first item on the remaining To-Do list Handy Dad is currently helping me with.  A custom TV cabinet.  Since this is my office primarily and den/tv room secondarily, I want to be able to cover up the tv with some pretty art and have it be out of sight out of mind when I need to focus on working.

After much debate and back and forth about how to engineer it, I ended up planning a shelf system with sliding doors.  I'll apply store-bought frames to the doors after construction and the art (hopefully) will slide with ease.  When the TV is in use, it will be framed out and flanked with beautiful art.

tv cab 1

When not, there will be a decorative shelving unit with statement art in the center.

tv-cab-2

Aside from gray frames and colorful art, the rest will be painted white to match the walls and trim and not get too busy.  Like I said... <100sf.

As for the statement art, I've been positively drooling over this art from etsy.

etsy-art

So far Handy Dad and I have solidified our construction plans and started to cut out all the pieces.  Hopefully we can start the assembly this week!