Bathroom

Happy Feet

House flipping is all about the ROI- return on investment.  Which means that I don't often get to be a frivolous designer and install expensive things just because they'll look pretty and I want to.  With this house, it's actually a slightly different story.  That's not saying I won't be keeping a very tight leash around my wallet, but because of the very specialized nature of this house, certain upgrades will actually be worth it.  Well, one upgrade in particular. I have 3 words for you: claw

foot

tub.

Are you swooning with me?

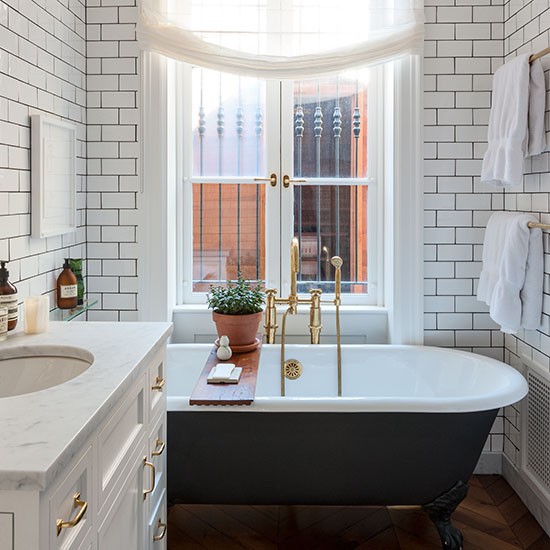
White tiled bathroom with black claw foot tub via house to home

via House to Home

I've wanted one for my own home for as long as I can remember, but since my own tub(ette) is less than 4' long and in our only bathroom, I won't be able to upgrade tubs until we upgrade houses.  I can indulge myself a little, however with this house.  In 1902 these sexy-footed beasts were it and in 2014 they'll help me make the bathroom(s) into a stunning selling feature.

better homes and gardens angled claw foot

via BHG

My current struggle is how to approach the tubs.  Do I try and find old ones that just need cleaning, old ones that need refinishing and try it myself, or old ones that need refinishing and pay the pros to do it for me?  I know you can buy already refinished ones and new replicas, but both would be a higher price tag than I'm willing to pay.... plus, who wants new, when you can have old, cool, and original??  Not this girl!

Young House Love vintage inspired house crash

via Young House Love

this old house favorite bathrooms/vintage farmhouse

via This Old House

I'm also reeling with the color possibilities here.  White tub, metallic feet.... white inside, color outside, white feet.... white everything....  These are the questions that I have so much fun figuring out the answers to!

leivars wimbledon vintage claw foot tub/shower chic bathroom

via Leivars

***If you love these images as much as I do, please click through to the original source and do not pin directly from my page.  Gracias!!***

Board & Batten Bathroom

Before I jump into the "Afters" of my board and batten, I wanted to share some minor restructuring around here.  Hopefully for the better.  I'll still be posting Mon/Wed/Friday, but now you'll know what to expect:  Mondays will be DIYs, Wednesdays will be a series post (craigslist, house crash, or one of a few new ones I have up my sleeve), and as always, Fridays will be flip days.  You may also find a rouge Tuesday or Thursday post in there if I find myself wanting to share off topic.  I think this new structure will help me to come up with even greater content! So I promised you Board and Batten part 2:  finished board and batten and you got it!

board-and-batten-5

When I left you in part 1 last week, I had all the wood pieces up and it was time to patch/caulk/paint, and generally make it look all polished and pretty.

I started this by patching all of the nail holes and any outside corners that may not have lined up 100% with plaster patch.  I know I'm supposed to use wood filler, but for such small, non structural spots, I find the plaster patch so much easier to work with.

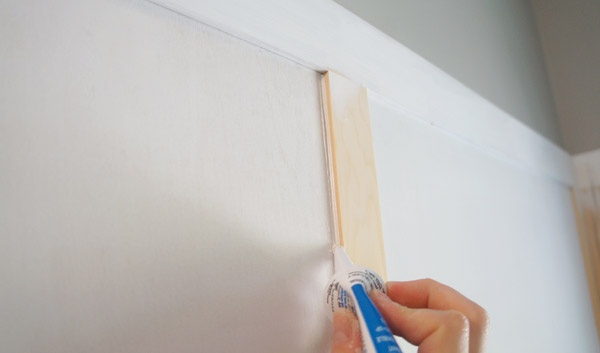
Next, I caulked every seam.  And I mean every.  single.  seam.  This is what makes a homeowner project look like a professional install.  Admittedly, caulking takes some practice.  The first time I tried to caulk my own bathtub, I had to scrape it back out and bribe Handy Dad to fix it for me.  Now on my 3rd flip, I think I finally have a handle on it, so I want to share my tricks.  I like to use the small squeezable tubes as opposed to a caulk gun- I feel more in control over the amount that comes out that way.  I pretty much try to squeeze out as little as possible that will still cover the seam.

bandb-caulk-bead

After I've squeezed out a bead of caulk, I wet my finger, then press it into the joint and wipe.

bandb-caulk-smooth

The water is crucial since it will help smooth everything and make it easier to clean the caulk off your finger.  I actually did this with a bucket of water next to me that I used for rinsing off my hands as I went as well as dunking my fingers to wipe the caulk joints.

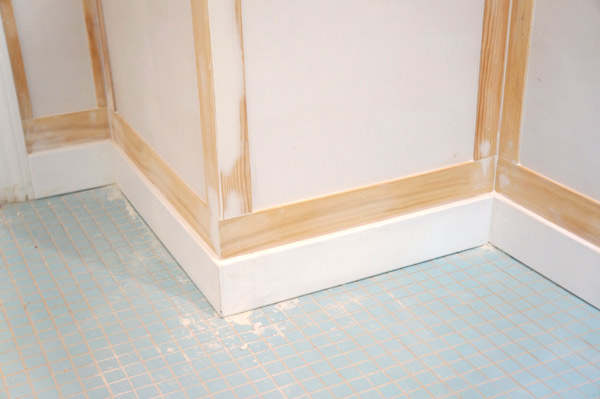
Eventually a corner that used to look like this:

bandb-closeup

Looked like this:

bandb-corner-caulked

Next came the fun part, painting.  Fun.  Or something like that.  With all the joints caulked and holes patched, the paint is the icing on the cake.

bandb-corner-done

board-and-batten-3

board-and-batten-1

I'm so pleased with the way this came out!

board-and-batten-4

It's almost hard now to picture what the bathroom looked like when I bought the house.  Blue galore, and it felt SO TINY.

grover-before12

and now:

board-and-batten

I'm eager to stage it but it will have to wait until the rest of the house is complete and ready for staging.  There's dust still flying elsewhere in the house.  But trust me when I say that once this room is 100% complete and staged, it will be so pin-worthy!  I can't wait!

What do you think of the bathroom transformation?

Board & Batten Beginnings

In an effort to make a would-be VERY VERY long post into just a very long post, I'm breaking up my Board and Batten tutorial into 2 parts.  Welcome to part 1! After ripping down the old, damaged, ugly blue wall tile in this latest flip, the bathroom walls were in sorry shape.

grover-w3-bathroom

Walls like that leave only 2 options: tear them down and start over, OR cover them up.  Last flip I went with the first option, so this flip I decided to have a bit more fun with woodworking.

The planning is the most time consuming, brain consuming, and tedious part with lots of math.  First I planned how high I wanted it.  There was no science to it- I knew I wanted it high to cover all the wall damage and picked a tile grout line to align it with so it didn't feel arbitrary.  It ended up somewhere around 6 feet, but as long as it looks good to the eye, the actual measurement doesn't matter.  If you look closely at the beautiful image below, you can see my horizontal planning pencil line.  I also made sure to plan out where I wanted my verticals to be- I wanted one at the mid-point of the mirror and divided the wall accordingly.

ugly bathroom walls

After a trip to Home Depot to look at my wood options, I decided to use 1/4" thick sheets of plywood for my 'boards' and lattice pieces for my 'battens'.  The formula that I decided on for the trim pieces was a base board topped with a 2 1/2" wide lattice piece.  The top would also be the 2 1/2" lattice with 1 3/4" lattice for the verticals.  Here comes the fun part- math!  Lots of measuring and figuring helped me determine how much I would need, then I bought a little extra in case of user error.  Not that that would ever happen....

I find projects like this to be a lot of fun in all seriousness.  It's like designing a puzzle, then building said puzzle, with the result being a pretty room.  I get to use my brains and brawn!

Once I brought all the wood home, I started with the plywood.  I cut it to size, then 'dry fit' it in the space.

board and batten dry-fit

Prior to install, I decided to prime the pieces, so that put off install for a bit while I waited for them to dry.

boar painting

A bit of construction adhesive and a finish nail gun is all that's needed to install.  I recommend painting the walls behind first too, in order to minimize touch-ups and detail painting.

board and batten install tools

Looking better already!

board and batten install progress

Next I installed the horizontal pieces starting with the base boards that I pre-painted.  I didn't want to have to try and cut in with paint at the floor, or any difficult areas, so I made the decision early on that any piece that would be touching wall, floor or tile would get painted before installing.

base paint

After the base and adjacent lattice horizontals, I installed the top trim being extra special careful to line it up with my intended grout line and to keep it level around the room.  I had levels of a few different sizes that I was using, but the best tool is your eyes-  level or not, it needs to LOOK right, so step back often and make sure nothing's looking wonky.

board and batten horizontals

Verticals next!

I measured each piece individually to make sure everything fit properly.  I'd say this part was the most happy-dance-inducing because as I installed the verticals, every last bit of ugly wall behind disappeared.

board and batten part one progress

As always, perfection with these steps is pretty much impossible (not that I don't try!!).  No house , not even a brand new one, is going to be totally level and square, so gaps are inevitable.

board and batten progress close-up

Luckily, caulk and paint are pretty much my best friends when it comes to wood-working projects.  To quote my grandfather: "caulk and paint make a carpenter where he ain't."

This is where I leave you with part 1... stay tuned for part 2 and near finished bathroom next Monday!!