Before & After

Board & Batten Bathroom

Before I jump into the "Afters" of my board and batten, I wanted to share some minor restructuring around here.  Hopefully for the better.  I'll still be posting Mon/Wed/Friday, but now you'll know what to expect:  Mondays will be DIYs, Wednesdays will be a series post (craigslist, house crash, or one of a few new ones I have up my sleeve), and as always, Fridays will be flip days.  You may also find a rouge Tuesday or Thursday post in there if I find myself wanting to share off topic.  I think this new structure will help me to come up with even greater content! So I promised you Board and Batten part 2:  finished board and batten and you got it!

board-and-batten-5

When I left you in part 1 last week, I had all the wood pieces up and it was time to patch/caulk/paint, and generally make it look all polished and pretty.

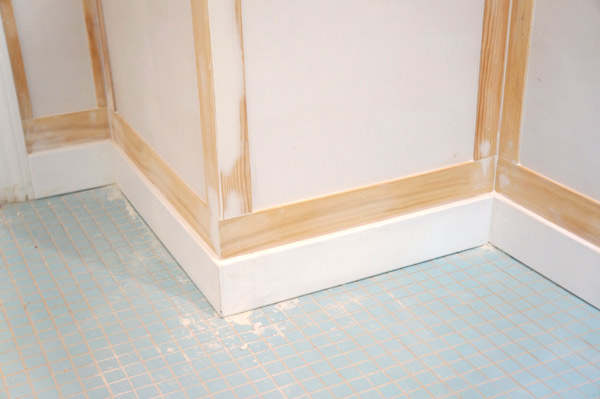
I started this by patching all of the nail holes and any outside corners that may not have lined up 100% with plaster patch.  I know I'm supposed to use wood filler, but for such small, non structural spots, I find the plaster patch so much easier to work with.

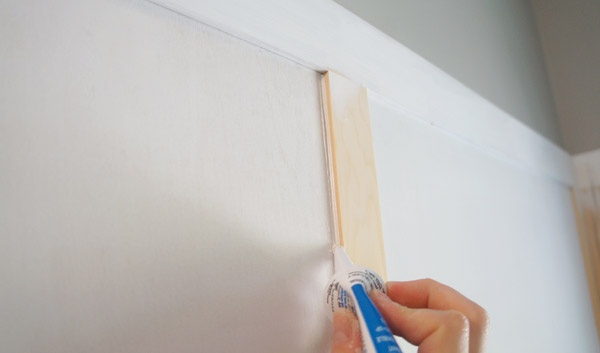
Next, I caulked every seam.  And I mean every.  single.  seam.  This is what makes a homeowner project look like a professional install.  Admittedly, caulking takes some practice.  The first time I tried to caulk my own bathtub, I had to scrape it back out and bribe Handy Dad to fix it for me.  Now on my 3rd flip, I think I finally have a handle on it, so I want to share my tricks.  I like to use the small squeezable tubes as opposed to a caulk gun- I feel more in control over the amount that comes out that way.  I pretty much try to squeeze out as little as possible that will still cover the seam.

bandb-caulk-bead

After I've squeezed out a bead of caulk, I wet my finger, then press it into the joint and wipe.

bandb-caulk-smooth

The water is crucial since it will help smooth everything and make it easier to clean the caulk off your finger.  I actually did this with a bucket of water next to me that I used for rinsing off my hands as I went as well as dunking my fingers to wipe the caulk joints.

Eventually a corner that used to look like this:

bandb-closeup

Looked like this:

bandb-corner-caulked

Next came the fun part, painting.  Fun.  Or something like that.  With all the joints caulked and holes patched, the paint is the icing on the cake.

bandb-corner-done

board-and-batten-3

board-and-batten-1

I'm so pleased with the way this came out!

board-and-batten-4

It's almost hard now to picture what the bathroom looked like when I bought the house.  Blue galore, and it felt SO TINY.

grover-before12

and now:

board-and-batten

I'm eager to stage it but it will have to wait until the rest of the house is complete and ready for staging.  There's dust still flying elsewhere in the house.  But trust me when I say that once this room is 100% complete and staged, it will be so pin-worthy!  I can't wait!

What do you think of the bathroom transformation?

Color Blocked Deco

I know you must be on the edge of your seat with anticipation- What did Karen spend her last $3 on at Brimfield??  Fear not, I'm here to put you at ease! Piled under other several other items, I discovered the most adorable wood and metal deco tray.  The handle caught my eye and once I moved the junk piles from it, I realized that it was in amazing condition.  I would've paid more than $3 for it if necessary- that's how much I love it.

deco wood tray

At first I just cleaned it up with a little wood conditioner (which worked miracles!) and fine steel wool on the metal, but I wanted to kick it up a bit.

deco tray progress

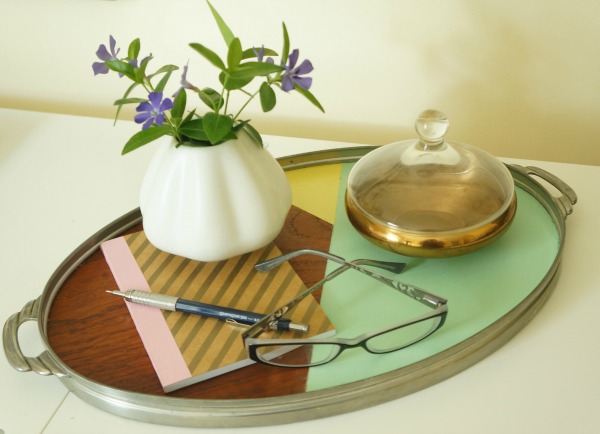
While adorable on it's own, it needed a pop of color.  After racking my brain for what pattern this little guy wanted- herringbone?  diamonds?  free-handed feathers?- I kept coming back to color blocking.  Why resist the urge?

Color blocked deco wood tray via Year of Serendipity

It's the perfect size to hang out next to my computer and corral the everyday necessities.

My sexy mac is in the shop, so I'm borrowing Hubby's extra lappy currently, hence the less-sexy black box.  Hopefully only another day or so.

deco tray syled desk

Considering I used paint, wood conditioner, and steel wool that I already had, the only cost here was the $3 tray!  And what a pretty $3 tray it is!

DIY color blocked deco wood tray via Year of Serendipity

I'm so happy that I could keep the integrity of the piece and give it a quick update.  My favorite type of DIY!

So, what do you think?


Plaster Patching

How to patch a swirled ceiling // Year of Serendipity I'm sure we've all seen it: a badly patched textured ceiling.  Joe Homeowner has a damaged textured ceiling and attempted to patch it himself.  He grabbed whatever patching compound he had and spread it over the damage in hopes no one would notice.  The resulting gloppy patch sticks out from the rest of the ceiling like a sore thumb.

For a hot second with this lastest flip, I thought I was free and clear with the textured ceilings- a few of the flat ceilings had issues, but the textured ones looked in good condition.... until I scraped the wallpaper in the hallway and discovered this gem.  The plaster layer of the ceiling was loose and started to crumble and fall the moment I touched it.

damaged plaster ceiling

No Joe Homeowner gloppy fix here!  Unless you're really looking for it, you'd never realize there was a patch! (cue sigh of relief here)

repaired plaster swirl ceiling

As it turns out, a large part of getting the patch to match (giggle) is in the magic coverup mixture:

plaster patch mix

Mix ceiling paint with joint compound until you have a mixture only slightly thinner than peanut butter.

ceiling patch mix

Once I had the mixture set, I went straight for the ceiling and got it perfect on the first try.  KIDDING!  I took a scrap of drywall and started testing out how to get the desired texture.  I tested out 3 different brushes that I had at the house.

texture testing

My verdict was to use the regular paint brush for application, then the large paint brush to texturize.  Now comes the ceiling... but not quite with the texture just yet.

I started with my ceiling by using regular (non-mixed with ceiling paint) joint compound to fill in where the plaster was missing.

ceiling patch

Once that dried, I sanded it and had a great base to texturize from.

sanded ceiling patch

Now comes the fun/difficult part.  As I mentioned above, I used a regular brush to spread the texturizing mixture, then used a large brush to add the correct scale to match the rest.  I paid careful attention to the directionality and pattern of the existing swirls, and tried my best to layer them and match them appropriately.

plaster swirl patch

This wasn't a first try result- I stepped back a few times and re-swirled, stepped back again..... etc... until it started looking like it should.

Not perfect, but definitely a good start.  The biggest difference between the new swirls and the old was the definition.  The new swirls were nice and sharp, the old had been painted over for 50 years.  To make the new swirls blend more, I took sandpaper to it once the patch was dry.  I feathered the edges out and dulled out some of the sharp texturing.

plaster swirl patch sanded

The last step was just to paint the entire hallway ceiling a crisp coat of white.  That was the true test: once everything was the same color, would the patch be noticeable?

plaster swirl ceiling

I'd call it a success!  Would I recommend this for a large blemish in the middle of your living room as a permanent fix?  Probably not.  In that case, skim-coating the entire ceiling would yield the best result... but as a quick temporary fix or a smaller patch in a less visible area (like mine), go for it!!

repaired plaster swirl ceiling

I'm rather proud of the finished result and how well it blends in with the old ceiling.  It's pretty near impossible to get the patch to match 100%, but I dare you to notice it when you're in the space.

Have you had any experiences (good or bad) in attempting to patch a textured ceiling?  I'd love to hear about it!