DIY

Flip Tip: Trimming

In last weeks Clark update, I showed you the new trim on the basement and side doors.  Today I'll show you HOW to add new trim to a door (or window, or anywhere) and and make it look like it's been there forever. First you need to remove the old or offensive molding.  I chose to replace the trim on these 2 doors, because they had obviously been replaced by the last owner and didn't match all the other moldings in the house  (tip- match other molding when replacing a piece of trim- it'll look seamless and original).  I was a little overeager and neglected to take a picture of this step, so just imagine an image here of me using a prybar to get the old moldings free.  Can you see it?  Great!

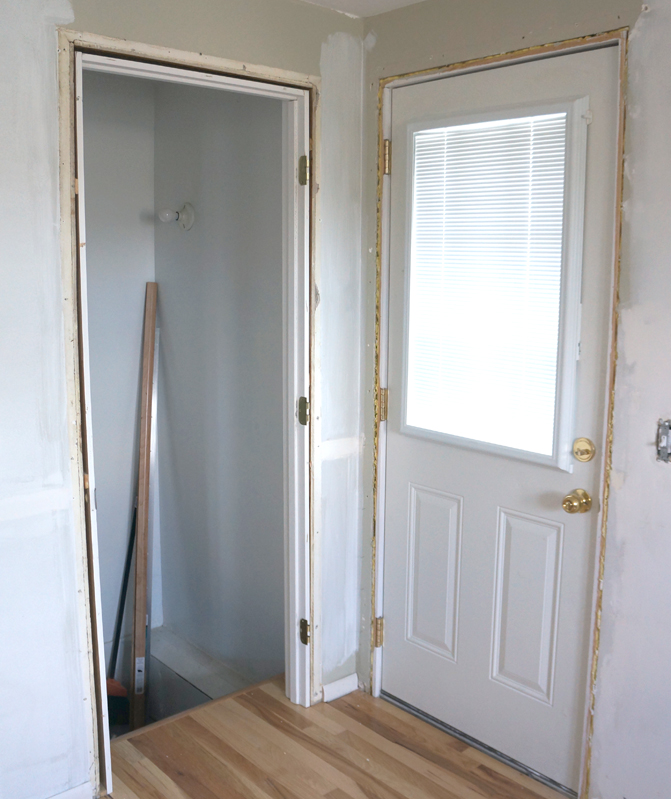
Now you have a blank slate.

trimless doors

The tools I used were:

  • a compressor
  • a brad nailer
  • a door trim kit
  • a miter saw (not pictured because he's hanging out in the basement)
  • white wood filler
  • white paintable caulk

trim tools

If you don't have a compressor and nail gun, you can certainly use finish nails and a hammer, but this girl likes power tools.  They're fun.  and much quicker.  The trim kit was my other way of saving a little bit of time, but you can also buy trim by the foot at any home improvement store.

As you can see below, the trim kit was a bit larger than the door, so I still had to make a few cuts.  I trimmed a few inches off the bottom of the sides, and used my trusty miter saw to shorten the top piece to the desired length and keep the 45 degree angle.  I've been using my brother-in-law's chop saw that can also be used for miters, but a hand saw and miter box work just as well.  (if you've been around this blog for a bit, you may remember my miter saw and a similar how-to when I did my dining room's picture rail)

trim kit size

Use your nail gun to securely fasten your new trim into place.  Now, unless you're a perfect measurer and builder, you'll probably have a few small gaps.  No worries- that's what wood filler and caulk are for!  Use wood filler (you can get this in white or whatever wood tone you're using if you plan on staining) to fill the nail holes and the corner joints.

trim corner

Sand it smooth once it's dry and no one'll know.

filled door trim

The step a lot of people forget is the caulk.  Make sure you get PAINTABLE caulk, because otherwise you're work will look terrible when you try to paint the trim or walls.  I again got a little overeager and forgot to take pics as I caulked the doorframe, but luckily I had some window molding to caulk where it had come loose (because the genius who build the old cabinets nailed them to the side of the window trims.... that's not usually how it's done...).

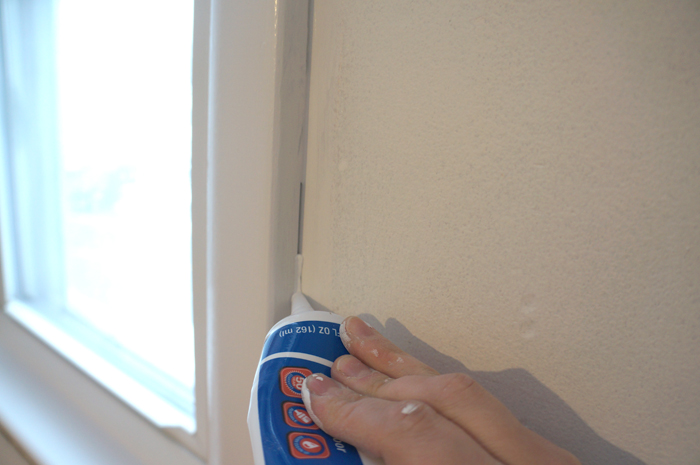
See, gap. (slightly blurry gap apparently, but you get the picture)

trim gap

With your paintable caulk, add a small bead right in the corner.  Please disregard my paint-covered hand.  I'm a very neat painter, but somehow my hands get covered.

trim caulk 1

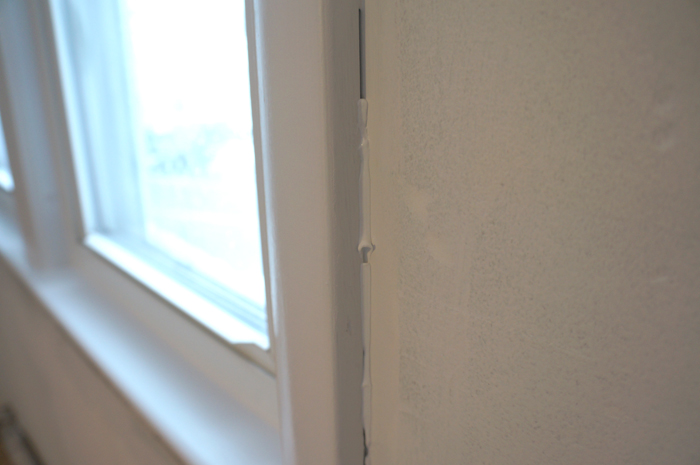
Luckily, your caulk bead doesn't have to be perfect because you'll smooth it all out in the next step.

trim caulk2

I've found that my finger is the best tool for the job, but make sure you have a wet paper towel handy to wipe the excess of your finger.

trim caulk finger

Voila!

trim caulk done

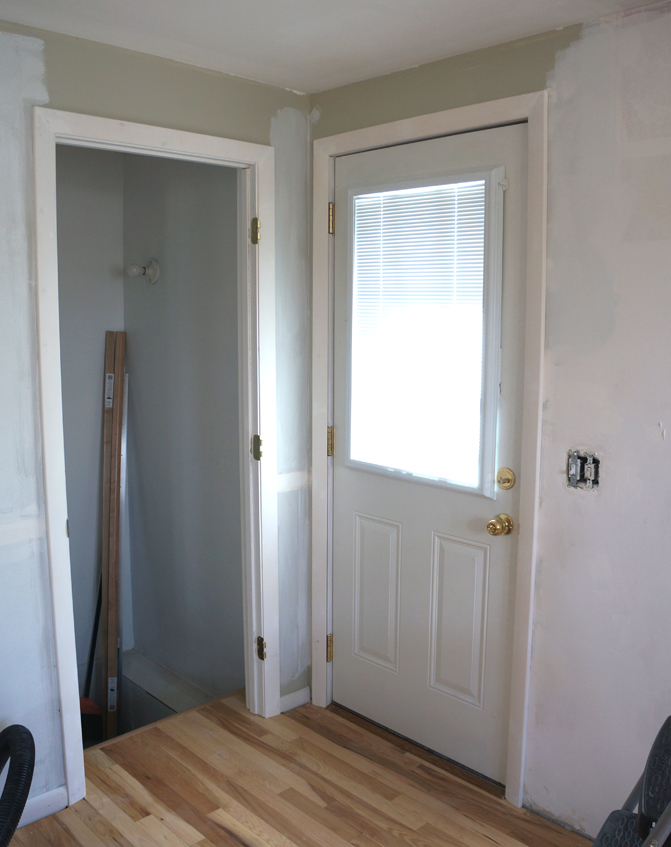
When you're all done, no one will be able to tell the molding hasn't been there since day 1.

door trims

The same steps can be used to replace almost any trim in a house.  I've never attempted crown molding, but I know that's a whole other beast.... but this method can be used for base boards, chair rails, picture rails, etc.

Happy trimming!

Clark: Week 4

I can't believe it's week 4 already!  (check out previous progress here) I've been doing a lot of flooring.

A LOT.

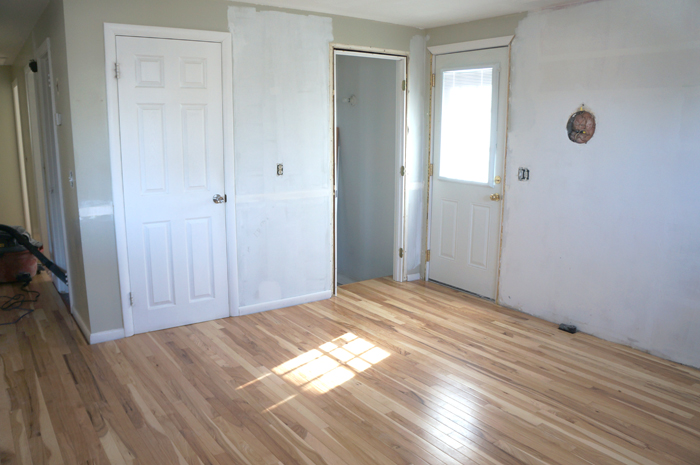
But I'm VERY pleased to say the kitchen and hall floors are DONE!!! (with the exception of closets and transitions which are ongoing)

kitchen floors 1

They make me so happy I could tap dance, but that would hurt the floors and be very counterproductive, so I won't.

I do need to shave down the bottom of the basement door, so that it can open with the new floor thickness, though.  This is what it looks like heading down to the basement- pretty wood tread.

hickory stair tread

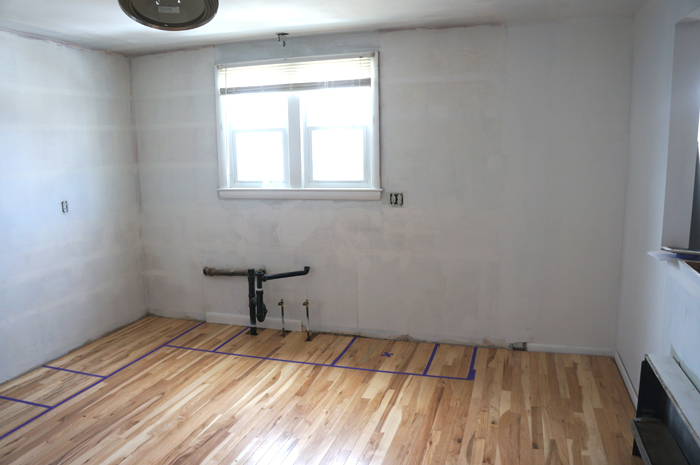
This is where our IKEA cabinets will be installed.

kitchen floors 2

I may be the crazy person who taped out where the cabinets are going to go to help me determine what fridge size/style to buy.  May be.

kitchen layout1

I think I have it figured out, but I'm going to measure the heater when I get to the house today, just to make sure before I buy appliances.

The basement door and side door also got new door trims to match the rest of the house.  They had been replaced by the previous owner and were the only trims of a different style in the house.  No more!

door trims

This week's other accomplishments include

  • buying LOTS of supplies for the next projects at Home Depot
  • harassing the IKEA kitchen install guy to give me a date (looking like end of next week, but not set in stone yet)
  • getting more quotes from painters, electricians, gutter guys, etc
  • purchasing the granite countertop
  • more appliance research
  • and did I mention laying lots of hard wood floors?

I'm hoping next week's progress will be in leaps and bounds!

Clark: Week 3

I vowed that this blog wouldn't turn into one all about the flip, but can someone please tell my brain that?  It's all I think about lately!  I mean, I guess that's a good thing- it's better than wanting to turn off my brain to work the second I walk out the office door.  I'm working on this whole work/life balance thing and its even tougher now that work and life are very much intertwined. So on to it!  Clark the flip house's week 3 progress- and finally I have some exciting progress!  (see other Clark progress HERE)

Aside from some straggling pieces, the demo pile is all gone from the living room.  It needs a GOOD vacuum, though, with all the demo dust.

buhbye demo

And we finally have a kitchen again!

ikea kitchen

What, that doesn't look like a kitchen to you??  It's still in boxes from IKEA waiting to be installed, but I need to finish the kitchen floor before that can happen.

There is finally one thing finished in this house, though!  Yesterday I had installers in rebuilding the shower walls and tiling them.  I didn't get any progress pictures, though- with 2 installers and all their tools in that tiny bathroom, there was no room for me and my camera.

bathroom shower progress1

Doesn't it look phenomenal??  I was practically jumping for joy when they left.  I debated a LOT about what to tile and what not to tile myself.  The more people I talked to about tiling, the more I heard how tough shower walls are to do right and have last.  So, I bit the bullet and hired installers to rebuild the walls with new cement board and install white subway tiles.  It only took them a day to install it all!

bathroom shower progress2

I honestly loved it even more before the grout when you could see the dark lines between the tiles.  If this were my house, I would totally have gone with dark grout, but I know that's very taste-specific and I'm trying to appeal to the majority.  With these walls all finished and looking spiffy, I need to get the rest of the bathroom to the same level- its currently nowhere close...

bathroom shower progress3

Next step is to rip up the remaining damaged floor, but that means making the bathroom unusable while I work.  Since It's the only toilet and only working sink in the house, I'm putting that off until I get a bit farther in the rest of the house.  I WILL be installing the mosaic tile floor and wainscoting wall myself.  I already have all the supplies for the tile, so I think that'll be my next focus after the hardwood floors.

So on to the hardwood!  So far, I've successfully built a bowling alley!

clark bowling alley

Ok, so maybe not literally, but that's what it feels like.  I LOVE these floors!  I want to pet them, but that might be creepy.  I didn't get to completely finish the hallway yet because I didn't want to be in the tile installers way as they came in and out of the bathroom, but that shouldn't take me long.  I'm definitely getting the hang of the floor install- I have a feeling the kitchen floors will go decently fast (knock on wood).

kitchen floor progress

If it was possible cheat on Hubby with a house, I think he'd be worried.  With these floors and the new shower tile, Clark is turning into one sexy beast.

The less-visual things accomplished this week include:

  • A working garage door opener (with Handy Dad's help- Thanks!!)
  • Leveling the kitchen floors where the cabinets and closet wall had been removed
  • Desqueaking the floors as much as possible (I emptied and entire box of screws)
  • Selected granite for the kitchen counters (ordering today if this snow ever stops)
  • Selected appliances, just have to hit the "order" button
  • Met with an electrician to get pricing on grounding outlets and adding outlets for appliances

I think that about covers it for this weeks progress.  I'm exhausted, but I'm so happy to start seeing the house come back together!