DIY

Build It: TV Cabinet

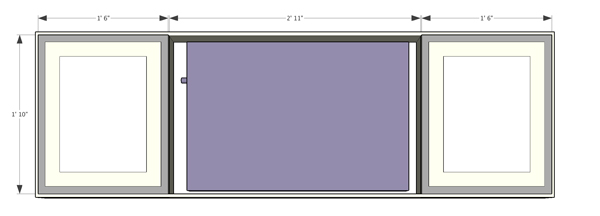
I'm so pleased to say that progress has been made on a project that I introduced you to a month ago!  The wall mounted TV cabinet for my office is finally all assembled and ready to be patched, sanded, and painted!  Let's chat about the whole super exciting building process today. I enlisted Handy Dad's help- when building things we're generally a pretty good team (plus he has more tools and space than I do).  Before breaking out the tools, though, I 'built' the TV cabinet in the 3d program Sketch-up so that we could really visualize how to make it happen.  The tv cabinet would have sliding panels on the front that would hide the TV when I'm in office mode and frame the tv nicely when my office turned into the den.

Build it: DIY tv cabinet - via Year of Serendipity

Build it: DIY tv cabinet - via Year of Serendipity

Over the past month, Handy Dad and I have cut out the pieces and routered a few pieces which I'll explain in a minute.  Let me first show you the breakdown of the parts.  I used 1/4" plywood for the backs and for the sliding door panels and 1x5 pre-primed pine boards for the box.

Build it: DIY tv cabinet - via Year of Serendipity

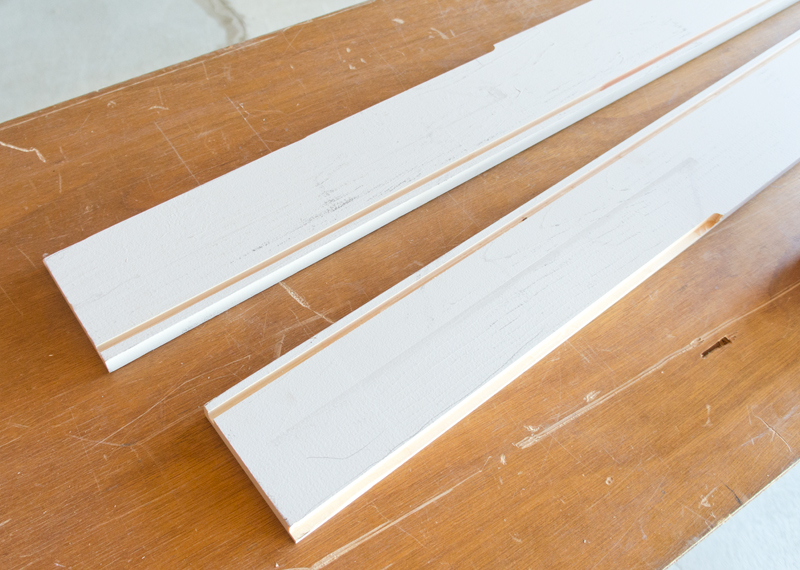
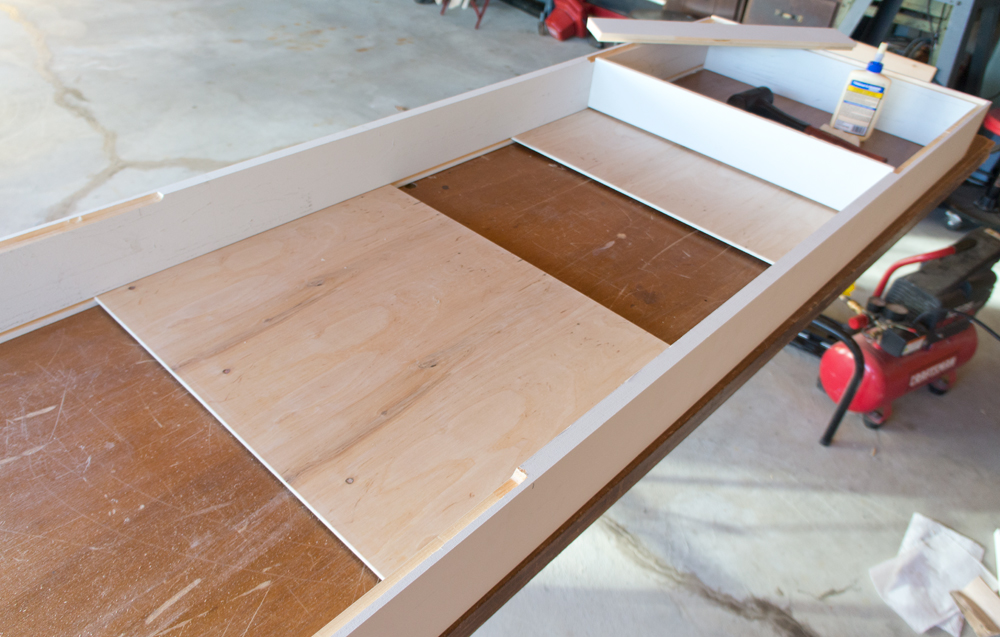
We used the table saw to create a few depths for the pieces.  The 4 outside pieces are the deepest and the inner pieces are narrower so that they can allow the door panel to slide past them with ease.

Once all the pieces were cut, Handy Dad and I used the table saw to add a groove into the top and bottom pieces for the door panels to sit and slide in.

Build it: DIY tv cabinet - via Year of Serendipity

Next we turned to what will be the back of the pieces and routered out a notch so that the back panels can be inset and the tv cabinet box can sit flush against the wall.  This needed to be done to the end pieces, the 2 middle verticals and to a section on each end of the top and bottom.  We over-routered a bit due to poor planning but that's totally patchable, so crisis averted.

You can really see the different depths of the boards in the pic below- the outside are the deepest, the vertical supports next and the horizontal shelves are cut even narrower since they will essentially be sitting on the pack panel and didn't need to be routed out for it.

Build it: DIY tv cabinet - via Year of Serendipity

Now came the fun part- assembly!  Wood glue and a nail gun are your bffs.  It was helpful for this to be a 2 person assembly, but it could be a 1 person job if you had the right clamps.  The first piece to get put on was one of the end pieces.  Putting wood glue on the joint before lining it up and nailing together.  You can see the routed notch a bit better in this pic too.

Build it: DIY tv cabinet - via Year of Serendipity

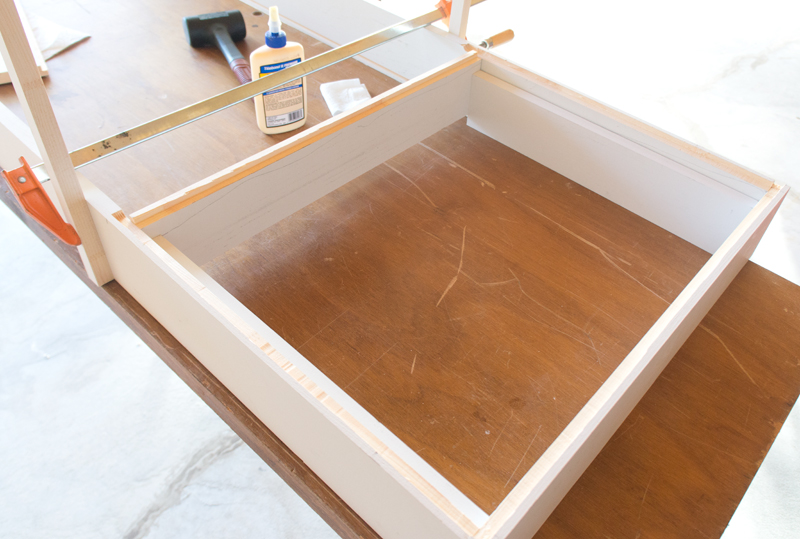
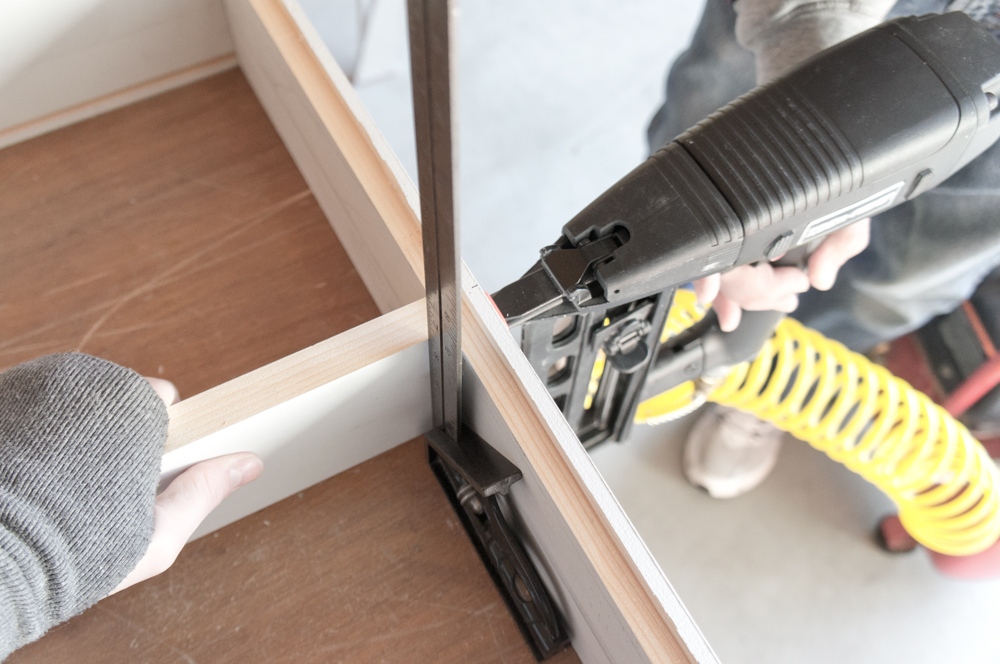
With the first end piece on, we then attached the middle vertical on that side.  Let me orient you a bit.  We're working with the cabinet face down, and since the doors will slide past the supports and shelves, they are getting inset a bit.  The clamp you see is keeping the vertical support aligned with the back of the cabinet and raised off the table by about a 1/2".  We used what will be the shelves to ensure consistent spacing, although they aren't attached yet.  Glue and nail.

Build it: DIY tv cabinet - via Year of Serendipity

Now it's starting to look like something!  Before we could attach the other end piece, we needed to slide the door panels into the groove.

Build it: DIY tv cabinet - via Year of Serendipity

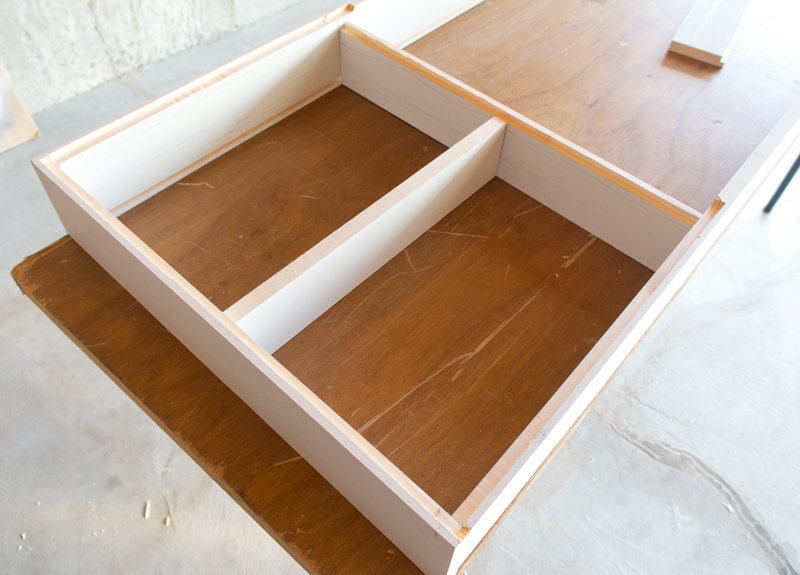
Rinse and repeat with the end and the vertical support on the other side.  With both end panels and both vertical support pieces attached, it's time for the horizontal shelves.  One of us held the shelf and made sure it would be square while the other nailed it in.

Build it: DIY tv cabinet - via Year of Serendipity

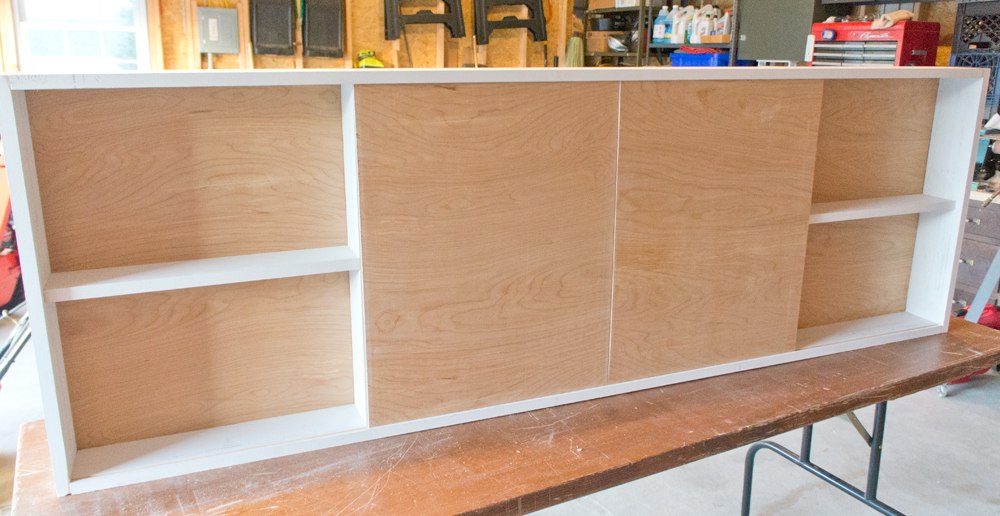
The last pieces to get attached are the pack panels.  We applied a generous bead of wood glue around the inside of the routed groove and on the back of the shelf.  Before the panel got nailed in, we put it in place and wiggled it around so that it and the glue really bonded.  I'm relying on these back pieces for a lot of the support!

Build it: DIY tv cabinet - via Year of Serendipity

As I mentioned above, we got a little router-happy, though luckily nothing that couldn't be remedied with a small scrap of wood and some wood filler.

Build it: DIY tv cabinet - via Year of Serendipity

My favorite part is always the last step: standing back to admire what you just accomplished.

Build it: DIY tv cabinet - via Year of Serendipity

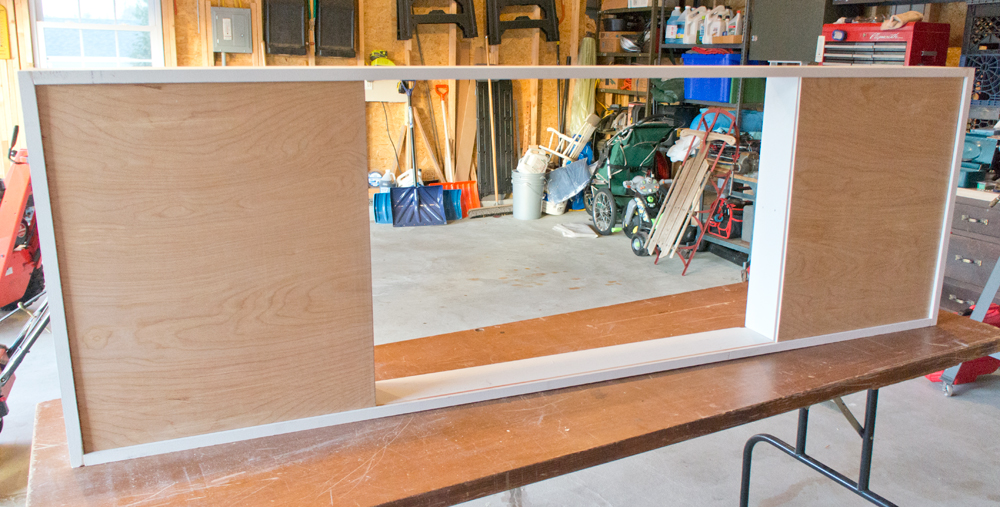
Peek-a-boo Handy Dad's garage!

Build it: DIY tv cabinet - via Year of Serendipity

I cannot wait to get my new tv cabinet all finished and hung on the wall!  For the next few days, this guy will be chilling out on my dining room table (the only surface in my house big enough that's not a central floor space) so that I can patch, sand, and paint it.

Hopefully by next weekend, I'll have this all set and Hubby can help me hang it.  A 6' long wall cabinet is not a one-person install job.  Are you as excited as I am to see this finally come together??

DIY Crepe Tassel Ornaments

While my Christmas decorating isn't quite done yet, the tree is set which makes me happy.  Few things set the tone for the season like the glow of a lit Christmas tree.  This year I wanted to add a little whimsy to the tree by making some crepe paper ornaments. DIY crepe paper ornaments -via Year of Serendipity

These are so easy to make and add a fun texture to the tree.

All you need is:

  • crepe paper
  • floral wire- 18 gauge
  • floral tape
  • scissors
  • wire cutters

DIY crepe paper ornaments -via Year of Serendipity

First you start with a strip of crepe paper about 2 inches wide.  For length, I cut them about as long as my arm.  You can make this longer or shorter if you want to make different thicknesses of tassels.  This is the hardest step.... are you ready?  Put the strip on the table and start bunching it together.  Use your fingers to pull the crepe paper toward your thumb, creating small, irregular pleats.

DIY crepe paper ornaments -via Year of Serendipity

DIY crepe paper ornaments -via Year of Serendipity

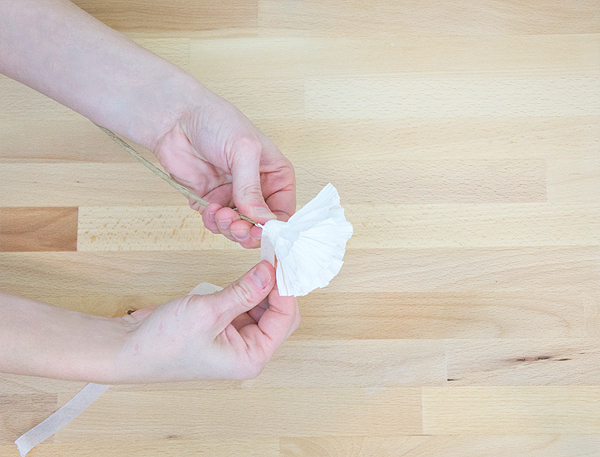
To attach it to the stem, use the 'gather and wrap' method... which is exactly what it sounds like.  Gather a pinch of the paper and put your stem into it.  Use one hand to hold the tassel and stem and use the other hand to gather another pinch of paper and wrap it around the stem.

DIY crepe paper ornaments -via Year of Serendipity

Continue to "gather and wrap" until you reach the end of the paper.

DIY crepe paper ornaments -via Year of Serendipity

Next, wrap your floral tape over the bottom pinch of the tassel where you see my fingers holding above.  Start at the bottom of the tassel and wind the floral tape at a slight diagonal, stretching it just a bit.  Wind it down from the tassel onto the stem a few inches.

DIY crepe paper ornaments -via Year of Serendipity

Voila, you made a tassel!

DIY crepe paper ornaments -via Year of Serendipity

To make this tassel into an ornament, use your wire cutters to trim the stem about an inch from the base of the tassel and fold it over.  This will give you a place to attach an ornament hook.

DIY crepe paper ornaments -via Year of Serendipity

Attach ornament hooks and start decorating the tree!

DIY crepe paper tassel ornaments- Christmas 2015 -via Year of Serendipity

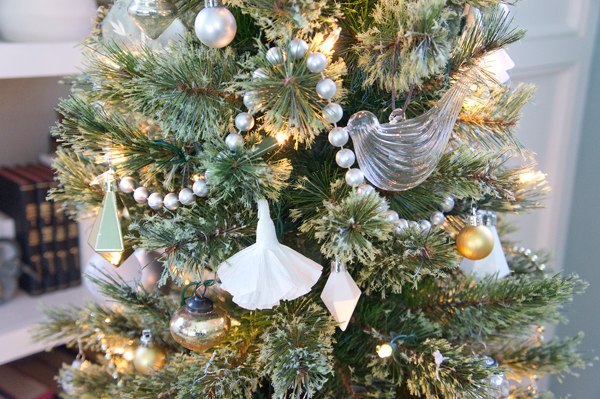
After installing my floor to ceiling book shelve last year, the short, squatty, fake tree that I've had for years just felt out of proportion.  This year, when I stumbled on a 6' pencil thin tree, I knew it would be the perfect fit for the limited space in front of the book shelves.

DIY crepe paper tassel ornaments- Christmas 2015 -via Year of Serendipity

The crepe paper ornaments add a touch of fun and "fluff" to the mostly neutral tree.  I'm actually tempted to make a mess of these ornaments and adorn a tree head to toe with them.  Like little jazzy snowflakes.

DIY crepe paper tassel ornaments- Christmas 2015 -via Year of Serendipity

And because dancing ornament gifs make me smile, I'll leave you with the same image that started this post.  Happy weekend!

DIY crepe paper tassel ornaments- Christmas 2015 -via Year of Serendipity

DIY to TRY: Ornaments

Welcome back!  I hope you had a wonderful Thanksgiving!  Last week was a little blog break for me as you may have noticed.  I took some time to clear my head, brainstorm for a better blog, and naturally spend time with family over the holiday.  Sometimes a time out is just what is needed. Some years it takes me a bit to get into the Christmas spirit, but this year once we checked Thanksgiving off the calendar, it was game on.  I'm not one to do any over the top decorating, but I do love me some white lights, gold everything, and Christmas music filling the air.  It just puts a smile on my face.

I'll be DIYing some ornaments as I seem to do just about every year, but before I share those later in the week, here's a round up some awesome DIY ornaments that may also make their way onto my tree.

**Please be courteous and click through to the original sources and pin from there.  Thanks!!**

Clay ornaments aren't anything new, but they're still one of my favorites.  Simple and elegant with endless ways to adorn them.  These feathers from 100 Layer Cake are a fun twist on a classic.

100 Layer Cake- DIY clay feather ornament

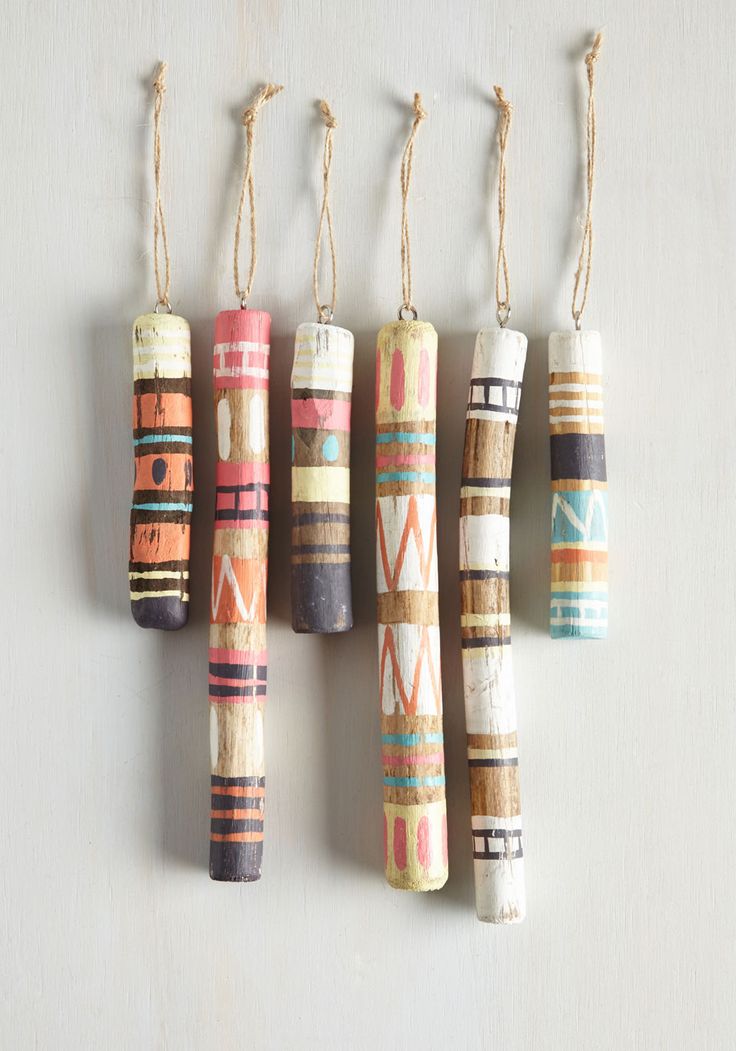
While these aren't currently a DIY, that's where my mind went as soon as I saw these on Modcloth.  Chop a stick, sand it smooth, paint it with fun patterns, sand lightly for distressing, and add hook.  So cute!

Modcloth painted stick ornament

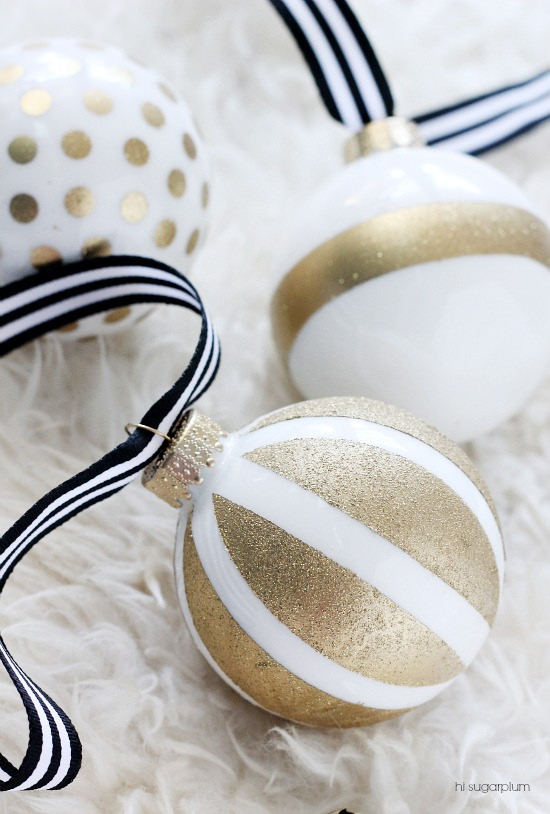
Another simple twist on a classic is these Kate Spade inspired ornaments from Hi Sugarplum.  So simple yet so fun.  I'm clearly a sucker for gold and white... especially with polka dots.

Hi Sugarplum- DIY-kate spade inspired ornaments

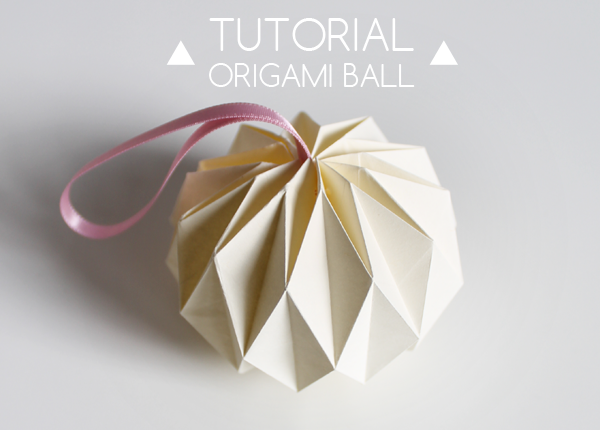
Origami ornaments are another that seem to win me over every time.  While quite involved, these origami ball ornaments from Giochi di Carta are gorgeous.

Giochi di Carta- DIY origami ball tutorial

For a slightly simpler version, these paper diamonds from Design and Form would look wonderful dripping from any tree.

Design and Form- paper diamond diy

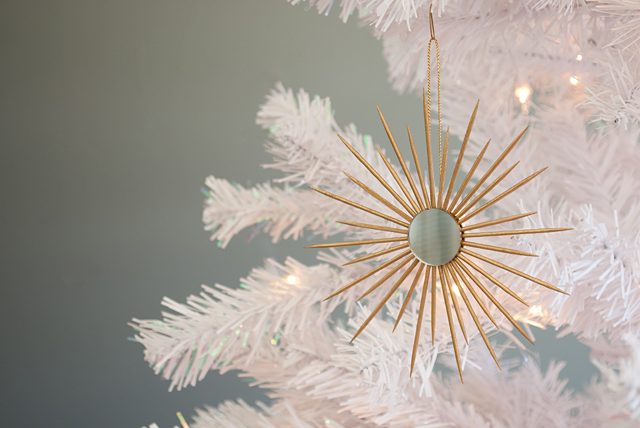
And since I clearly can't get enough gold, isn't this starburst ornament by Brynne of The Gathered Home simply divine?  I came across them when she shared them on eHow a few months ago, but she's sharing them over on her blog today too.

The Gathered Home- gold starburst ornament

What are you planning to DIY for the holidays?