Living Room

Rug Talk

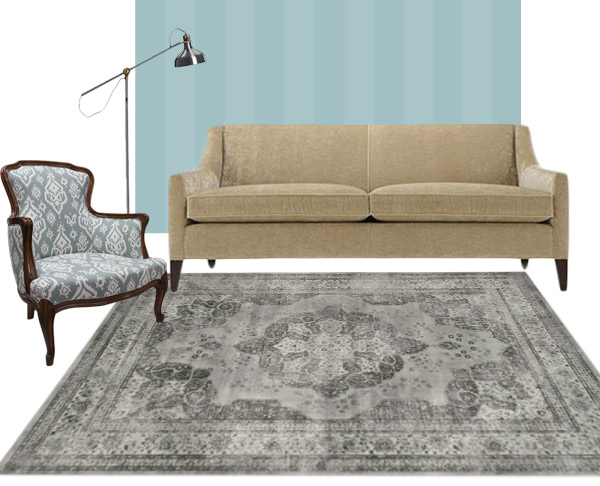
Now that my antique chair is almost done being reupholstered (only the cushion left!) and back home in the living room, it may be time to revisit the rug. This is the current rug with the new/old chair (sans cushion), the sofa that I plan to purchase soon, and an IKEA lamp I'm contemplating (wall color and stripes shown as reference).

living room rug existing

The existing rug's not terrible with the chair, but I think we can do SO much better.  I do actually love having a darker neutral on the floor- it doesn't provide high contrast with the floor, but it adds needed texture to the space.

I considered a larger scale pattern like a Moroccan trellis, but If I were to chose a rug right this second, I'd probably be buying this one:

living room rug trad gray

Same neutral texture that I love, but with a larger overall pattern, it's not fighting with the ikat on the chair.  Having these neutral grounding pieces, allows me to go crazy have a little bit more fun with pillows and accessories.  But since I'm indecisive, let's visit a few more options.

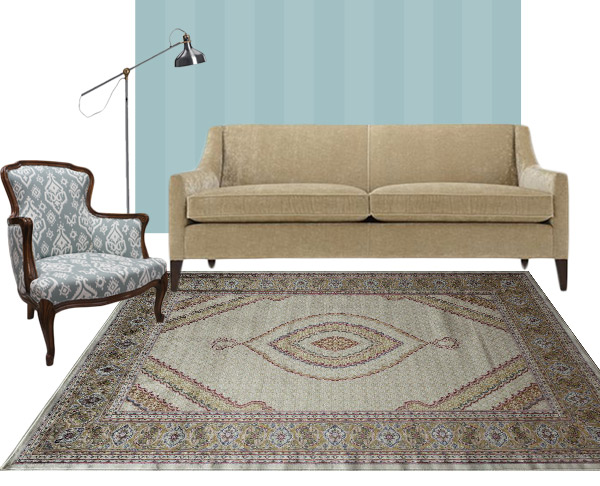
I thought it might be fun to try one with a bit of color, but the jury's still out.

living room rug colorful

After my love/hate relationship with Clifford the big red chair, I'm paranoid that a rug like this will overwhelm this small room.

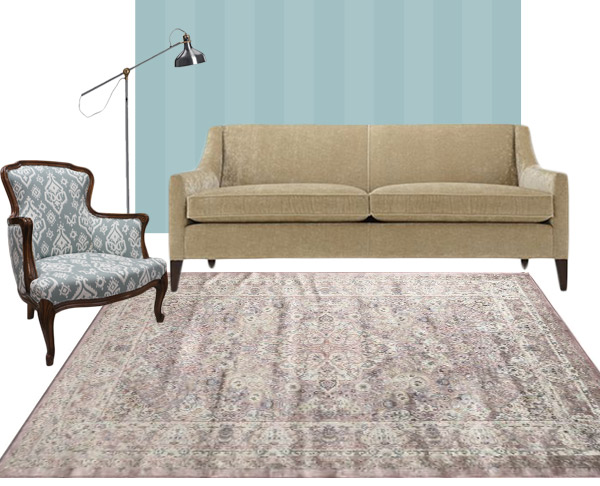
Following the theme of color, this one's not yelling as loud.

living room rug purple

It may border on too traditional for me, but hey, if you had shown me the first rug a year ago I would have said the same.  My how tastes have changed in my old age!

I even toyed with the idea of a natural fiber rug with a small geometric, but that got swiftly nixed.

living room rug neutral

Even with a smaller pattern, the natural color just doesn't jive with a beige sofa.  Or maybe they jive too much.  Either way, no me gusta.

Time for you to weigh in!  Which one would you pick?

All rugs are from Rugs USA, but I was not compensated, nor do they even know who I am- they just have a great selection to peruse!  Beware, they'll suck you in for hours!


Bookcase Style: Take 1

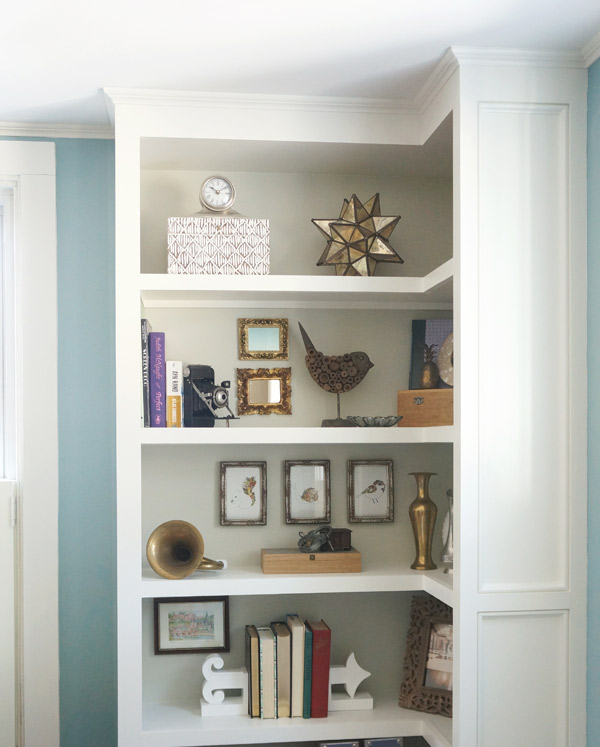
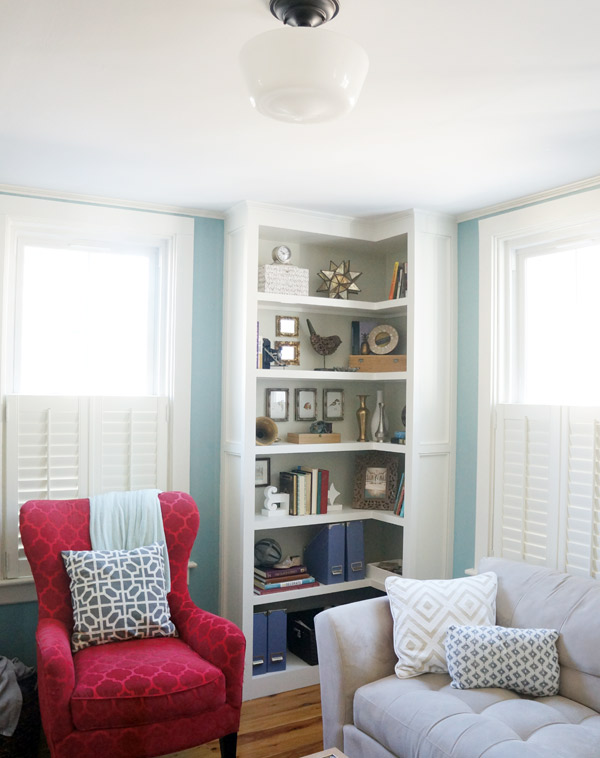
Nothing like styling an 8 foot tall bookcase to make you realize how few books you actually have!  Seriously, I grabbed books from my office cubies and hubby's office built-in and maybe had enough to fill a shelf.  Good thing that tag sale season is about to start- I need to go on a (cheap) book buying binge! As you might be able to see if you pay close attention, I painted the back of the shelves a very light gray to add a bit of contrast.

Styled Living Room Built-in


I'm fairly confident that this styling will be evolving greatly over the next few months as I acquire more books and the room grows around it, so consider this Style Take 1.  I'm also still hunting for the perfect baskets and/or bins to live on the bottom shelf.  I wish I had gotten these before they sold out.

Styled Living Room Built-in side

I'm practically bouncing out of my socks in anticipation for my newly reupholstered chair to come home this Wednesday after my last upholstery class.  At that point I'll be banishing Clifford the big red chair upstairs to hubby's office (YAY).  The reupholstered chair won't be 100% complete and I'll still have some homework to finish but GUYS, IT'S GOING TO MAKE THIS ROOM!  I'm not excited at all.  nope.  not me.

Styled Living Room Built-in Full

The other major change in the room will be a sofa.  I'm very very very impatiently trying to wait until we sell Frankie to order it, but Mitchell Gold is making it difficult and having a stellar sale.  I have, however, narrowed my fabric selections down to 2- velvet or microsuede??  I think the velvet would be top if I knew how it would work with the kitties.  Any crazy cat ladies with velvet sofas out there??

Back to the shelves!  In addition to an embarrassingly small collection of books, a little bit of everything made it on there from wedding pictures to IKEA art and quite a few thrift finds.

Styled shelves 1

Styled shelves 2


Styled shelves 3

Styled shelves 4

Now I have to revisit styling throughout the rest of my house since the majority of my small items have now found a home here.  Darn, more styling to do.

Styled Corner Built-in Bookcase

So what do you think?


Save

Save

DIY Disbelief

Have you ever completed (or mostly completed) a project, then stepped back and were in disbelief that you actually just created that?  That's where I am right now with my bookcase. I'm channeling Steve Urkel- "Did I do that??" Apparently I did.

The construction is complete, and it's time to start on the finish work- patching, priming, painting.... but OMG guys, it looks fantastic!!!  The decorative trim really makes the piece!

built in bookcase completed

Naturally, it took longer to get here than I wanted.  Originally, I though I could maybe get it done in a weekend.  Maybe the ACTUAL building took a weekend, but the planning and prepping took much longer.  Totally worth it though!

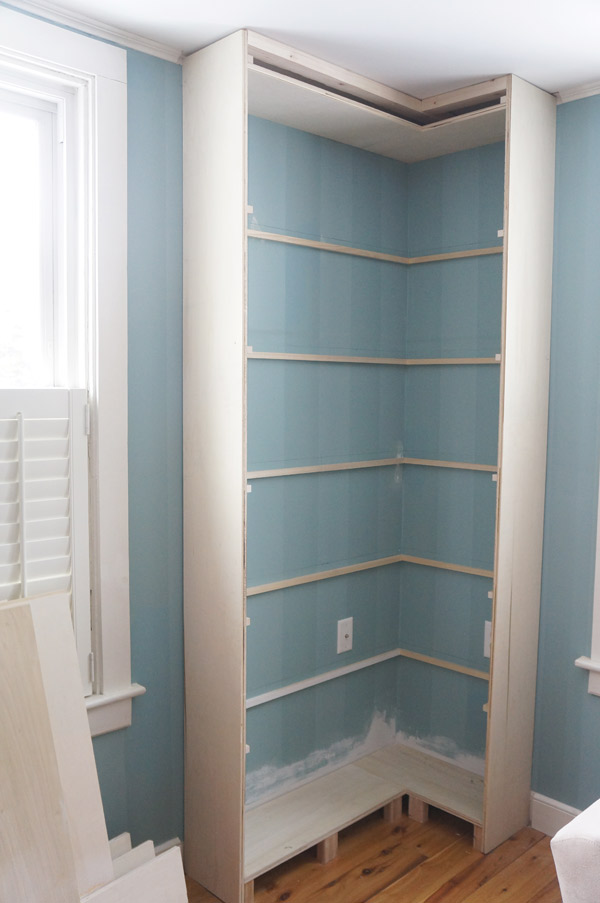
Like I mentioned on Friday, Remodelaholic's step by step bookshelf DIY was an amazing place to start and really helped me wrap my head around how to build this beast.  On Friday, I showed you the basic skeleton, and shockingly it came together pretty easily from there.  I'll show you the over-simplified steps.

Getting the top and bottom attached were the most time consuming, since, as I've mentioned before: my house = not level.

Once I got the top and bottom attached like I showed you Friday, I attached the sides, then the shelf supports.

built in bookcase progress

Once all the supporting pieces were in, it was time for the fun part- nailing in the shelves and starting to apply the finish trim pieces.

built in bookcase progress2

Once I had all the basic trim pieces up, it was starting to look pretty sturdy.


built in bookcase progress3

My absolute favorite step was the decorative trim and crown.  Totally took it to the next level!

built in bookcase completed top

built in bookcase completed trim

I still need to patch, caulk, sand and paint like a mad woman, but I'm so excited to have this built!

built in bookcase completed 2

Now the only thing left to debate is: should the back be white or should I paint it gray for a little contrast?

UPDATE: check out the finished built-in and my first attempt at styling it here.

UPDATE #2: If you love this project, check out my latest build- a DIY TV cabinet here.

Save