Projects

DIY Herringbone Headboard

aka How NOT to Herringbone your Headboard (you'll see) DIY Herringbone Headboard via Year of Serendipity

You guys (almost) unanimously voted for me to make a herringbone headboard this past weekend.  It was kinda fun relinquishing the choice- should I make this a regular?

Anyway.... on to the headboard!!

Once upon a time, in 2008 when Hubby and I moved in together, we decided it would be delightfully adult of us to buy a matching bedroom set.  A very large black set.  I'd like to hop in a time machine and tell 2008/2009 Karen that matching sets are kind of a no no for an interesting space.  You can still see the basic black set in my (apparently outdated) home tour.  A year ago, I replaced the black box of a dresser with a sweet mid mod vintage wood one that I've shown you glimpses of:

figgy on mid mod dresser via Year of Serendipity

And I've been neglecting showing you the rest- I mean nothing's really changed in here just about 3 years.  So when we dismantled our bedroom to refinish the floors a couple months ago, I devised a plan for the bed.  We like the bed in general- it's a nice scale, has a nice solid frame, and a black leather upholstered panel in the headboard.  Well... had an upholstered panel...

Upholstered headboard before

When it came apart for the floor refinishing, I found out that the upholstered panel was simply screwed in and easily popped out.

unholsered headboard with panel removed

This opened up a world of possibilities and suddenly, I knew my plan:  a wood herringbone pattern to break  up all the black.

First step was to create a bunch of wood 'tiles.'  I used 2 1/2" pine lattice moulding cut to 12" pieces with my chop saw.  In what turned into a happy accident, I ended up with 2 different thicknesses by going to 2 different Home Depots.

wood tiles

After sanding any rough edges, I used a wood conditioner, then stained all the pieces with American Walnut.

DIY Herringbone Headboard via Year of Serendipity

Next came the fun part- making the puzzle.  For the backer, I used an 1/8" composite panel and got it cut to size at the Depot.  Once I had the tiles all cut and stained, I market the center of the panel and got to work laying the pattern out.

DIY Herringbone Headboard- backer panel via Year of Serendipity

DIY Herringbone Headboard layout via Year of Serendipity

I ended up alternating rows between the thinner tiles and thick and it added a wonderful dimension to the pattern.  Happy accident.  Once all laid out, I trimmed the edge pieces, eventually ending up with something that looked almost finished.  Too bad every piece was still loose.

DIY Herringbone Headboard puzzle via Year of Serendipity

Instead of adhering it out in the driveway and flat, I knew that the headboard had a slight bow to it, so I wanted to screw the backer piece on, and then adhere the tiles.  I numbered each tile by row so I could easily put the pattern back together and moved the operation into the bedroom.

Since the furry ones greatly enjoy a made bed, they opted to be my silent partners on this project and only gave me the evil eye when I moved the bed.

DIY Herringbone Headboard helpers via Year of Serendipity

Lazy bums.

Here's where the problems began.  I opted to install in place vertically since I was being lazy didn't feel like taking the bed apart and really have no floor space to lay the headboard.  It all started well and good: follow my numbering and use liquid nails to adhere the tiles...

DIY Herringbone Headboard glue via Year of Serendipity

I got all the tiles on and it was looking pretty darn good if you ask me.

DIY Herringbone Headboard glued via Year of Serendipity

So I decided to try gluing the trim pieces on...... and the headboard started spitting pieces at me.

DIY Herringbone Headboard issues via Year of Serendipity

My assistants were seriously NOT helpful.  Every time I tried to glue a piece back, 2 more fell down.

DIY Herringbone Headboard useless cat via Year of Serendipity

Here were my fatal flaws:

  • the flimsy paneling/backer just absorbed the adhesive
  • I may not have made the right choice in adhesive
  • in trying to save energy by taking the bed apart, I was trying to work against gravity.

Gravity+slow drying glue trying to stick to an absorbtive slightly curved panel= huge headache.

Luckily for me, I had picked up some small screws, so after a few curse words and a brainstorming call to my dad, I started by screwing pieces from behind to anchor them.  A few pieces anchored didn't help too much, but I could see that I was headed in the right direction.  I thanked my lucky stars for the 'accidental' thicker pieces and ended up screwing into the back of each and every one, effectively anchoring every other row.

DIY Herringbone Headboard screwed back via Year of Serendipity

The back isn't pretty, but if the tiles stay in place, I'll take it.  Yeah.... not the ideal way to herringbone your headboard.  Once everything was stable, I glued and clamped on the trim pieces and crossed my fingers.

DIY Herringbone Headboard clamped via Year of Serendipity

I'm pleased to say, with a combination of screws and glue, the tiles seem to be stable and the headboard made it through the night.

DIY Herringbone Headboard via Year of Serendipity

I actually really love the dimension created with the different thicknesses.  Let's pretend that was intentional.  Not seeing a generic upholstered headboard anymore is a big win.  The beauty is, however, if I ever changed my mind and wanted to switch this panel out again, I can remove a few screws and put the upholstered piece back or make a new insert.

DIY Herringbone Headboard via Year of Serendipity

Still to go with this bedroom mini-redesign is:

  • new or painted nightstands (out with the black!)
  • an area rug
  • new bedside lamps
  • reupholstering the bench at the foot of the bed
  • styling & accessories

DIY Herringbone Headboard via Year of Serendipity

Bear is excited, can't you tell?

My Office Updates (progress)

I was trying to hunt through my photo archives for some good "before" pics of my office, but for some strange reason they're all small vignette images.  Ok, not so strange- my office has never been fully photo-worthy so I just tried to show you pretty little snippets and hide the rest. office2

This one below from when I first switched out the light fixture is definitely the most true:  yellow walls from the last owner, cheap roman shade from our last apartment, a delightfully photogenic elliptical in front of a store bought, dirty brown cat perch, in a window with decorative trim that doesn't match any of the other trim in the house, and an awkward outlet on the wall with several power strips plugged into it for the computer and TV on the wall on the right.

old-office-light-3

It's other charming features included coax cable running along the baseboard on 3 walls, baseboard which also did not match any other trim in the house, the hideous old carpet, no real desk space, just a cubby I used to sit in front of,

IKEA-lamp-2

oh, and a yellow maple closet door that Bear is modeling here: (also note the baseboard and coax cable- sexy)

bear-carpet

I am beyond pleased to say that most of the offenses have been remedied and the office is on it's way to being a gorgeous, functional office/den/work out room.  There's still a ton to go decoration-wise, but the shell is set.

Daisy wanted to be a part of the progress shoot since Charlie (Bear) was in the befores...

No more orange wood closet door and trim and walls both got Ben Moore's Dune White (Satin on trim and matte on walls).

office-progress-1


Once I get the decoration on the office/TV wall set, I'll put some simple artwork above settee.  For the settee itself, I'll be making several new pillows with pops of color.


office-progress-2

My $25 Brimfield chair will get reupholstered and get casters for usability and the TV is going to be getting a fancy shelf unit around it with sliding art to hide the big black box when not in use.  I'm still working out those logistics.  The window now has appropriate square trim that matches the rest of the house and will (at some point in the nearish future) don a new DIY roman shade.

office-progress-3

The new desk was a craigslist find and needs a little love eventually, but there are other more pressing design matters in here.  The new IKEA cubby doors will be getting painted gray and get matching handles to their drawer counterparts.  As you can see, however, I already remedied the ugly brown cat perch with a custom built one (tutorial coming soon!) which the cats only chose to use a fraction of the time.

office-progress-4

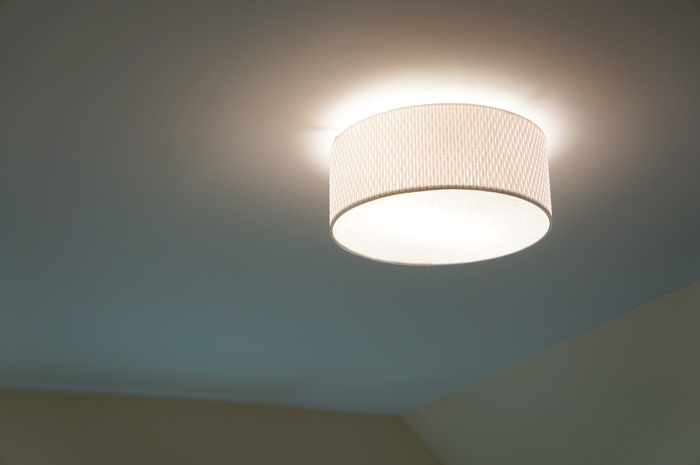
The overhead light needs to be replaced again too.

new office light 2

While I still like the IKEA light, the shade shines a yellowish glow on the new white walls.

As you can see my office has come a long way, but still has a way to go and several fun projects ahead!  Now if only I could stop working and focus on finishing my office, I'd have a beautiful space to work!  That might be a little counter-productive though.....

On the Rail

With my house finally coming back together after the floor/stair/railing reno, I have TONS of awesome DIYs planned for you guys.  For some strange reason, however, Hubby's pretty insistent that I install baseboards and door trim and finish painting before I start decorating.  Silly boy.  So basically, big, exciting things are coming, but my house needs to look like a house first.  Sad Trombone. I thought I'd pop in quickly today and show you that we are no longer at high risk for falling down the stairs- we have a railing!!!  I coerced my contractor (since we're still awaiting permit on the flip) to come and install this beaut.

railing

With 2 super sexy newel posts that used to not be super sexy.

oldnewel

newel-1

After all my crazy patching, I ended up painting it with a base of solid stain, then countless coats of Polyshades to give it a multi-dimensional, stained look.  I have some touch-ups to do now that they're installed, but I humbly think my paint treatment worked!

It's weird that we never realized how low our old railings were until we got one of the proper height.  Don't get me wrong, we knew the height was off, especially at the top, but check out the hole where the old railing hit the wall- a good 9 inches lower!

railing-4

The entire old railing wasn't 9" lower, just the return at the top, but man was it awkward.  As you can see, 2 spindles are missing and replacements have been ordered.  For some reason, my count was 1 less than was actually needed since we changed the configuration a bit (the top newel post moved up a step) and one snapped during install.  No sweat, I've been assured by my contractor that I can install them myself without issue.

railing-2

Now we just need to get used to not only using and seeing a railing again, but one that is the proper height!

Next step for these stairs? A runner!  These buggers are slippery now that they're refinished.  Slippery + already steep stairs = runner as necessity.