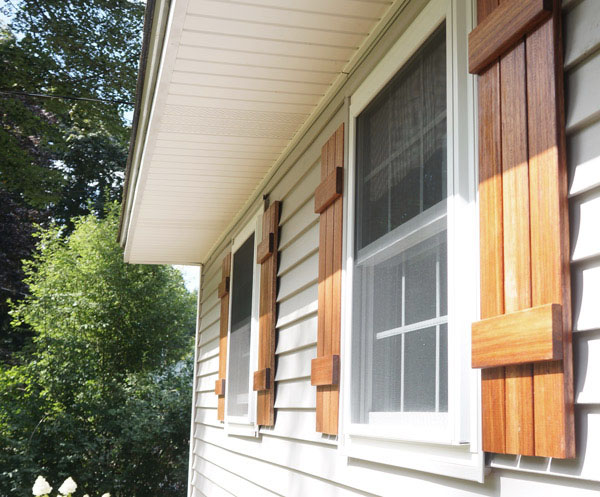
I was hoping to post these DIY shutters yesterday, but one of the downfalls of blogging in real time is that mother nature doesn't always follow my schedule.

BUT yesterday was gorgeous and I was able to install the shutters and take after pics to complete this DIY. So let's start from the very beginning (a very good place to start).
This house NEEDED curb appeal. It had curb unappeal before. It was so bland that I knew I needed to throw some personality in somehow and adding something generic and store bought just wasn't going to cut it. Enter: DIY shutters.
My original intention was to make the shutters out of cedar, but when shopping, the gorgeous Meranti Mahogany one bay over in the lumber isle screamed to me. The graining was dreamy and they wouldn't need to be stained- SOLD. Let me tell you- this is probably one of the simplest ways to make a big impact. If you can cut a few pieces of wood and screw them together, you're gold.
Step 1:
Cut your pieces to size (and try not to swoon over the pretty mahogany...) and lightly sand off any rough edges or splintering. I opted to cut my shutters to the height of the windows as opposed to the height of the trim and the horizontals slightly wider than the 3 boards side to side so there would be a slight space in between. You'll need 3-verticals, 2-horizontals, and one spacer. Make sure you have exterior screws to put everything together!
Step 2:
You'll be screwing the shutters together from the back side, so face nicer side of the wood (if there is one) down. The horizontals go on the bottom and verticals on top, using the spacer to 'measure' the placement of the horizontal. Screw the 2 outside vertical pieces to first one horizontal than the other.
Step 3:
Double check to see that your shutter looks square before installing the middle piece. Since I cut my horizontals slightly wider than the 3 boards, I centered the last board in the gap, eyeballing it, before screwing it down. Once all the pieces were together, I added a few more screws for stability, but you can put your power tools down for now (until we get to install)
Step 4:
Flip them over and feel the pride of what you just made. Gorgeous!
Step 5:
Seal them! I had teak oil on hand, so that's what I chose to use. A natural sealant will... well, seal the wood, bring out the natural color and graining, and highlight the richness of the wood. Basically it seals it from the elements and makes it even prettier. Apply several coats according to your desired finish and the directions of the product you're using.
Step 6:
Install!!! You'll only need your screw gun for this, and some more outdoor screws (I used decking screws that were already a brown color so they'd blend better)
Pre-screw the top 2 screws before climbing up on a ladder to make the juggling a bit easier. Dropping screws while you're up on a ladder is fun for no one.
Now just line up your shutters and screw them to the house!! note: make sure your screws are long enough to screw through any siding and into the structure behind. If you have siding, you can use that as a guideline to align your shutters.
Step 7:
Step back and take in the visual awesomeness that your DIY shutters just added to your house. You're welcome neighbors.
Now we just need a pop of color and some finishing touches!
All totaled for the wood and screws, this project came in at less than $200. For something with such a huge impact on the curb appeal, I think that's some stellar bang for your buck!


