Before & After

DIY 101: Recovering a Chair

Let's start at the very beginning- a very good place to start.  When you read you begin with A B C, when you DIY you begin with... recovering a dining chair.

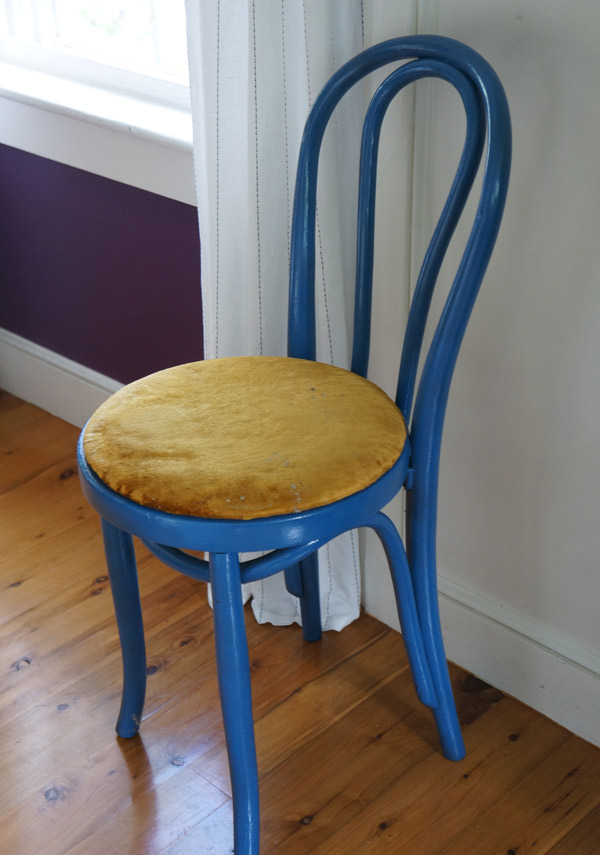
diy-101-dining-seat before

I know I often do more involved DIY's but sometimes I forget to share the basics.  So I figured let's start with DIY 101.

Recovering a chair can seem intimidating to start off, but once you realize how easy it is to recover the seat, you'll want to keep doing it!  Maybe that's the root of my chair addiction.  As you can probably guess with this chair, I've already attacked it with a vibrant blue spray paint.  No matter what color the frame, however, that orange velour seat would need to go.  Far away.

First you need to remove the seat.  Normally it's held on with a few screws from under the chair.

DIY 101: How to Recover a Dining Chair via Year of Serendipity

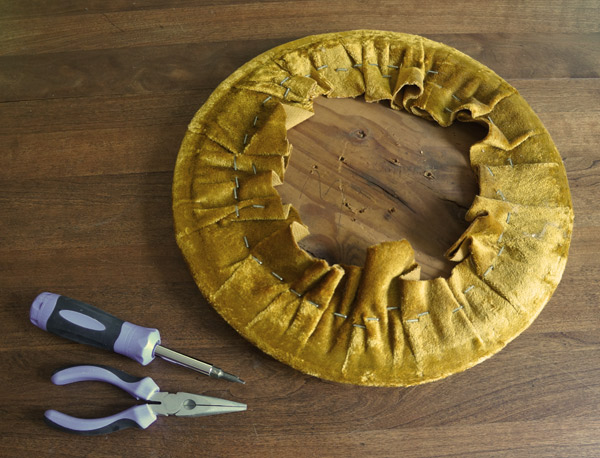
Once your seat is free, go ahead and grab pliers and a flat-head screwdriver and start prying out the old staples.  If your seat is in decent condition and the cushion is still adequate, you can always skip this and cover right over the old fabric.  If that's the case, skip down to the fabric step.

DIY 101: How to Recover a Dining Chair via Year of Serendipity

You'll need to take the staples out to free both the fabric and the underlying foam.  I promise, this is the most tedious part, so if you can make it through this- you got it!

DIY 101: How to Recover a Dining Chair via Year of Serendipity

Now for the fun part- putting it all back together!

I used 2 layers of dacron batting for my cushion.  If you want something squishier, you can use a layer of 1" foam with a layer of batting over it to smooth it.

DIY 101: How to Recover a Dining Chair via Year of Serendipity

Start by stapling the top, bottom and 2 sides about 1" in from the edge.

DIY 101: How to Recover a Dining Chair via Year of Serendipity

DIY 101: How to Recover a Dining Chair via Year of Serendipity

After stapling the 4 sides, go ahead and staple all the way around and trim the excess batting.

Next you'll need to position your cushion on the back of your fabric.  Make sure if you have a directional pattern like a geometric or stripe, that you have the pattern oriented as you'd like to see it on the chair.

DIY 101: How to Recover a Dining Chair via Year of Serendipity

Now, with the fabric, you'll want to first staple the 4 sides as before.  Staple in just a bit from where you stapled the foam so that the fabric will cover it.

DIY 101: How to Recover a Dining Chair via Year of Serendipity

Once you have the sides stapled, work inward from each staple.  You want to make sure not to pull the fabric tight otherwise you'll see the stretching.  Instead, use your full hand to smooth the fabric tight like so.

DIY 101: How to Recover a Dining Chair via Year of Serendipity


Create pleats in your fabric as necessary as you go.  You won't see these on the finished product, but it will help your pattern sit properly.

DIY 101: How to Recover a Dining Chair via Year of Serendipity

Continue this all the way around until your entire seat is stapled.

DIY 101: How to Recover a Dining Chair via Year of Serendipity

Once the stapling is set, trim your fabric at least a half inch from the staples- any closer and your fabric may fray.

DIY 101: How to Recover a Dining Chair via Year of Serendipity

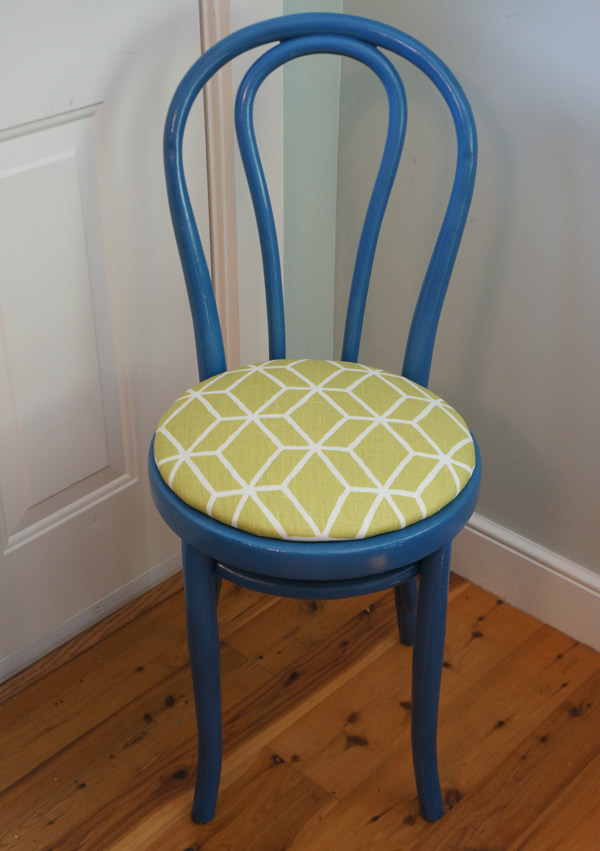
Once trimmed, you get to turn the cushion back over an admire your handy-work.

DIY 101: How to Recover a Dining Chair via Year of Serendipity

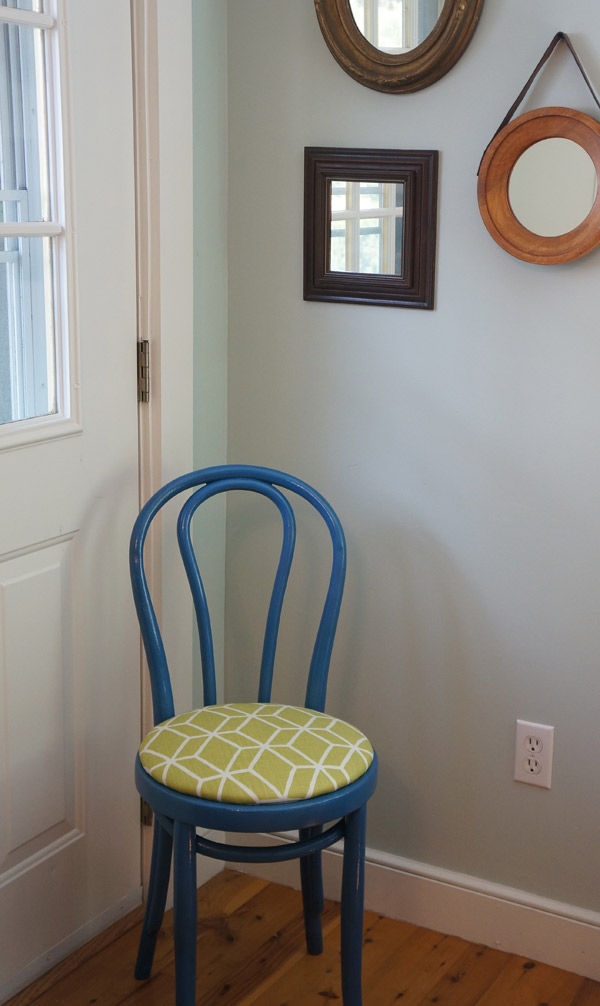
Reattach it to the chair and enjoy the fruits of your labor!

DIY 101: How to Recover a Dining Chair via Year of Serendipity

See, that wasn't so hard, was it?

DIY 101: How to Recover a Dining Chair via Year of Serendipity

DIY 101: How to Recover a Dining Chair via Year of Serendipity

Now you're ready to give your dining room a whole new look!


Revived Luggage Rack

On Monday I showed you the "before" a beaut of a luggage rack that was mid-makeover.  I was planning to fix it up to put out for sale at our tag sale this weekend, but a friend offered to adopt this little guy instead.  I hope she loves how he came out as much as I do! Vintage luggage rack before via Year of Serendipity

I rescued it from an estate sale several years ago- I think it was $15.  I loved the shape and the potential history, I just couldn't let it end up in the trash.  But it did need some love.

Vintage luggage rack before via Year of Serendipity

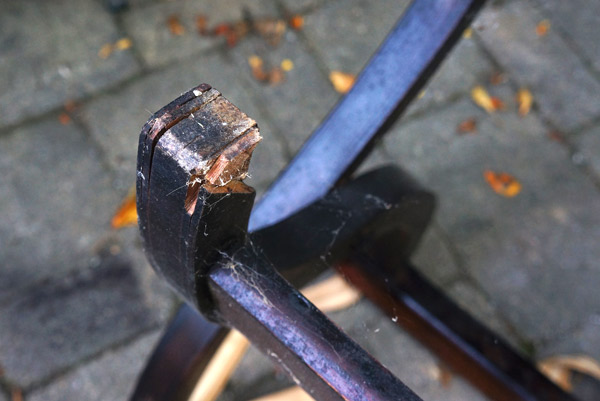
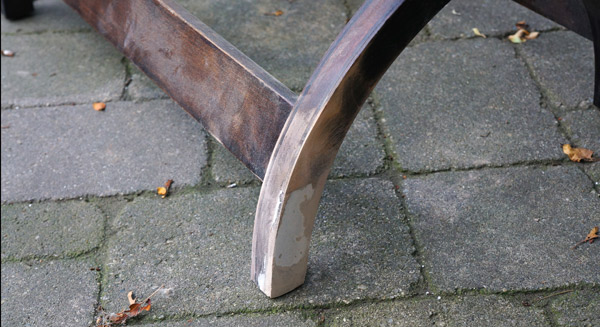
In addition to obviously needing new ribbon and refreshed stain, the bottoms of the legs were coming apart and had some severe chipping.Vintage luggage rack before via Year of Serendipity

Using wood glue, clamps, and wood filler, the legs were all patched up.

Vintage luggage rack repair via Year of Serendipity

*tip* I prefer using Dap Plastic Wood to fill blemishes on stained pieces.  I tried both that and Minwax's Wood Filler (since I ran out of Plastic Wood mid-project) on this and I confirmed my previous ideas that the Dap is easier to work with and takes stain better.  It'll never act like real wood, but I've found this to be the closest.  Not sponsored, just wanted to share my experience.

Vintage luggage rack repair via Year of Serendipity

Once everything was patched, I stained just the parts that had been patched so they'd blend more once I applied the final coat.

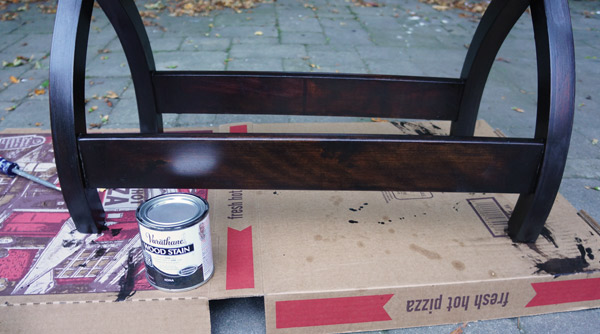
For the final coat I decided to try a new stain- Varithane Wood Stain.  There was mixed reviews online, but I found it to be exactly what I was hoping- thicker than regular stain, but not as annoying to work with as Polyshades (which acts more like a translucent paint).

Vintage luggage rack stain via Year of Serendipity

Now for the fun part- putting the new ribbon on.

Vintage luggage rack ribbon via Year of Serendipity

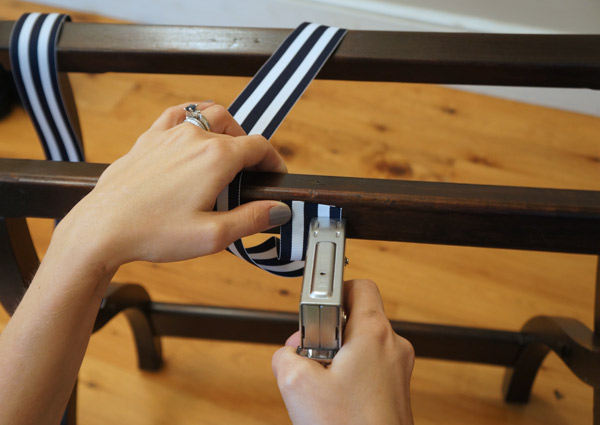
I used staples to secure the ribbon, knowing they'd be hidden when I folded the ribbon over and put on decorative brass nails.

Vintage luggage rack ribbon staple via Year of Serendipity

Because they didn't go in 100%, I hammered them flat so that there would be no bumps when I folded the ribbon over them.

Vintage luggage rack ribbon via Year of Serendipity

So, a little DIY admission here- this was my first time ever using decorative nails and it wasn't as easy as it looks. With the hardness of the wood I was working with, they did want to go in without bending.  After much trial and error, I ended up creating the holes with an awl first, then hammering in the nails the rest of the way.

Vintage luggage rack brass nail head via Year of Serendipity

I'm glad I made it work, because look at him now.  All nautical and sexy.

Vintage luggage rack after via Year of Serendipity

Just look at him in action!

Vintage luggage rack after via Year of Serendipity

Fun fact: the blue case is actually an accordion.  My dad's from when he was little that was rediscovered when cleaning out his Aunt's house a few years ago.  Priceless.


Grover REVEALED!

There isn't a whole bunch of instant gratification when flipping a house, but if you can wait almost 5 months oh man, satisfaction city!  Congrats on making it all the way with me! Week 18, AKA Grover's Big Day!!!

This might end up being my longest post probably ever, but guys, this house is kinda pretty now.  Just kinda.

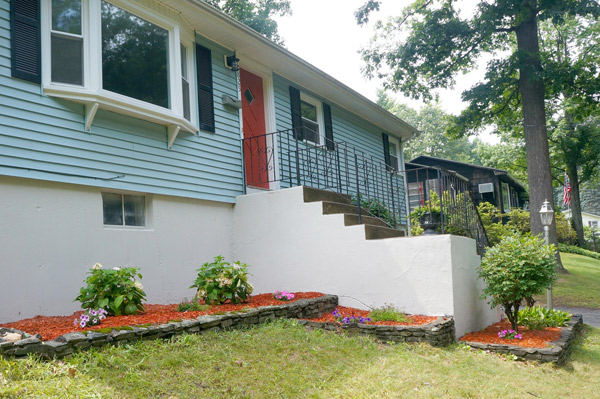
Let's start outside.  Before he was very blah.  The garage door was demanding more attention than the front door and he just looked tired.

grover

It's amazing what a few small changes can do to curb appeal.

Grover the fliphouse curb appeal via year of serendipity

Aside from the biggies of new roof and windows, the foundation, stairs, garage door, and front door got painted, shrubs got trimmed, flowers got planted, mulch got spread, and the lights and mailbox got upgraded.  Now the front door demands the attention it deserves and the entrance has presence.

Grover the fliphouse curb appeal via year of serendipity

The outside is nice and all, but the inside is where the WOW is.

From the second potential buyers step in the front door, I'm hoping to take their breath away.

Before... dark dark dark and closed in.

grover-before5

grover-before3

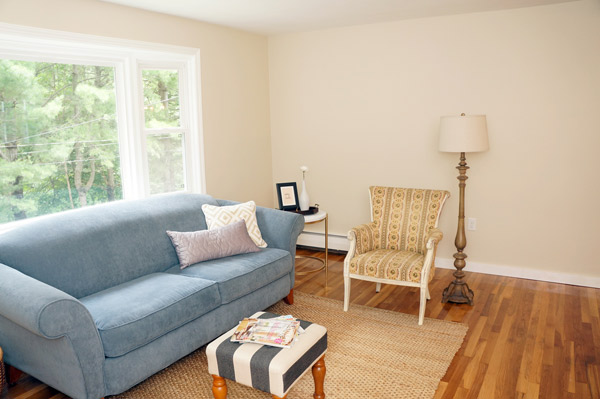
Now?

Grover the fliphouse living room after via year of serendipity Grover the fliphouse living room after via year of serendipity

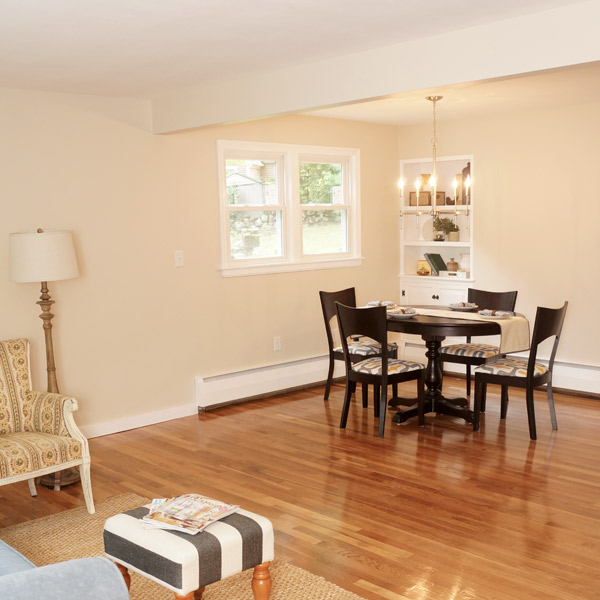
Oh and remember how there used to be a wall?

grover-before6

What wall?

Grover the fliphouse open concept living/dining via year of serendipity

Grover the fliphouse open concept living/dining via year of serendipity

And who didn't love the scallops..

grover-before8

Oh right, me.

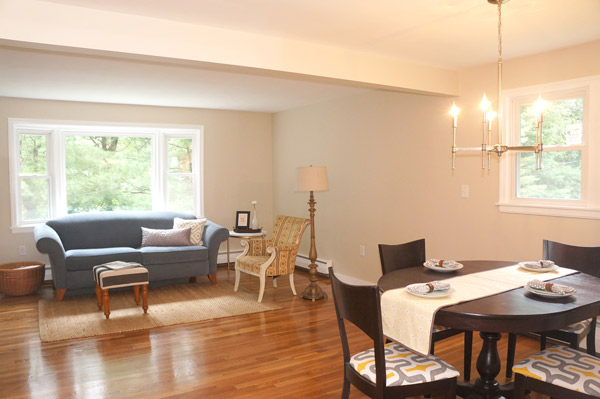
Grover the fliphouse open concept living/dining/kitchen via year of serendipity

The view from the sofa has changed a tiny bit.  This might be my favorite spot in the entire house.  Ok, tour over.  I'm just going to hang out here.  You don't need to see the kitchen or the rest of the house.

Grover the fliphouse open concept living/dining/kitchen via year of serendipity

Ohhhh, fine, I guess I'll show you the rest.

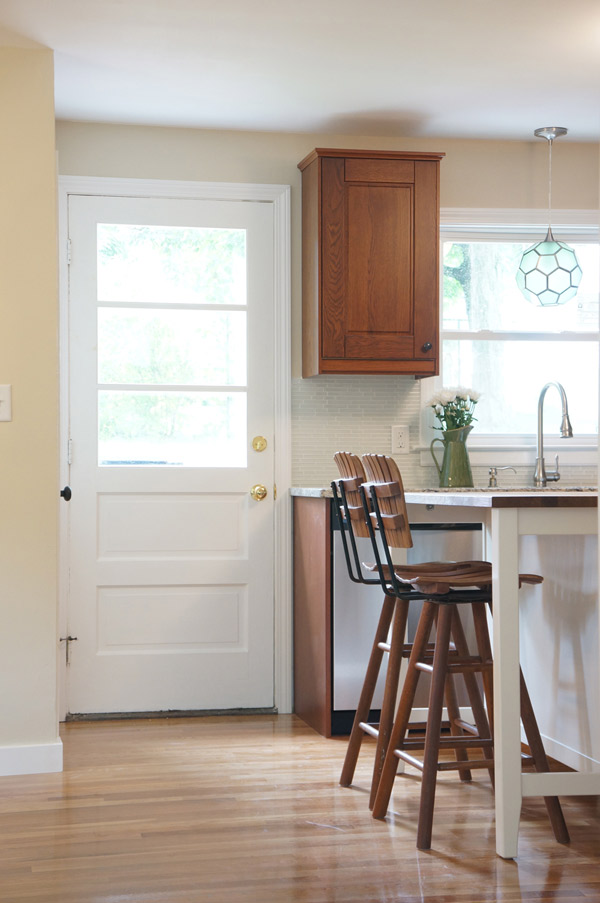
This once sexy dark kitchen with beautiful yellow laminate counters, fake wood-over linoleum floors and a fan to hit your head on was hard to tear out.  And by 'hard to tear out' I mean it was a sledge hammer's dream.

ISd01dr7wjzjms1000000000

I'll just let you take in the difference here.

Grover the fliphouse retro charm ikea kitchen after via year of serendipity

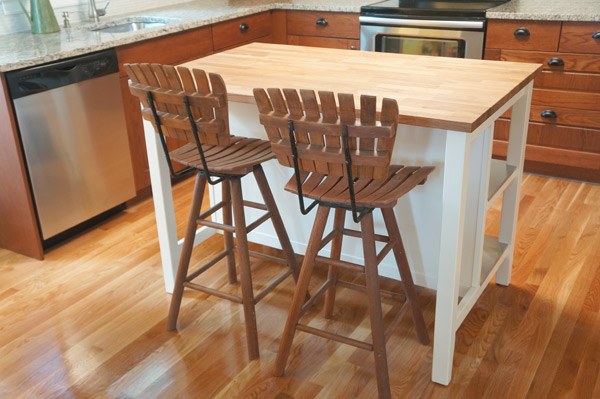
Is it weird that my favorite thing in this room might just be those stools?  (yes, they are almost identical to the ones from Young House Love's last kitchen)  I scored them for a whopping $35 on craigslist and we've bonded.  Their style is PERFECT for this kitchen and adds just the right vintage touch.  Handy dad helped me trim down the legs so they could be counter height instead of bar height and you'd never know.

Grover the fliphouse retro charm ikea kitchen via year of serendipity

Grover the fliphouse retro charm kitchen stools via year of serendipity

Grover the fliphouse retro charm kitchen via year of serendipity

Grover the fliphouse ikea kitchen island via year of serendipity

Grover the fliphouse retro charm kitchen via year of serendipity

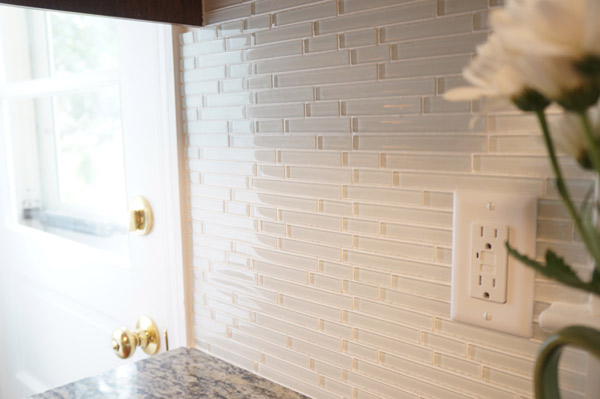
Grover the fliphouse glass mosaic backsplash via year of serendipity

I'll admit- I am planning to do another layer of grout to smooth over a bit.  Even though unsanded grout was the right one to use for this size grout line, I'm finding that the first layer always looks a bit rough.  Maybe it's just my OCD talking, but I need to fix it a bit to be comfortable handing this house over to the next owners

Continuing down the hall, first stop is the bathroom.  This gem was a wow before, but in a bad way.

grover-bath

grover-bathroom-before-2 grover-bathroom-before-4

Now it sports new everything- tub, toilet, vanity, wall tile, floor tile, paneling.

Grover the fliphouse board and batten bathroom via year of serendipity

Grover the fliphouse board and batten bathroom via year of serendipity

Grover the fliphouse board and batten bathroom via year of serendipity

Grover the fliphouse board and batten bathroom via year of serendipity

Grover the fliphouse board and batten bathroom with subway tiles via year of serendipity

Grover the fliphouse board and batten bathroom via year of serendipity

The 3 bedrooms thankfully just needed lots of paint and floor refinishing.

The back bedroom:

grover-before-br-2

Grover the fliphouse back bedroom staged via year of serendipity Grover the fliphouse back bedroom staged via year of serendipity Grover the fliphouse back bedroom staged via year of serendipity

Master bedroom/largest bedroom:

master before

Grover the fliphouse master bedroom staged via year of serendipity

Grover the fliphouse master bedroom staged via year of serendipity

Grover the fliphouse master bedroom staged via year of serendipity

And the smallest bedroom:

grover-before-br1

Grover the fliphouse small bedroom staged via year of serendipity Grover the fliphouse small bedroom staged via year of serendipity

Not that the basement underwent a HUGE transition, but you totally need to see these 2 spaces.

grover-before20

The neon seafoam garage received a new electrical panel, neutral paint, and a new, functioning garage door opener.

Grover the fliphouse garage via year of serendipity

And the weird, creepy, paneled room that looked like it belonged in a bad 70s porno...

grover-before19

Now is totally refreshed and could be the perfect play room, media room, family room, etc.

Grover the fliphouse paneled room via year of serendipity

I still have a few items left on my punch-list to get this house completely done.  I know this post started strong with the fancy areas of the house then moved on to the less exciting, so I'll leave you with my favorite shot of the new open concept and kitchen.  Isn't he charming now??

Grover the fliphouse open concept kitchen/dining with retro charm ikea kitchen via year of serendipity

Remember how this is a flip house and I'm selling it now??  Well guess what- it's listed!!! I didn't share the MLS listing with you at the top so you didn't get distracted, but here it is!  Go buy him!  He needs a wonderful family to love and take care of him!