
Reupholstery can be a very daunting project. I was lucky enough last time around to be in a class where a professional helped to walk me through the steps with epic results, but making a go of it on my own had me hesitant and procrastinating a bit. Since announcing my Franken-Chair plans to you almost 3 months ago, the disassembled pieces of my beloved chair have been floating around my house, hiding in corners and shoved in closets until I was ready to take on the reupholstery.

The key tip if you plan to tackle a reupholstery project?
- Take LOTS of pictures. Especially before you disassemble and while you disassemble. Especially WHILE you disassemble. Every. Little. Step. You'll need to remember exactly how the pieces went together/were stapled/etc so you can put the puzzle back together. That's the best way to look at it- a puzzle. The pieces need to fit back in a certain way and if you forget that you need to attach tab A before tab B, you'll find yourself undoing and redoing the task repeatedly or trying to rack your brain what piece what supposed to go where. Unless you're a pro and you have it all filed away in your memory, your camera is your upholstery bff.
Since I intended on marrying the chair above with the antique base below, I did have to modify the bottom just a bit.

Some of the fiberglass on the bottom would need to be cut back to allow the base to sit flat on the chair. Handy dad lent me a hand in making sure this plan was viable and that cutting back the fiberglass wouldn't compromise the structure in any way. *NOTE* I made sure before modifying the chair that I wasn't working with a priceless antique. Luckily, my chair is a very close replica of the expensive version, so my modifications aren't blasphemous.
This is a view from underneath the chair and you can see the pencil line where we were cutting the fiberglass. If I ever want to reattach the old legs, I may need to replace the piece that we removed, so it's not finding it's way into the trash yet.

All it took was a hack saw and a bit of muscle to cut the fiberglass, although I would recommend this ALWAYS be done outside.

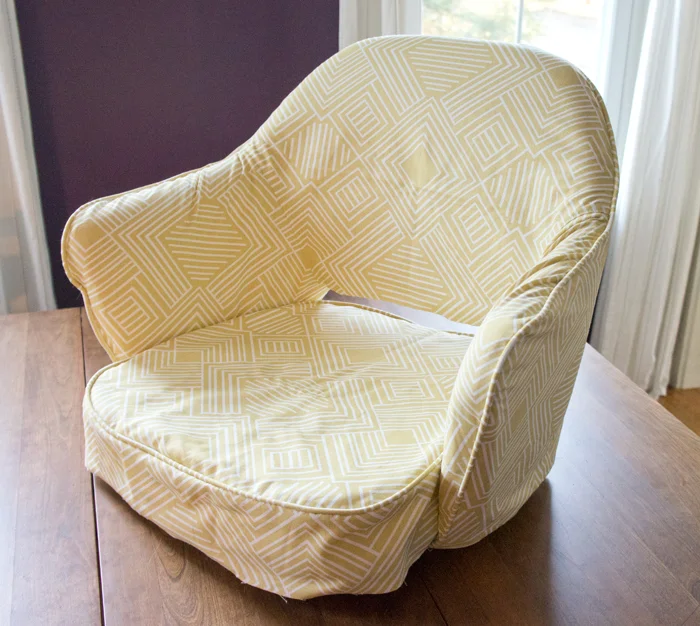
Once the structure was ready for it's pairing, I needed to get the upper portion ready. This is where all the pictures come in. I carefully unstapled all the upholstery from the frame and the main, visible upholstery came off in 2 parts, almost like a slipcover.

I very carefully ripped apart all the seams on the old upholstery so that I could use the pieces as a pattern for my new upholstery. If you're working with a printed fabric like I am, you need to pay attention to how the pattern lines up with the print.

Then came the sewing. Sewing piping out of the fabric, then using the 'pattern' to recreate the slipcover that I removed from the chair. If you've sewn before and can follow a pattern, that's basically what this was.
Before I could replace my 'slipcover' I needed to address the seat cushion. The back cushion was still in good shape, amazingly, but the seat foam not so much. No one wants to be sitting on this. It was like the Mohave desert. The fluffy stuff around the edges is just cotton, not something growing, but getting this foam off the wood seat was not a clean, or pleasant process.

Luckily, once the desert was removed, cutting a new seat out of super high density foam was simple. I used a dollar store bread knife and traced the seat. I wasn't worried about perfection because I'll be wrapping the seat with extra cotton and batting to fill out the seat and give it a bit of extra cush.

So that's where the chair currently stands. Upholstery is sewn, the seat foam has been replaced and the structure has been modified to allow for it's new base. Before I can staple the 'slipcover' onto the chair and make it look finished instead of like a kid wearing his big brother's clothes, I'll be adding a a bit more cotton and batting to give this old chair a cushy, squishy, and polished new appearance.

I'm so eager to get this chair finished so I can use it in my office! The dining chair that I've been working in for the past few months just isn't cutting it.
Do you have any daunting projects that you've been inching away at? It's like eating an elephant...