Projects

Frankie: Week 8

I hope you enjoy these weekly updates as I learn to navigate through the business of flipping houses.  Check out other posts about Frankie the Fliphouse HERE. Merry belated Christmas!  I hope it was everything you were hoping for and more!

With Christmas smack in the middle of the week, Week 8 was understandably not excessively productive for Frankie the Fliphouse.  It was rather productive for my kitchen with holiday baking, though (not all successful as you may have seen on instagram...)

christmas-baking

Tonight I'll be attempting to make nut-free, gluten-free macaroons for another holiday party.  Keep your fingers crossed, I hope they taste good! (the macaroons, not your fingers...)

Anyway, back to Frankie...

The tiling is complete throughout the house.  Wahoo!!  The kitchen floor (which you saw last week) now has baseboards and wood transitions into all the rooms.

w8-kitchen

The kitchen ceiling also started to get painted.  I say started, because coat #1 made some of the paint underneath crack more, so I then had to patch before I do coat #2 today.

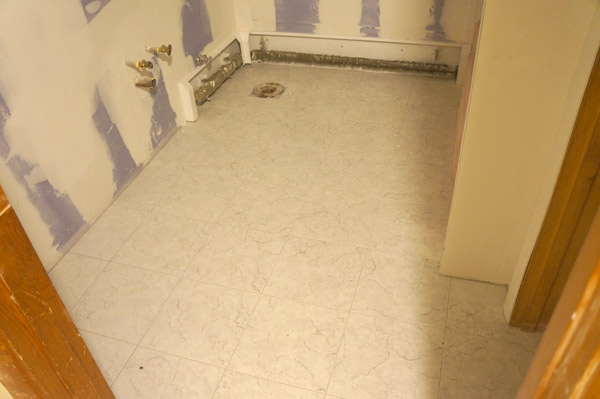
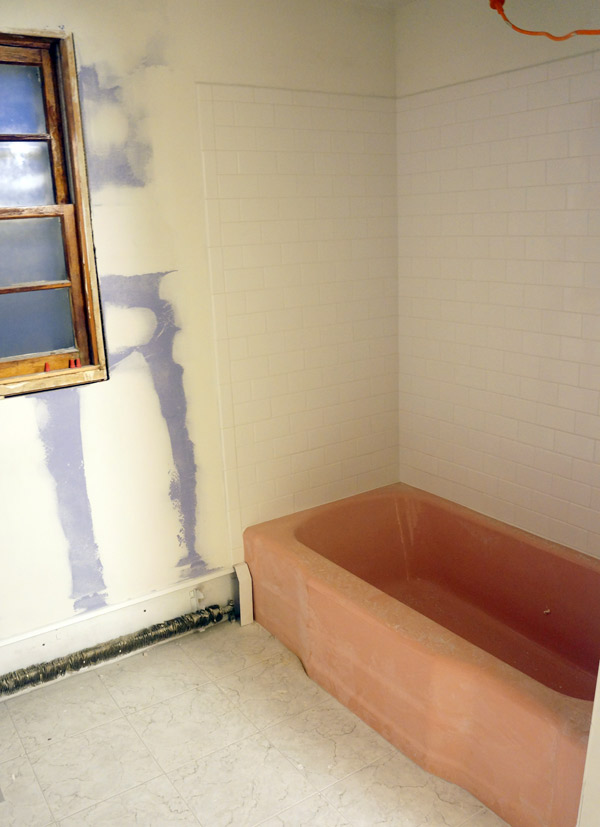
Moving down the hall, the bathroom floor and walls are d.o.n.e.  I'll come clean to you- while I LOVE the tile I used on the kitchen, I am not so enamored with the bathroom floor tile.  It'll look nice once the room is all together, but I won't use it again.  It looks less expensive than it actually cost, and my goal is kind of the reverse.

w8-bathroom-floor

I believe the contractor is planning to start putting the room back together today.  That'll make me a very happy flipper.  I like when rooms become functional, pretty spaces again.

w8-bathroom-tile

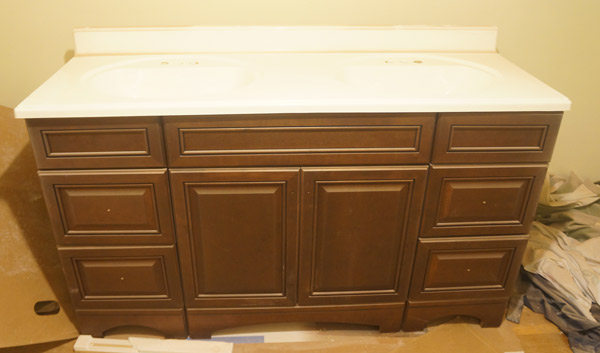
I do have a feeling the vanity is going to require more plumbing work than the contractor thinks, but lets hope I'm wrong.  The pretty vanity has been patiently sitting in one of the bedrooms awaiting install.

w8-vanity

It's totally covered in tile dust currently, but I was able to clean up the old vanity top from the demo'd bathroom and get a pretty, appropriately-sized (very reasonably priced) vanity base for it.

In less photographic progress news:

The contractors have also been plugging away at the basement including jack-hammering an old cement shower pan and more drywall and taping of the walls that are staying.

In addition to more painting (trim, ceilings, ya know, the fun stuff), I also took a heat gun to remove bubbling veneer on the back of the future island that I showed you last week.  Since I'll be painting the piece, I can sand and patch as necessary without worrying about grain not matching.  This piece'll get it's own post/tutorial once more of the house is set.

And now that the contractors are winding down upstairs, I'm gaining space back in the rest of the house and can get back to some bedroom painting this week.  More painting!  Exciting stuff, no?  I'm also working to schedule my electrician so that I can get a jump on this kitchen install!  Is it strange that I want the kitchen to be in because I'm super excited to tile the backsplash?  This backsplash is going to be pretty epic if I do say so myself- just you wait.


Frankie: Week 7

I hope you enjoy these weekly updates as I learn to navigate through the business of flipping houses.  Check out other posts about Frankie the Fliphouse HERE. Frankie's kind of a disaster area this week.  The contractors are in the bathroom, kitchen/hall, and the basement, leaving only one bedroom free of saws or supplies.  I'm willing to sacrifice space in the house temporarily for things like a new kitchen floor and bathroom, though.

Speaking of kitchen floor.... she's getting pretty!  The grout went down yesterday, so now it just needs trim & transitions.  The tile (from Lowe's) is so pretty in person and almost looks like real stone- it even has a tiny bit of sparkle in it.  I did make a last minute grout change- the first one I bought was WAY WAY too dark and would have ruined the entire floor.

week 7 kitchen tile

I REALLY can't wait until I have all the ceilings painted and can put up new lights- the ones existing are barely bright enough and cast a terrible color on the space as you can see.

Aside from buying the wrong color grout, another thing that I'm kicking myself for a bit is trying to add texture to the ceilings...  The ceilings have some textural issues in most rooms (old cracks etc), so when I saw a product that you add to paint that helps to hide these imperfections, I was on board.

week 7 bedroom ceiling

I was expecting a fine, slightly textured result and I ended up with uneven sandpaper.  I'm going to try and even out the 2 ceilings that I used this on, then attempt to use just flat ceiling paint everywhere else (and pray the ceilings look decent).  It was worth a try, but I'm going to see if I can get my money back on the product.  You live and learn.  It was a great idea that just didn't pan out in execution.

But in brighter news, the bathroom's coming back together!  It has walls!  And electrical boxes for the sconces!

week 7 bathroom walls

Is it weird that the water resistant green-board (which is interestingly NOT green as you can see) kind of makes me want to paint the bathroom purple?  I'm resisting, though... it'll be a serene light green very close to the color of my own kitchen.

The shower walls are 2/3 tiled, too.  The tile won't be going 100% to the ceiling since it's a bit uneven, so it'll be stopping about a foot short with a nice bullnose edge.

week 7 bathroom tile

The bathroom floor tile should be going down today as well.  I'm excited! Git-r-done!

They've also gotten started on some less ecxiting minor work in the basement- dry-walling the utility room.

week 7 basement

And apparently my furniture hoarding has now extended beyond my basement to Frankie's.  It's for a good reason, though!  This pretty guy is going to be transformed into Frankie's kitchen island.  It was a steal for $66 at the Habitat for Humanity ReStore.  It'll get a fun paint color, new knobs, and a butcher block top.

week 7 dresser island

Aside from buying furniture and paint and lots of supplies this week, I've been trying to stay out of the contractors ways and have been popping from room to room with my primer can, priming trim wherever I can.  The current hall view is making me happy- it's far from done, but with a new floor and almost no more wood trim, I can see where it'll end up.

week 7 hallway

Once the contractors are set with their scope, I have a feeling this place will come together FAST (keeping my fingers crossed at least!).  I'll admit, it's been tough for me to really hand control over to the contractors.  Shocking, I know, but I can be a bit of a control freak at times.

I must be glutton for punishment, though- we just started the hunt for flip #3!  We're hoping to get Frankie on the market at the end of January, and would love to jump right into the next project.  Here's hoping we find the next faster than we found Frankie!

Hand Made 2013

I really love the idea of DIYing new fun ornaments each year.  Not only does it keep your tree looking a little different each year, but it also gives you a keepsake from each Christmas. I was really hoping to be able to fill my tree with these beauties,

diy-paper-ornament

but after these 2 took me almost an hour, I put them temporarily aside and decided to try something different for today.

2013-ornament-parts

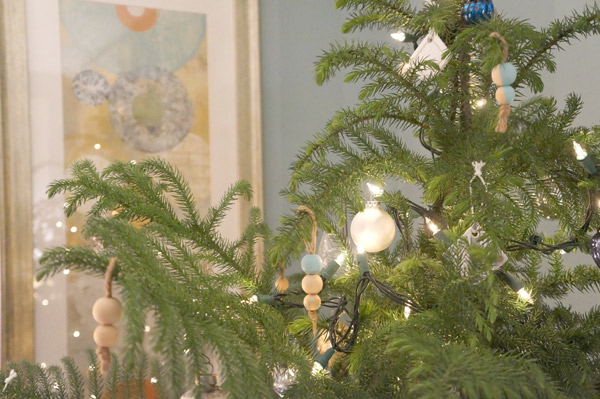
These ornaments were super easy and only required 2 different sizes of wooden beads, twine, and paint (optional).  We often used wood bead garland on our tree growing up, so I decided to play around with that idea a bit and make ornaments.

2013-diy-ornaments

I didn't take pictures of each step since it was so easy.  Try and follow if you can:

First you make a loop out of twine and knot the end.  Then you thread beads on it.  Are you still with me?  The last step if you chose to do it- paint your new ornaments whatever pattern/color your little heart desires.

I know, expert difficulty, right?

2013-ornament-1

Rather chic for something so simple and rustic, I think. Can't you just see a tree covered head to toe in these (because trees have heads and toes....)?  They'd also be pretty cute if they were painted in an ombré effect down the tree. Spell Check is questioning "ombré"... he's clearly not up on his design lingo.

2013-ornament-2

On my second year of doing this myself, I'm totally looking forward to starting this yearly ornament-making tradition with future children.  Maybe next year I'll get Cutest-Nephew-Ever-Eli to start the tradition with me.